Arduino BabyTV Is Big Fun At Low Resolution

What kind of TV do you have? An older 720p model, or the now standard 1080p? Perhaps you’ve made the leap to the next generation, and are rocking a 4K display in the living room. All those are are fine and dandy if you just want to watch the local sportball contest, but where’s the challenge in that? With all the technology and modular components we have access to anymore, nowadays all the real hackers are making their own TVs.

Of course, when [Nikolai] built his very own LED TV, he did have to make a few concessions. For one thing, there’s no tuner on this model. Oh, and there’s the small issue of only having a 16×16 resolution. It might not be your idea of the perfect display, but it’s just perfect for his newborn son.

That’s right, [Nikolai] got his entry for the “Hacker Parent of the Year” award in early, and built an LED display for his son that he’s calling “BabyTV”.

Rather than the shows, trash, advertisements that they play on the kid channels, this TV only shows animated characters from retro games. We’ll concede that this project might be an elaborate Clockwork Orange style attempt at hypnotizing his son to instill an appreciation for classic gaming. But we’ll allow it.

To make his BabyTV go, [Nikolai] used a 16×16 WS2812B LED panel and an Arduino Nano. Two rotary encoders are used to allow adjusting brightness and change the character currently being shown on the screen. As a particularly clever hack, the Arduino has an IR sensor attached and is constantly watching for any signals. If an IR signal is detected, the BabyTV switches to the next image. So if Junior has a standard IR remote in his hands, any button he presses will cause the display to change to the next “channel”.

Historically speaking we haven’t seen much stuff for children here at Hackaday, but 2018 seems to be changing that. Recent projects like the incredible scratch built mini excavator and gorgeous AT-ST high chair would seem to indicate we’re currently witnessing a generation of hackers become parents. Don’t panic folks, but we might be getting old.

Continue reading “Arduino BabyTV Is Big Fun At Low Resolution”

Threat Meter Gauges Risk Of Creeper-Assisted Suicide

If you’ve played even just a few minutes of Minecraft, you know what a creeper is. For those not familiar with the wildly popular sandbox game, a creeper is a monster that creeps along silently until it’s close to a player, whereupon it self-destructs by exploding. Sometimes it kills the player outright, and other times the explosion blows them into lava or off a cliff, or off a cliff and then into lava. Creepers have no friends.

But now there’s a way to avoid creeper attacks, or at least get a little heads up that these green nasties are lurking about. With [John Allwine]’s creeper detector, Minecraft players can get a real-world indicator of the current in-game creeper threat. The hardware end is simple enough — it’s just a SparkFun RedBoard and a small strip of Neopixels in a laser-cut plywood case. The LEDs lie behind a piece of etched acrylic to diffuse their glow — extra points for the creeper pattern in the lens. The detector talks over USB to a Minecraft mod that [John] wrote to interface the game with the real world. The closer a creeper gets to the player, the brighter the light. — and when it flashes, watch out. See it in action in the video below, if you can stomach watching someone dig straight down. Never dig straight down.

If interfacing the Minecraft world and the real world sounds familiar, maybe it’s because we featured [John]’s SerialCraft mod a while back and admired the potential for using Minecraft as a gateway for getting kids into hardware hacking. We agree that this is a great project to work on with kids, but we may just order the parts to do it for our own Minecraft world. Creeper hate isn’t just for kids.

Continue reading “Threat Meter Gauges Risk Of Creeper-Assisted Suicide”

Your Audio Will Be Back, Right After This Commercial Break

[LittleTern] — annoyed by repetitive advertisements — wanted the ability to mute their Satellite Box for the duration of every commercial break. Attempts to crack their Satellite Box’s IR protocol went nowhere, so they thought — why not simply mute the TV?

Briefly toying with the idea of a separate remote for the function, [LittleTern] discarded that option as quickly as one tends to lose an additional remote. Instead, they’re using the spare RGYB buttons on their Sony Bravia remote — cutting down on total remotes while still controlling the IR muting system. Each of the four coloured buttons normally don’t do much, so they’re set do different mute length timers — customized for the channel or time of day. The system that sends the code to the TV is an Arduino Pro Mini controlling an IR LED and receiver, with a status LED set to glow according to which button was pressed.

Continue reading “Your Audio Will Be Back, Right After This Commercial Break”

A Game That Does More With Less

[David Johnson-Davies] created a minimal Secret Maze Game using a single ATTiny85 and a few common components. This simple game uses four buttons, four LEDs, and a small speaker. The player moves in the four cardinal directions using buttons, and the LEDs show walls and corridors. If an LED is lit, it means the path in that direction is blocked by a wall, and attempting to move in that direction will make a beep. When the player reaches the exit, a short victory tune chirps from the speaker.

Sample maze. A 16×16 matrix is allocated for maze designs.

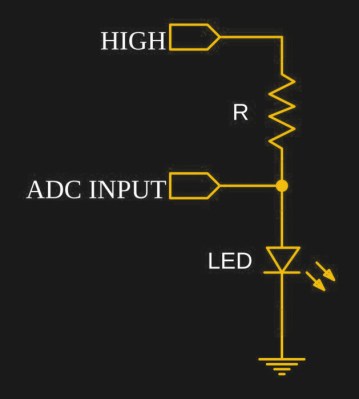
Since the ATTiny85 has only five I/O lines, [David] had to get a bit clever to read four buttons, display output on four LEDs, and drive a little speaker. The solution was to dedicate one pin to the speaker and the other four to charlieplexing, which is a method of driving more LEDs than you have pins. It takes advantage of the fact that most microcontroller pins can easily switch state between output high, output low, or low-impedance high-impedance input.

As for the buttons, [David] charlieplexed them as well. Instead of putting an LED in a charlieplexed “cell”, the cell contains a diode and an SPST switch in series with the diode. To read the state of the switch, one I/O line is first driven low and the other I/O line is made an input with a pullup. A closed switch reads low on the input, and an open switch reads high. With charlieplexing, four pins is sufficient for up to twelve LEDs (or buttons) in any combination, which is more than enough for the Secret Maze.

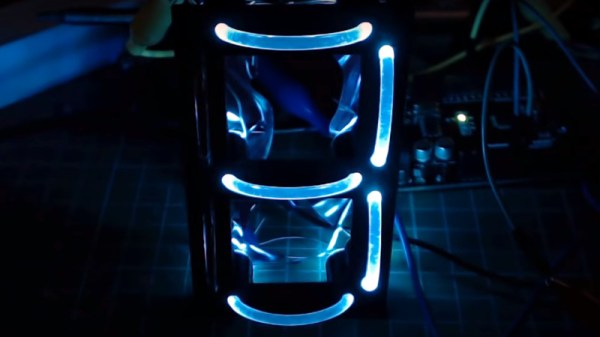
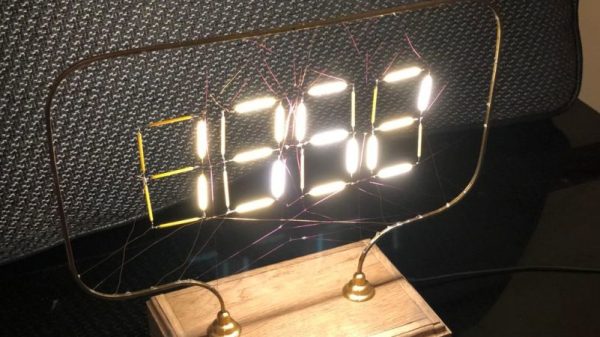
Charlieplexing is also what’s behind this 110 LED micro-marquee display, or this elegant 7-segment display concept that takes advantage of modern PCB manufacturing options.

The Engineering Case For Fusing Your LED Strips

Modern LED strips are magical things. The WS2812 has allowed the quick and easy creation of addressable RGB installations, revolutionizing the science of cool glowy things. However, this accessibility means that it’s easy to get in over your head and make some simple mistakes that could end catastrophically. [Thomas] is here to help, outlining a common mistake made when building with LED strips that is really rather dangerous.

The problem is the combination of hardware typically used to run these LED strings. They’re quite bright and draw significant amounts of power, each pixel drawing up to 60 mA at full-white. In a string of just 10 pixels, the strip is already drawing 600 mA. For this reason, it’s common for people to choose quite hefty power supplies that can readily deliver several amps to run these installations.

It’s here that the problem starts. Typically, wires used to hook up the LED strips are quite thin and the flex strips themselves have a significant resistance, too. This means it’s possible to short circuit an LED strip without actually tripping the overcurrent protection on something like an ATX power supply, which may be fused at well over 10 amps. With the resistance of the wires and strip acting as a current limiter, the strip can overheat to the point of catching fire while the power supply happily continues to pump in the juice. In a home workshop under careful supervision, this may be a manageable risk. In an unattended installation, things could be far worse.

Thankfully, the solution is simple. By installing an appropriately rated fuse for the number of LEDs in the circuit, the installation becomes safer, as the fuse will burn out under a short circuit condition even if the power supply is happy to supply the current. With the example of 10 LEDs drawing 600 mA, a 1 amp fuse would do just fine to protect the circuit in the event of an accidental short.

It’s a great explanation of a common yet dangerous problem, and [Thomas] backs it up by using a thermal camera to illustrate just how hot things can get in mere seconds. Armed with this knowledge, you can now safely play with LEDs instead of fire. But now that you’re feeling confident, why not check out these eyeball-searing 3 watt addressable LEDs?

Continue reading “The Engineering Case For Fusing Your LED Strips”

Disco Bulb Keeps The Party Spinning

Even if you don’t like disco, you might like the slick moves that went into this project. [W&M] built a miniature motorized mirror ball inside of a standard incandescent light bulb, and the results are something to dance about.

Short of blowing a glass bulb, building a motor, and growing the wood, this is about as scratch-built as it gets. Much of the woodworking is done on a metal lathe, and this includes the base of the mirror ball itself. As with all good thing-in-a-bottle builds, the ball is too big to go in the bulb, so [W&M] quartered it, drilled a few holes, and ran a string through the pieces so they can be carefully glued and drawn back together into a sphere. He even cut up mirror tiles and painstakingly applied them with tweezers.

This disco bulb is meant to be hung from the ceiling and wired into mains like a regular mirror ball. [M&W] stuffed the guts from a small USB wall charger into the handmade beech base to provide clean power for both the geared motor that spins the ball and the tiny LED that illuminates it. Slip into your best leisure suit (or sweat suit, we won’t judge) and hustle past the break to watch the build video.

We don’t see a lot of disco balls around here, but we did see a disco icosahedron once.

Continue reading “Disco Bulb Keeps The Party Spinning”

Counting Is For Sheep: Use A Light To Fall Asleep

How do you get to sleep at night? For some of us, it can be the most difficult thing we do all day. Worrying about falling asleep and letting other intrusive thoughts in night after night only compounds the problem, as less sleep leads to depression which (for us) leads to even less sleep. We lay there, trapped inside a vortex of churning thoughts, imprisoned in a mind that feels like it’s malfunctioning and half-wishing for a future where instructor-led meditation videos can be beamed to the insides of our eyelids. In the meantime, there is FADing, the Fall Asleep Device.

FADing takes its cues from a relaxation technique that uses light to focus your attention and control your breathing. The light’s intensity waxes and wanes on a schedule designed to get you down from the average eleven breaths per minute to a zen-like six breaths per minute. You surrender to the light, breathing in as it intensifies and breathing out as it fades. There are commercial products that bring this technique to the bedroom, but they aren’t cheap and don’t offer much control. Fail to fall asleep in the prescribed window and you’re back to square one with one more thing to think about: buyer’s remorse.

[Youz] was inspired by these devices but dissatisfied with the price tag and lack of options, so he created his own version with a flexible window of operation that appeals to both back- and side-sleepers. It uses an Arduino Nano and two momentaries to control two LEDs, a relay to hold the power after startup, a 9V, and a diode to protect the Nano. One LED projects on the ceiling, and the other radiates through a slice of acrylic which has been shaded blue. One button is for power, and the other lets you add time by two-minute increments. You can see the build video after the break and then tell us how you’d do it with a 555, a coin cell, and a chunk of uranium glass in the comments.

Once you can focus on your breathing without a light, reuse that Nano to measure the quality of all that sleep you’re getting.

Continue reading “Counting Is For Sheep: Use A Light To Fall Asleep”