Introducing The BeagleBone Blue

The BeagleBone is a board that doesn’t get a lot of attention in a world of $5 Raspberry Pis, $8 single board computers based on router chipsets, and a dizzying array of Kickstarter projects promising Android and Linux on tiny credit card-sized single board computers. That doesn’t mean the BeagleBone still isn’t evolving, as evidenced by the recent announcement of the BeagleBone Blue.

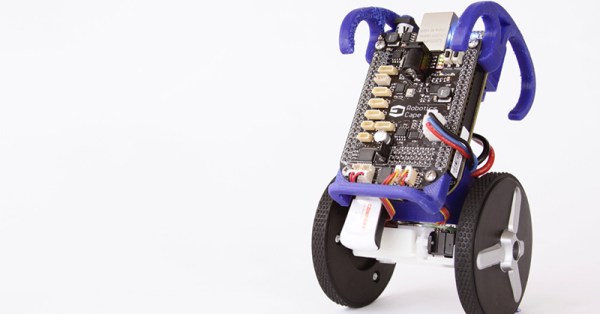
The BeagleBone Blue is the latest board in the BeagleBone family, introduced last week at CES. The Blue is the result of a collaboration between UCSD Engineering and TI, and with that comes a BeagleBone built for one specific purpose: robotics and autonomous vehicles. With a suite of sensors very useful for robotics and a supported software stack ideal for robots and drones, the BeagleBone Blue is the perfect board for all kinds of robots.

On board the BeagleBone Blue is a 2 cell LiPo charger with cell balancing and a 6-16 V charger input. The board also comes with eight 6V servo outputs, four DC motor outputs and inputs for four quadrature encoders. Sensors include a nine axis IMU and barometer. Unlike all previous BeagleBones, the BeagleBone Blue also comes with wireless networking: 802.11bgn, Bluetooth 4.0 and BLE. USB 2.0 client and host ports are also included.

Like all of the recent BeagleBoards, including the recently released BeagleBone Green, the Blue uses the same AM3358 1 GHz ARM Cortex 8 CPU, features 512 MB of DDR3 RAM, 4GB of on board Flash, and features the main selling point of the BeagleBoard, two 32-bit programmable real-time units (PRUs) running at 200 MHz. The PRUs are what give the BeagleBone the ability to blink pins and control peripherals faster than any other single board Linux computer, and are extremely useful in robotics, the Blue’s target use.

Right now, the BeagleBone Blue isn’t available, although we do know you’ll be able to buy one this summer. Information on pricing and availability – as well as a few demos – will come in February.
PIC32 Smart Watch For Less Than A Benjamin

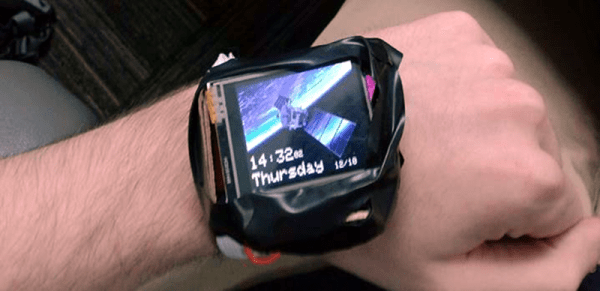
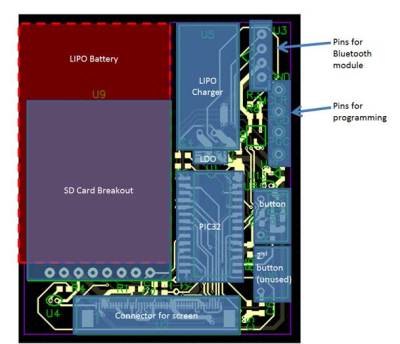
[Matthew Filipek] likes smart watches, but wanted to build one for under $100, so he did. The watch has a 1.7 inch LCD touchscreen, a rechargeable LiPo battery, an SD card, and Bluetooth. The watch is a little large since [Matthew] had only a month to complete the project that drove him to use some pre-made modules image004and meant one shot at getting his custom PCB right.
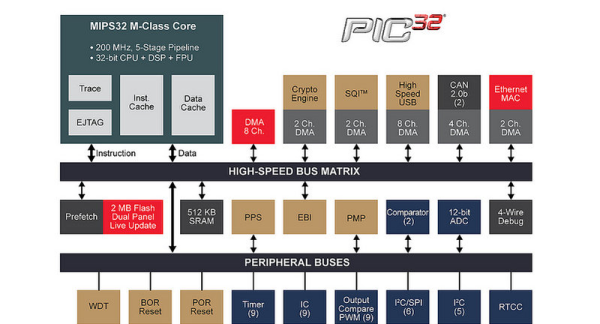
The watch sports three applications: a settings app, a simple game, and a sketch program (you can see a demo in the video below). Power management is a primary goal, of course, although the clock rate is held high enough to make the game playable. To simplify the software, [Matthew] uses protothreads–a lightweight thread abstraction for embedded systems.

We’ve seen several DIY smartwatches in the past including one entry for the Hackaday Prize. It is hard to roll your own watch that has the same small size and style as a commercial offering. However, there is something to be said for having a homebrew watch for boosting your hacker cred.

Continue reading “PIC32 Smart Watch For Less Than A Benjamin” →

LiteBSD Brings 4.4BSD To PIC32

A few years ago [Serge Vakulenko] started the RetroBSD project–a 16-bit port of the old 2.11BSD operating system to the Microchip PIC32 microcontroller. This was impressive, but version 2 of BSD is, to most people, old news and somewhat difficult to use compared to modern BSD and Linux operating systems.

[Serge] has been at it again, however, and now has a port of 4.4BSD–LiteBSD–running on the PIC32MZ. According to [Alexandru Voica] there is about 200K of user space memory in the basic build, and by removing some OS features, you could double or triple that figure.

Continue reading “LiteBSD Brings 4.4BSD To PIC32” →

SPI: Let Go And Use The Force

Take a leap the next time you use SPI and don’t poll for the busy flag. “What, are you crazy? That’s the whole point of the busy flag! It’s a quick check to make sure you don’t kill a byte waiting to be shifted out!” Sure, we thought the same thing, but the other side of the coin is that it takes time to check the busy flag, and that’s time he could be transmitting data. [bigjosh2] calculates that his technique saves 20% of those wasted cycles in this particular case. And he’s “using the force” only because he’s a Jedi master able to rely on the cycle count of a chunk of assembly code.

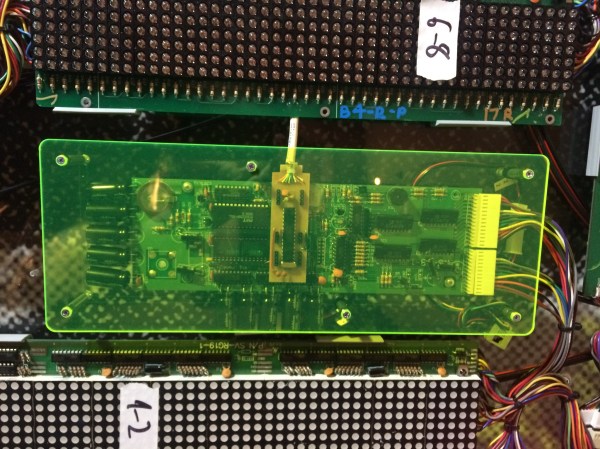
He’s working with an AVR processor, and pumping out bits to drive the vintage LED display pictured above. The ancient chips don’t have buffered SPI so he has to blank the display while shifting new data in to prevent it from glitching. Because the display blank during the SPI transmission, the slower it goes, the dimmer the lights.

He attacks the problem with synchronous code. It takes 2 cycles for the hardware SPI to send each bit, so he twiddles his thumbs (that’s exactly what he wrote in his code comments) for 16 cycles before reloading the SPI register with his next value. This leaves it up to faith in the silicon that the shifting will always take the same number of cycles, but the nice thing about hardware is that it’s deterministic. He ends up killing a few cycles in order to save time by not polling the busy flag.

Still need a crash course in what SPI actually does? [Bil Herd] has you covered with this SPI communication demo.

Magic Mirror On The Wall, “Is Pi Or ESP, Fairest Of All?”

“What’s the weather like, honey?” “I don’t know. Let me check the mirror.”  The mirror?

Both [Dylan Pierce] and [squix] have mirror projects that display the weather. They took two different approaches which makes for an interesting comparison. [Dylan] uses a Raspberry Pi with an actual monitor behind the mirror. [squix] puts an OLED behind the mirror driven by a ESP8266.  It appears there is more than one way to hack a mirror, or anything, which is what makes hacking fun.

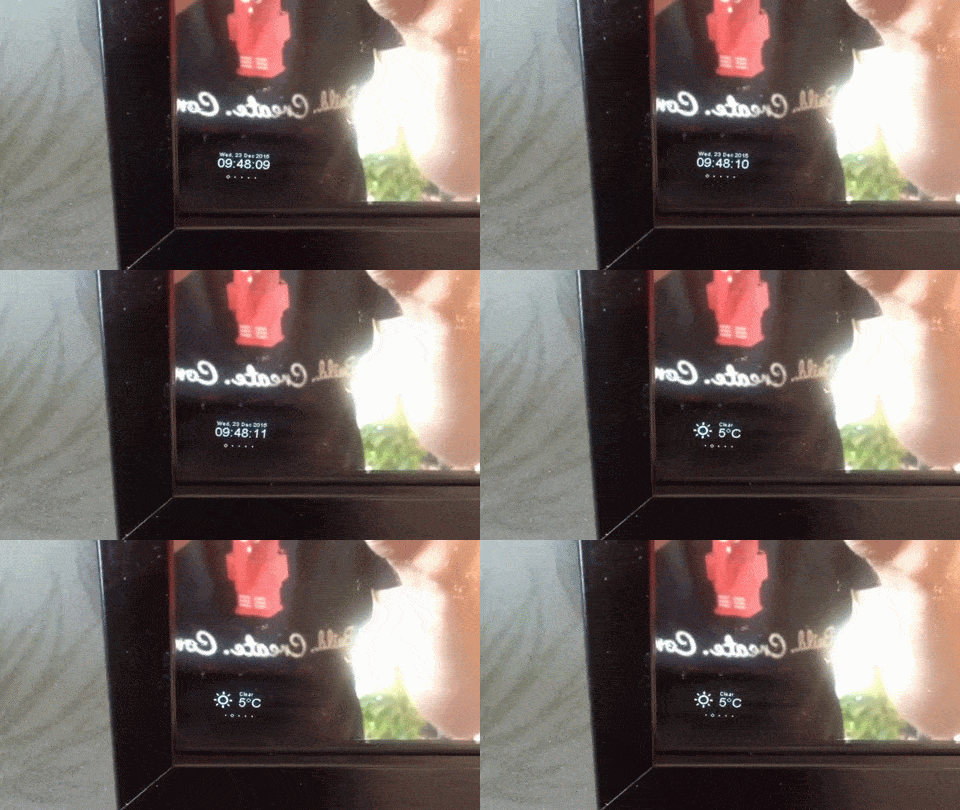
[squix] started with a picture frame, adding tinting film to the glass so it would reflect. A small section of tint was removed to allow the OLED to be seen. The ESP8266 software connects to the Weather Underground to get the latest information.

The Raspberry Pi version by [Dylan] puts a 27″ monitor behind the mirror. That is either terribly impressive or way over the top but seeing Linux boot behind the mirror makes it worth the effort. The Pi generates a web page which makes this adaptable as a general purpose kiosk.

A video of [squix]’s mirror in operation, after the break.

Continue reading “Magic Mirror On The Wall, “Is Pi Or ESP, Fairest Of All?”” →

Stepping Out In Style With Top Hat Navigation

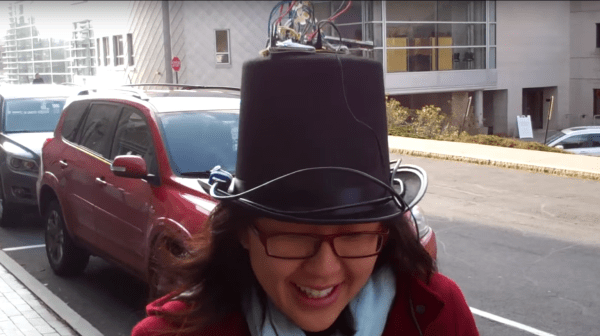
Wearable tech is getting to be a big thing. But how we interface with this gear is still a bit of a work in progress. To explore this space, [Bruce Land]’s microcontroller course students came up with an acoustic interface to assist with navigation while walking. With style, of course.

[Bruce], from the Cornell University School of Electrical and Computer Engineering, has been burning up the Hackaday tips line with his students’ final projects. Here’s the overview page for the Sound Navigation Hat. It uses a PIC32 with GPS and compass. A lot of time was spent figuring out how to properly retrieve and parse the GPS data, but for us the interesting bits on that page are how the directional sound was put together.

Audio tones are fed to earbuds with phase shift and amplitude to make it seem like the sound is coming from the direction you’re supposed to walk. Navigation is all based on pre-programmed routes which are selected using a small LCD screen and buttons. One thing’s for sure, the choice of headwear for the project is beyond reproach from a fashion standpoint – engineering has a long history with the top hat, and we think it’s high time it made a comeback.

Is this a practical solution to land navigation? Of course not. But it could be implemented in smartphone audio players for ambient turn-by-turn navigation. And as a student project, it’s a fun way to demonstrate a novel interface. We recently covered a haptic navigation interface for the visually impaired that uses a similar principle. It’ll be interesting to see if either of these interfaces goes anywhere.

Continue reading “Stepping Out In Style With Top Hat Navigation” →

Color Sonification Could Be Key To Rainbow Connection

Have you seen any loud sweaters this holiday season? Now there is a way to quantify their vibrancy and actually hear them at the same time. Cornell engineering students [Mengcheng Qi] and [Ryan Land] focused on the sonification of color and translated the visible spectrum into audible sounds.

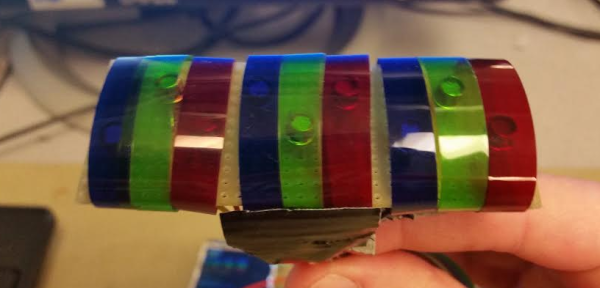
They originally planned to use pixel samples from an OV7670 camera module, but weren’t able to extract any useful color data from it. We prefer their Plan B anyway, which was to use CdS photo resistors and the plastic color filters used for photography in red, blue, and green. The varying intensity of light falling on the photo resistors creates different patterns according to the voltage levels. The actual sound generation was done with FM sound synthesis.

There wasn’t a lot of natural sound variation between different RGB values, so in order to make it more fun, they created different instruments which play different patterns at variable speeds and pitch according to the colors. In addition to the audio feedback, the RGB values are displayed in real-time on a small TFT. Below those are dynamic bar graphs that show the voltages of each color.

Check out the demo after the break; they walk through the project and try it out on different things to hear their colors.

Continue reading “Color Sonification Could Be Key To Rainbow Connection” →