New To The Store: Teensy 3.1

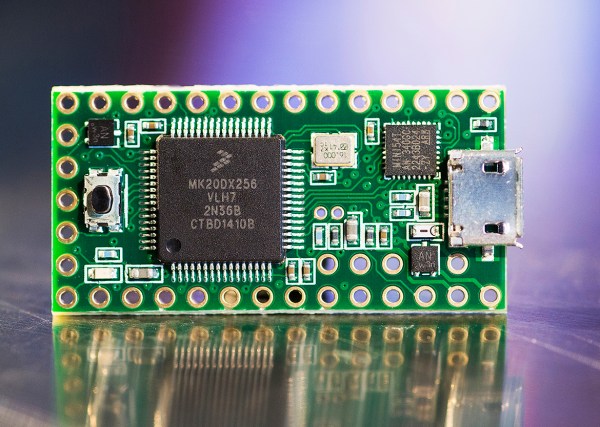
New today in the Hackaday Store is the Teensy 3.1. This development board blows away most others in its class. The board plays nicely with the Arduino IDE, but embedded developers who are hardcore enough have the option of bare metal programming for the Coretex-M4 chip.

Why would we say this blows most others away? In our minds, the 64k of RAM and 72 MHz clock speed place this far outside of what you would normally see hanging out in the Arduino ecosystem. That may be changing with new players like the Edison, but the Teensy 3.1 doesn’t require a host board and comes in just under $20 compared to the Edison’s $50 price tag.

[Paul Stoffregen], the developer of the Teensy, is a hacker’s hacker and is known to be found round these parts. All year [Paul] has been developing an Audio Library that takes advantage of the Teensy 3.1’s powerful processor (including its DMA features; we’ve been pestering him to write an article for us on that topic). We covered the library back in September and are stocking the audio add-on board in the store as well. Quite frankly, the quality of sound that this puts out is astonishing. If you’re working on a project that calls for playback of recorded sound this is one of the least-complicated ways to get there.

Homer Smart Remote

Homer Robot Ensures You Don’t Miss An Episode

With our busy lives, who has time to pay attention to TV show schedules? [Tamberg] certainly didn’t and that is why he came up with the web-enabled TV remove he calls the Smart Homer. This miraculous device knows when ‘The Simpsons’ is being broadcast, turns on the TV and switches to the appropriate channel.

Like the real Homer, not too much is going on up in this toy’s noggin. A couple of IR emitters are mounted in place of pupils and the associated wires are run down into his body. Right between a pink donut and a Krusty burger resides an Arduino and ethernet shield. This electronic duo acts as a web server and looks out to the ‘net for an online script. The script polls an online TV Program Guide and if ‘The Simpsons’ are on at that time, it sends a signal back to the Arduino to turn the TV on.

Homer Smart Remote   Jolly Homer

Hackaday 10th Anniversary: Jon McPhalen And The Propeller

[Jon] came out to our 10th anniversary mini-con to talk about the Propeller, and judging from his short introduction, his hacker cred is through the roof. He has a page on IMDb, and his first computer was a COSMAC. Around 1993, he heard of a small company introducing the BASIC Stamp, and like us with most new technology was incredulous this device could perform as advertised. He tried it, though, and for a few years after that, he was programming the BASIC Stamp every single day.

Having a lot of blinky light project under his belt, [Jon] was always struggling with interrupts, figuring out a way to blink an LED exactly when he wanted it to blink. A lot has changed over at Parallax since 1993, and now they’re spending time with the Propeller, an 8-core microcontroller where interrupts are a thing of the past. He showed off a huge, 10-foot tall bear from League of Legends, all controlled with a single Propeller, using 1000 LEDs to look like fire and flames.

[Jon] shared the architecture of the Propeller, and the inside of this tiny plastic-encapsulated piece of silicon is wild; it’s eight 32-bit microcontrollers, all sharing some ROM and RAM, controlled by something called a Cog that gives each micro access to the address, data, and IO pins.

When the Propeller was first released, there were a few questions of how the chip would be programmed. C isn’t great for multicore work, so Parallax came up with a language called Spin. It’s written for multicore microcontrollers, and from [Jon]’s little session in demo hell, it’s not that much harder to pick up than Python. Remember that hour or two where you learned the syntax of Python? Yeah, learning Spin isn’t a huge time investment.

Even though you can program the Propeller in C and C++, there’s a reason for Spin being the official language of the Propeller. It isn’t even that hard, and if you want to dip your toes in multicore microcontroller programming, the Propeller is the way to do it. It’s an open source chip as well so you can give it a try with an FPGA board.

Acoustic Impulse Marker Tracks Sounds With A Pencil

Acoustic Impulse Marker (aiming device)

Two students at Cornell University have put together a rather curious sound tracking device called an Acoustic Impulse Marker.

[Adam Wrobel] and [Michael Grisanti] study electrical and computer science, and for their final microcontroller class they decided to build this device using the venerable ATmega 1284p.

The system uses a three-microphone array to accurately position sharp noises within 5 degrees of accuracy. The microcontroller detects the “acoustic delay” between the microphones which allows it to identify the location of the sound’s source vector. It does this using an 8-stage analog system which converts the sounds from each microphone into a binary signal, which identifies when each microphone heard the noise. The resultant 3 binary signals are then compared for their time delay, it selects the two closest microphones, and then does a simple angle calculation based on the magnitudes of each to determine the sounds position. Continue reading “Acoustic Impulse Marker Tracks Sounds With A Pencil”

An MSP430 Flash Emulation Tool From An MSP430

It isn’t much trouble programming one of TI’s MSP430 chips, but outside of the official Flash Emulation Tool, TI doesn’t make programming one of these microcontrollers cheap. The most common way of programming an MSP430 is using a Launchpad Dev board, and [Vicente] has the best looking one yet.

The MSP430 series of chips can be programmed through JTAG or Spy-By-Wire, and the official, professional engineering tool from TI for these chips costs about $100. Those of us with more sense than money have another option – use one of the TI Launchpad dev boards as an MSP430 programmer.

[Vicente]’s project uses the MSP430G2 Launchpad, with just a few wires going to the proper connector found in the official programmer from TI. There are a few limitations; the programmer only works at 3.6V, so programming 1.8V devices might not be a good idea. Also, it only works with Spy-By-Wire and no JTAG support is available. Still, it’s a great looking project, and does exactly what it’s designed to.


GCC For The ESP8266 WiFi Module

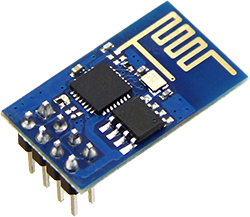
When we first heard about it a few weeks ago, we knew the ESP8266 UART to WiFi module was a special beast. It was cheap, gave every microcontroller the ability to connect to a WiFi network, and could – possibly – be programmed itself, turning this little module into a complete Internet of Things solution. The only thing preventing the last feature from being realized was the lack of compiler support. This has now changed. The officially unofficial ESP8266 community forums now has a working GCC for the ESP8266.

The ESP8266 most people are getting from China features a Tensilica Xtensa LX3 32-bit SOC clocked at 80 MHz. There’s an SPI flash on the board, containing a few dozen kilobytes of data. Most of this, of course, is the code to run the TCP/IP stack and manage the radio. There are a few k left over – and a few pins – for anyone to add some code and some extended functionality to this module. With the work on GCC for this module, it’ll be just a few days until someone manages to get the most basic project running on this module. By next week, someone will have a video of this module connected to a battery, with a web-enabled blinking LED.

Of course that’s not the only thing this module can do; at less than $5, it will only be a matter of time until sensors are wired in, code written, and a truly affordable IoT sensor platform is created.

If you have a few of these modules sitting around and you’d like to give the new compiler a go, the git is right here.

Thermal Printer Brain Transplant

Thermal Printer Brain Transplant Is Two Hacks In One

You know how sometimes you just can’t resist collecting old hardware, so you promise yourself that you will get around to working on it some day? [Danny] actually followed through on one of those promises after discovering an old Radio Shack TRS-80 TP-10 thermal printer in one of his boxes of old gear. It looks similar to a receipt printer you might see printing receipts at any brick and mortar store today. The original printer worked well enough, but [Danny] wasn’t satisfied with its 32 character per line limitation. He also wanted to be able to print more complex graphics. To accomplish this goal, he realized he was going to have to give this printer a brain transplant.

First, [Danny] wanted to find new paper for the printer. He only had one half of a roll left and it was 30 years old. He quickly realized that he could buy thermal paper for fax machines, but it would be too wide at 8.5 inches. Luckily, he was able to use a neighbor’s saw to cut the paper down to the right size. After a test run, he knew he was in business. The new fax paper actually looked better than the old stuff.

The next step was to figure out exactly how this printer works. If he was going to replace the CPU, he was going to need to know exactly how it functioned. He started by looking at the PCB to determine the various primary functions of the printer. He needed to know which functions were controlled by which CPU pins. After some Google-Fu, [Danny] was able to find the original manual for the printer. He was lucky in that the manual contained the schematic for the circuit.

Once he knew how everything was hooked up, [Danny] realized that he would need to learn how the CPU controlled all of the various functions. A logic analyzer would make his work much easier, but he didn’t happen to have one lying around. [Danny] he did what any skilled hacker would do. He built his own!

He built the analyzer around an ATMega664. It can sample eight signals every three microseconds. He claims it will fill its 64k of memory in about one fifth of a second. He got his new analyzer hooked up to the printer and then got to work coding his own logic visualization software. This visualization would provide him with a window to the inner workings of the circuit.

Now that he was able to see exactly how the printer functioned, [Danny] knew he would be able to code new software into a bigger and badder CPU. He chose to use another ATMega microcontroller. After a fair bit of trial and error, [Danny] ended up with working firmware. The new firmware can print up to 80 characters per line, which is more than double the original amount. It is also capable of printing simple black and white graphics.

[Danny] has published the source code and schematics for all of his circuits and utilities. You can find them at the bottom of his project page. Also, be sure to catch the demonstration video below. Continue reading “Thermal Printer Brain Transplant Is Two Hacks In One”