The Most Minimal Homebrew Computer

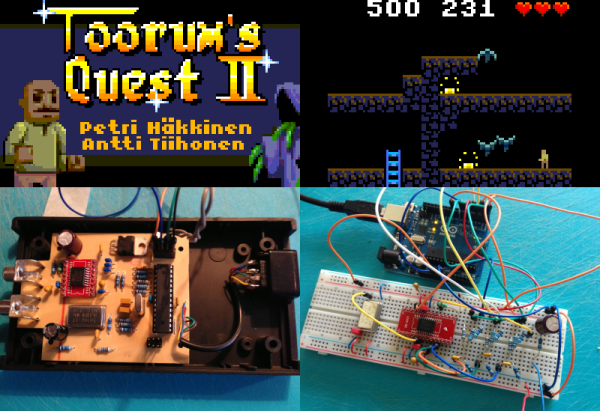
Perfection is achieved not when there is nothing more to add, but when there is nothing left to fail. Going by that metric, [Stian]’s three-chip 6502 homebrew computer is the epitome of perfection. It’s a real, working, homebrew retrocomputer using only three chips: a CPU, some RAM, and a microcontroller to bootstrap the computer and provide a video output,

The key to this minimalist build is having the entire boot process controlled by an ATMega16 microcontroller, This interfaces to the 6502 through a dual-port SRAM, a 1 kilobyte Cypress CY7C130. This dual-port RAM allows the CPU and microcontroller to access the same bit of memory, making it easy to bootstrap a computer from a bit of AVR code.

Output is provided with [Stian]’s ATMega video text generator putting a 37×17 characters on any television with an RCA jack. While input isn’t handled yet, [Stian] says it should be possible with his AVR PS/2 keyboard library.

While other 6502 homebrew computers such as [Quinn Dunki] Veronica can reach unparalleled heights of complexity, there is a lot to be said about the minimalism of [Stian]’s three-chip computer. With some clever coding and a modified parts list, it may well be possible to put a retrocomputer in the hands of everyone with a bare minimum of cost and parts.

Build A Sensorless Brushless DC Motor Controller

[Davide Gironi] shows us how to implement a sensorless brushless DC motor controller (sensorless BLDC) using an ATmega8 microcontroller. In order to control a BLDC motor you need to know its rotational sequence position and speed so you can calculate and apply the correct current phase sequence to the motor windings at just the right time.

Simply said, sensorless BLDC means you’re not using a purpose built sensor to determine the motor’s position and speed, however, you are sensing the motor’s sequence position using the back EMF signal coming from one of motor’s coils that is not currently receiving power. When this back EMF signal crosses zero voltage a microcontroller can calculate the rotational speed and when to switch to the next power sequence. This technique is not good for position control motors but is great for continuous motors like computer fans and drives were the slightly reduced wiring costs make this type of BLDC control favored.

If you want to build a BLDC controller we recommend starting with [Davide’s] last project on sensor controlled BLDC motors. You can also checkout these interactive demonstrations for more understanding on the different BLDC configurations.

Follow along after the break to watch the video demonstration of [Davide’s] sensorless BLDC controller controlling a motor from CD-ROM drive.

Continue reading “Build A Sensorless Brushless DC Motor Controller”

Making A Diode Matrix ROM

Here is a nice project that allows youngsters (but also adults!) to actually see the data stored in a Read Only Memory (ROM). The memory shown in the picture above is made of diodes. [Scott] made it as a part of his Barcamp Fall 2013 presentation about visualizing ROMs. He starts his write-up by stating the obvious: this memory is not practical. Nonetheless, it still was a fun exercise to do. [Scott] then greatly described all the different kinds of read only memories that you can find out there, with a few words explaining how they work. In his diode ROM, bits are ‘programmed’ by adding (or not) a diode between a given data line (anode) and an address line (cathode). When pulling low a given address line, the corresponding data line will only be pulled low if a diode is present. [Scott] finally checked his circuit by using a very old device programmer which could only be run in DOS.

Teach An Old LCD New Tricks

pic-lcd

[Art] has done some amazing work with character LCDs. He started with a classic character LCD. These LCDs are typically controlled by Hitachi HD447XXX compatible controllers. Hitachi’s controllers allow several custom characters to be defined. We’ve used those characters in the past for applications like spinners and bar graphs. [Art] took things to a whole new level. He created a double buffered LCD graphics library which allows these old LCDs to perform tricks usually reserved for graphical LCDs. Even more impressive is the fact the whole thing runs on a Microchip PIC16F628A programmed mostly in PICBASIC.

According to [Art’s] thread on the PICBASIC forum, he is using the custom character memory as a framebuffer. The LCD is set to display all 8 custom characters. Each frame is then in the PIC’s RAM. The completed frames are then pushed to the custom character memory of the Hitachi LCD controller. The result is a very smooth update rate on the LCD. [Art] wrapped the whole example up in a video reminiscent of the C64 demoscene.

Continue reading “Teach An Old LCD New Tricks”

Breadboarding With A ARM Microcontroller

NXP’s LPC1114 ARM microcontroller is in a class all of it’s own. ARM microcontrollers are a dime a dozen, but this fabulous chip is the only one that’s housed in a hacker and breadboard friendly PDIP package. However, breadboard setups usually won’t have the luxuries of a true development platform such as flashing the part, single stepping through the code, and examining memory. [Steve] found an interesting solution to this problem that involves a Dremel and hacking up even more hardware.

[Steve] found a few LPC1769 dev boards that include a debugger and a way to program these chips. Simply by hacking off the programmer and debugger portion of this dev board with a Dremel tool, [Steve] had an easy to use interface for his breadboardable ARM.

After connecting the power rails to his breadboarded chip, [Steve] connected his programmer up and set up a gcc toolchain. For about $25, he has a breadboard friendly ARM microcontroller with full debugging capabilities.

This isn’t the first time we’ve seen a few people play with this DIP28 ARM chip; someone even milled this 600 mil chip down to 300 mils for even easier prototyping. Still, this is the best and cheapest way we’ve seen yet to turn this ARM into a proper prototyping platform.

Running Custom Code On Cheap One-time Password Tokens

One-time passwords (OTP) are often used in America but not so much in Europe. For our unfamiliar readers, OTP tokens like the one shown above generate passwords that are only valid for one login session or transaction, making them invulnerable to replay attacks. [Dmitry] disassembled one eToken (Aladin PASS) he had lying around and managed to reprogram it for his own needs.

Obviously, these kind of devices don’t come with their schematics and layout files so [Dmitry] had to do some reverse engineering. He discovered six holes in a 3×2 arrangement on the PCB so he figured that they must be used to reprogram the device. However, [Dmitry] also had to find which microcontroller was present on the board as its only marking were “HA4450” with a Microchip logo. By cross-referencing the number of pins, package and peripherals on Microchip parametric search tool he deduced it was a PIC16F913. From there, it was just a matter of time until he could display what he wanted on the LCD.

We love seeing tiny consumer hardware hacked like this. Most recently we’ve been enthralled by the Trandscend Wi-Fi SD card hacking which was also one of [Dmitry’s] hacks.

A Simple Forth Development Board

forth

Forth is a very interesting programming language. It’s very flexible and is extremely efficient on low powered hardware, but unfortunately not very popular simply due to the fact that it’s not very popular. There were a few Forth-based microcomputers built in the 1980s, but these were largely unsuccessful.

[Leon] is a Forth aficionado and came up with his own Forth development board in the hopes of Forth making a comeback. It’s a very small and cheap board – only about $12 in parts – but it’s still extremely powerful and a fun platform for investigating Forth.

Compared to other programming languages found in 80s microcomputers, Forth is just weird. It’s a stack-based language, so instead of adding two numbers like 3 + 4, Forth uses postfix notation (or Reverse Polish Notation) so the same statement is expressed as 3 4 +. It’s a much more efficient way for computers to handle data, and some claim it’s more efficient for humans as well.

[Leon] created his own board able to be programmed in Forth, shown above, that uses an ATMega328 microcontroller. He’s using AmForth to put Forth on his system, but also extended the base AmForth install with his own floating point version. making this version of Forth at least as powerful as any 80s microcomputer or ATMega development board is today.

[Leon] put together a great demo of the capabilities of Forth and his dev board. You can check that out below.

Continue reading “A Simple Forth Development Board”