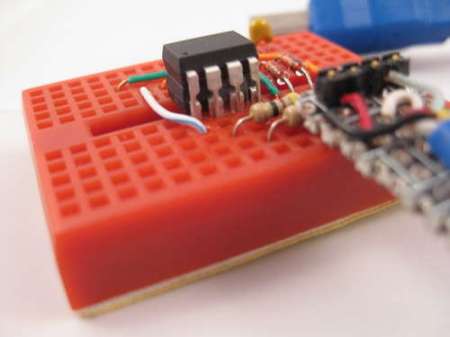
Arguably, Microchip’s PIC microcontrollers do not get enough posts here. One of the drawbacks for some of us is that Linux support for PICs is not very well known. The information is out there, but no one has laid out the process of going from writing C code to programming a chip. Written for Linux users that are familiar with microcontrollers, basic circuits, the C programming language, and can read a datasheet, this how-to should get you up and programming a PIC quickly with Linux.
Microcontrollers2381 Articles
Hacking A Hack: Disassembly And Sniffing Of IM-ME Binary

It’s fun to pick apart code, but it gets more difficult when you’re talking about binaries. [Joby Taffey] opened up the secrets to one of [Travis Goodspeed’s] hacks by disassembling and sniffing the data from a Zombie Gotcha game binary.
We looked in on [Travis’] work yesterday at creating a game using sprites on the IM-ME. He challenged readers to extract the 1-bit sprites from an iHex binary and that’s what got [Joby] started. He first tried to sniff the LCD data traces using a Bus Pirate but soon found the clock signal was much too fast for the device to reliably capture the signals. After looking into available source code from other IM-ME hacks [Joby] found how the SPI baud rate is set, then went to work searching for that in a disassembly of [Travis’] binary. Once found, he worked through the math necessary to slow down communication from 2.7 Mbit/s to 2400 bps and altered the binary data to match that change. This slower speed is more amenable to the Bus Pirate’s capabilities and allowed him to dump the sprite data as it was sent to the LCD screen.
[Thanks Travis]
IM-ME Graphic Manipulation Using Sprites
![]()
Here’s a study in sprite animations that [Travis Goodspeed] put together. He’s working with one of his favorites, the pink IM-ME device that he’s been hacking on for a while now. But if you don’t have this hardware that shouldn’t discourage you. There’s a lot to be learned from his methods which will translate to any microcontroller working with a graphic LCD.
He starts with a 24-bit PNM sprite that includes three frames of his desired animation. From there he needs a way to store the data for use with 8-bit microcontrollers. He chose to write a Perl script that will translate the image format into a 1-bit map. Each frame of the animation takes up a column width that is a multiple of 8 for easy retrieval by the processor. This translation into a C array, and the accompanying code that translates it into data for the frame buffer is the key to the animation process. What is he shooting for? A sprite-based video game on the handheld.
Tiny USB Business Card

[Frank Zhao] put together a USB business card. It’s even got the instructions printed right on the silk screen of the PCB explaining how it should be used. He based the design around an AVR ATtiny85 microcontroller. It runs the V-USB package that handles USB identification and communication protocols. The rest of the hardware is pretty standard, the uC draws power from the 5V USB rail, with a couple of 3.6V Zener diodes to drop the two data lines down to the proper level.
Once plugged in it waits until it detects three caps lock keypresses in a row, then spews a string of its own keypresses that type out [Frank’s] contact information in a text editor window (video after the break). It’s not as reusable as the mass storage business card because [Frank] didn’t breakout the pins on controller. But we still enjoy seeing business cards that make you stand out.
This is a great project to tackle with your newly acquired AVR programming skills.
Smallest Gaming Console Ever. EVER!

That’s it… the controller and the video game system all in one. This is the standalone version of [Rossum’s] RBox. We looked in on the prototype in June but that was using a bulky development board. You can see the CR1632 button battery, which powers the device for about four hours, sandwiched in between the joystick and the mainboard. Exiting the image on the right are cables used to connect mono-audio and video to a TV via RCA connectors. There’s no port for interchangeable cartridges which means that all game data must be programmed into the ARM Cortex M0 processors. See [Rossum’s] demo video after the break.
70 LED Matrix In A Jack-o-lantern
What takes eight hours to solder and uses more shrink tubing that you thought imaginable? An LED matrix installed in a real pumpkin. When I mentioned that we’d like the LED pumpkin in last Friday’s post scaled up to a full LED matrix I had no idea it would be me doing the work. But [Caleb] and I thought it might be just the thing to present for the hacker’s favorite holiday.
Installed in the autumn vegetable is a marquee made from a 5×14 matrix of light emitting diodes. I spaced them by printing out a grid on the computer, taping it to the pumpkin, and drilling 70 holes in the front of the thing. The real trouble came when inserting all of the LEDs from the inside; each of them has four wires soldered to it, creating a net of black wiring. Above you can see it turned out great. This is a shot of it scrolling the message HAPPY HALLOWEEN.
Join us after the break for video of this prop. But we’re not just sharing the finished product. I’ll take you through the build process. Along the way you’ll learn the design considerations that go into an LED matrix and how you can use these techniques to build your own in any size and configuration you desire.
AVR Programming 02: The Hardware
You may be able to write the most eloquent code in the history of embedded systems but without a way to run it on the hardware it will be worthless. In this installment of the tutorial series we will:
- Look at some of the available AVR programmer options
- Place the microcontroller on a breadboard and connect it to a power supply and a programmer.
- Use programming software to send some example code to the microcontroller
If you missed Part 1 take a few minutes to review that portion of the tutorial and then join us after the break.
Series roadmap: