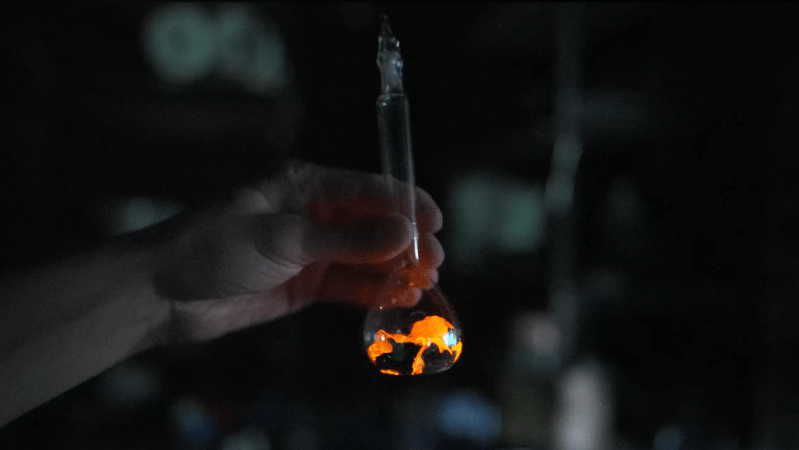
A person's hand is shown holding a glass flask in a dark room. An orange-red glow is emanating from the flask in a patches, forming a splash-like pattern near the base of the flask.

A Sloshing-Mercury-Powered Neon Light

In 1675, while transporting a barometer by night, the astronomer Jean Picard noticed a glow inside its glass tube, just above the mercury. As the mercury sloshed and splashed across the surface of the glass, a static electric charge had built up, which was discharging by ionizing the residual gas molecules inside the evacuated tube. [Styropyro] recreated this effect, and found that the dim glow could be made much stronger by adding some noble gas to the tube.

It starts with a simple recreation: he took a volumetric flask, attached a narrow glass stem to the mouth, added some mercury to the flask, evacuated it with a vacuum pump, and sealed off the glass stem. This produced a faint glow when shaken, but it was only really visible under very low light. When [Styropyro] brought it near a Tesla coil, however, it did glow much more brightly.

Backfilling an identical flask with neon to about 40 millitorr produced a much more spectacular result (a low pressure in the tube is necessary, but moderate pressure variations don’t significantly alter the effect). When shaken even slightly, this neon-containing flask produced a bright orange-red glow just above the surface of the mercury. Points of obstruction, such as those in a zig-zag tube, produced a brighter glow. A krypton-containing tube glowed blue, but less brightly than the neon tube.

Since this is, essentially, a triboelectric effect, other materials besides mercury should work; [Styropyro] tested several materials, and found that pieces of Teflon produced a faint glow, and copper beads a somewhat brighter glow. Unfortunately, Galinstan, the obvious replacement for mercury, wets and coats glass, preventing a charge buildup.

Without an added noble gas, the standard glow of barometric light comes from the excitation of mercury vapors, a glow which can also be seen in mercury rectifiers, and which excites the phosphors of fluorescent light bulbs.
Continue reading “A Sloshing-Mercury-Powered Neon Light”

Hard Drive Speakers Crank Out Classic Demo

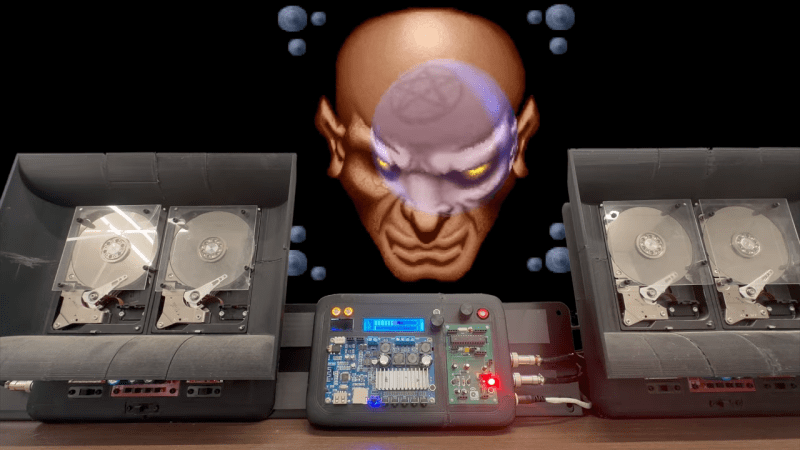
Second Reality is a legendary demoscene release by Future Crew, which won Assembly 1993 with its technical and artistic mastery. [Niv Singer] decided to give the classic demo a spin on a rather unconventional sound system with a particuarly techy twist.

Hard drives are great for storing data. They’re designed for this purpose. What they’re not designed for is acting as speakers, but you can hack them into acting that way if you’re so inclined. For this project, [Niv] pulled apart a whole stack of drives, so they could be repurposed in this way. The principle is simple enough—just feed audio to the coil driving the head, and it will vibrate and wiggle around, creating soundwaves in the air. It’s not particularly effective, and you get limited volume with a terrible frequency response, but that’s half the fun. [Niv] actually took some of this into account, too. Four Western Digital Caviar 500GB drives were chosen for this build, two for the left channel, and two for the right. Each channel had a crossover, allowing one drive to handle low frequencies while the other handled higher ones. For a further nice touch, the platters spin with the beat as well, with [Niv] providing a great explanation on how this was achieved with the use of some nifty PWM tricks.

Files are on Github for the curious. We’ve featured plenty of hard drive speakers before, too. Video after the break.

Continue reading “Hard Drive Speakers Crank Out Classic Demo”

A Custom Zigbee Touch Keypad

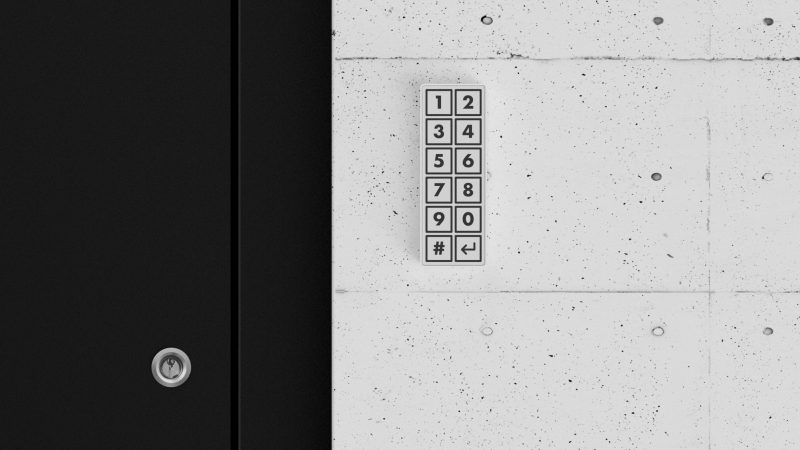
[Dominic Buchstaller] wanted a neat, tidy entryway keypad that actually looked good. Prime goals were something slim, wireless, and with no visible screws. Dependency on the cloud was also a no-go. With few ready-to-go options available on the market, he set about whipping up his own.

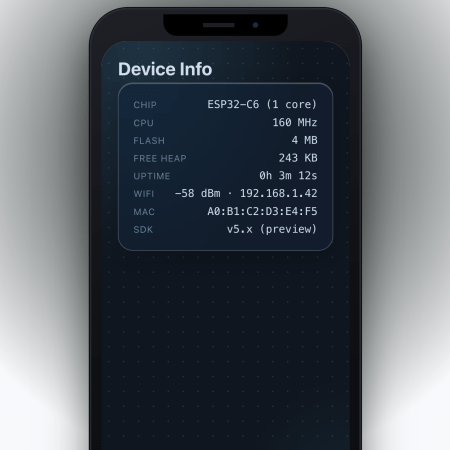
The heart of the build is an ESP32-C6 microcontroller devboard. This device has the benefit of including Zigbee communication functionality baked right into the chip. It’s hooked up to an MPR121 capacitive touch controller, which allows different segments of the touchpad PCB to act as capacitive buttons for numerical entry. The number labels are directly printed on the PCB solder mask, so there’s no overlay or other label required on top. Power is courtesy of a 1300 mAh lithium-polymer cell which gives a useful lifespan of six months between recharges. A simple 3D-printed case holds everything together and completes the clean and simple look. [Dominic] notes that it’s possible to also use the device via Matter or Thread without a lot of changes, as the ESP32-C6 can easily handle those protocols, too.

If you’re looking for a cheap, handsome keypad for your Home Assistant setup or similar, you might find this useful. We’ve explored DIY keypad entry systems before, too. If you’ve come up with some other creative way to get into your house, car, or bank vault, be sure to notify us via the tipsline.

A GUI Solution For ESP32 Web Development

These days, a lot of embedded projects feature some sort of screen, and a screen often creates a desire for a nice user interface. [Geoffrey Wells] has created a tool for developing web interfaces for the ESP32, named ESP-GenUI.

The aim was to make UI development as easy as possible for this platform. ESP-GenUI allows the creation of a website by dragging various nodes on to a canvas and linking them up to create the desired web interface. There are nodes for GPIO control, camera feeds, gauges, and all sorts of other common elements for quickly putting together dashboards and control panels. All this is done from within the browser, and the code generated by the tool can even be flashed without having to open any external tools. Alternatively, it can spit out Arduino code that you can open and flash from within the IDE. You can try the tool out yourself right here.

We’ve featured some other great resources for developing embedded user interfaces, like this highly-flexible display library for the ESP32. Feel free to espouse on your own favorite tools and techniques in the comments.

Continue reading “A GUI Solution For ESP32 Web Development”

Flying Cell Towers Are A Thing

Typically, when you’re sitting on a plane on the tarmac, you switch your phone to flight mode while you’re sitting through yet another “quirky” (boring) safety video. You’ll watch some inflight entertainment, read the airline magazine if you get really desperate, and wonder if anyone ever buys those random watches for sale in the “duty free” section. Then, finally, upon landing, you’ll be connected back to the Internet and you’ll finally feel like you can breathe again.

Only, this time, you forgot to set your phone to flight mode. You’re sitting at 30,000 feet, and… your phone has signal? You’re online, and you’re getting notifications and emails just like you’re on the ground. You’ve accidentally discovered that your flight has an on-board cell tower.

Continue reading “Flying Cell Towers Are A Thing”

Laser Scanning A Cave With Homebrew Gear

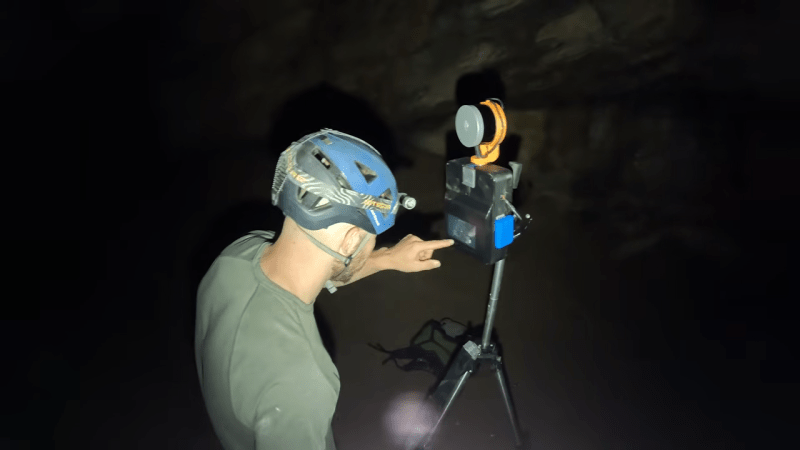
How do you measure the inside of a cave? You could do a bunch of hard work with classic surveying gear… or you could just use a laser scanner. [9nl] did the latter, with a scanning rig of his own creation.

The build is based around an Ouster VLP-16 mid-range lidar sensor. It shoots out pulses of light and measures how long it takes them to bounce back in order to determine the range of objects in the vicinity, and thus can be used to great effect for 3D scanning tasks. For [9nl], though, the sensor had a serious limitation. Since it only had a 40-degree field of view, it wasn’t ideal for the desired application of scanning a cave. However, by building a custom rig that could rotate the sensor, [9nl] ended up with a rig that could 3D scan an area through a full 360 degrees. There’s nothing wildly complex involved, just some good old mechanical engineering—putting the sensor on a shaft and spinning it with a belt drive. Then it’s just a matter of processing the data correctly. The hard part is then getting the rig in and out of the cave without breaking anything.

There are plenty of off-the-shelf 3D scanning solutions that can do this work, but few of them come cheap. Plus, rolling your own teaches you a great many things as you hone your solution to your particular needs. Video after the break.

Continue reading “Laser Scanning A Cave With Homebrew Gear”

Battery Tester Gets An App Upgrade

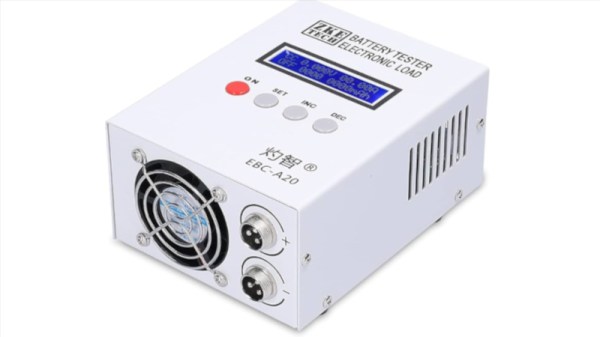
Do you have a ZKETECH EBC-A20 battery tester? Perhaps you don’t like the default software used to control the device. In that case, you might like the alternative whipped up by [Kazhuu.]

A reverse-engineering effort targeted at the EBC-A20 served as the basis for the work. The battery tester is ultimately controlled by a simple serial interface, running at 9600 bps, 8 bits, with odd parity. Armed with a relatively complete understanding of the commands used to control the device, [Kazhuu] was able to whip up a simple web app to control the device instead, using WebUSB to access the device over a USB-to-serial converter, though a desktop version for Linux and Windows is also available. If you’ve got one of these battery testers sitting on your bench, using the app is as simple as pointing your browser here with the device plugged in via USB. Then you can run basic load tests on battery cells and graph the results right on your computer without having to deal with the proprietary software.

Of course, if you don’t like the EBC-A20 battery tester, you could always build your own. If you’re whipping up your own test hardware on the lab bench, don’t hesitate to notify us on the tipsline.