A Think-tank Solution For Monitoring Radioactive Water Storge Tanks

SONY DSC

When we hear reports of radioactive water leaking into the ocean from the [Fukushima Dai-Ichi] plant in Japan we literally have to keep ourselves from grinding our teeth. Surly the world contains enough brain power to overcome these hazards. Instead of letting it gnaw at him, [Akiba] is directing his skills at one solution that could help with the issue. There are a number of storage tanks on site which hold radioactive water and are prone to leaking. After hearing that they are checked manually each day, with no automated level monitoring, he got to work. Above is the wireless non-contact tank level sensor rig he built to test out his idea.

A couple of things made this a quick project for him. First off, he just happened to have a MaxSonar MB7389 waterproof sonar sensor on hand. Think of this as a really fancy PING sensor that is water tight and can measure distance up to five meters. [Akiba’s] assumption is that the tanks have a hatch at the top into which this sensor would be positioned. The box next to it contains a Freakduino of his own design which includes hardware for wireless communications at 900 MHz. This is the same hardware he used for that wireless toilet monitor.

We really like seeing hacker solutions to environmental problems. A prime example is some of the cleanup hacks we saw around the time of the BP Gulf of Mexico oil spill.


Making Keys After The Apocalypse

Making keys is an amazing art with a lot of skill and technique involved. For those of you living in a post-apocalyptic world, [Dan] has a much simpler solution to the problems of having one too few keys for your locks and deadbolts – just cast them out of scrap with the power of the sun.

To make the mold of the key, [Dan] is using a two-piece plaster of paris mold. First, a thick layer of plaster is laid down in a small container and the key floated on the surface. After drying, sprues are put in with clay and the key embedded in a curing plaster block. After a few hours, a proper mold is created ready to receive molten metal.

The casting material is zinc – not as hard as the original steel key, but more than strong enough to turn a lock. This zinc is melted in a steel and plaster crucible with a gigantic fresnel lens.

As for the utility of this method of copying keys after the apocalypse, we’ll have to wonder how practical this method is. A giant fresnel lens isn’t just something you randomly find unless you’re going house to house looking for projection TVs, and finding a can of mold release after the end of the world is beyond credulity. That said, it’s a cool demonstration of metal casting that can be easily accomplished at home or at any hackerspace.

Continue reading “Making Keys After The Apocalypse”

Ultrasonic Anemometer For An Absurdly Accurate Weather Station

With his meteorological interests, [Carl] builds weather stations. Temperature and humidity sensors are a dime a dozen, but with his DIY ingenuity, [Carl] has built some very interesting and complicated devices. The latest of which is an ultrasonic wind sensor that uses the time of flight of ultrasonic pulses to detect how fast the wind is blowing.

[Carl]’s sensor uses four ultrasonic transducers aligned to North, South, East, and West to detect the wind speed. By measuring the time it takes an ultrasonic pulse to travel between the sensors indoors, Subtracting the in-situ measurement gives him the time of flight for each axis, and thus the wind speed.

It’s an impressive display of engineering that comes with an amazingly detailed design report. After three months of operation, [Carl] has found his ultrasonic anemometer is better than the traditional mechanical ‘egg-cup’ anemometer at measuring low wind speeds. The only real problem with the build is the fact the design makes a great bird perch, but some fine steel wire quickly corrected that problem.

The BatBox: Portable Power, Polished And Professional. Plus Smoke!

batBox

About the size of a shoebox and stuffed with a compact battery/inverter combo, the BatBox packs a mean wallop at 480Wh. What else was [Bill Porter] supposed to do with his free time? He’s already mailed out electronic wedding invitations and built custom LED centerpieces for the reception. He and his wife [Mara] then made an appearance in a Sunday roundup tying the knot by soldering a circuit together. Surely the LED Tetris Tie would have been in the ceremony had it existed. This time, though, [Bill’s] scrounged up some leftover electronics to put a realistic spin on a Minecraft favorite: the BatBox.

A pair of 18V high energy density batteries connect up to a 12V regulator, stepping them down to drive a 110VAC inverter. The BatBox also supplies 5V USB and 12VDC output for portable devices. Unfortunately, [Bill]’s first inverter turned out to be a low-quality, voltage-spiking traitor; it managed to let the smoke out of his fish tank’s LED bar by roasting the power supply. Undeterred, [Bill] pressed on with a new, higher-quality inverter that sits on an acrylic shelf above the batteries. OpenBeam aluminum extrusion seals up the remainder of the enclosure, completing the BatBox with a frame that looks both appealing and durable.

The Cramp: A MSP430-powered Crane Lamp

theCramp

If you think your last project required a lot of soldering, take a look at [Multivac’s] remote controlled and fully-articulable desktop crane lamp. Sure, it’s a 430 microcontroller combined with an LED driver, 32 LEDs, PWM control, and some moving parts: but take a closer look at the structure. The Cramp uses an old HDD as its base, with the crane spinning around the main bearing that previously supported the platter. A system of spools and pulleys provides a reasonable range of motion to the rest of the build. Relocating the entire assembly, however, is evidently an unpleasant task.

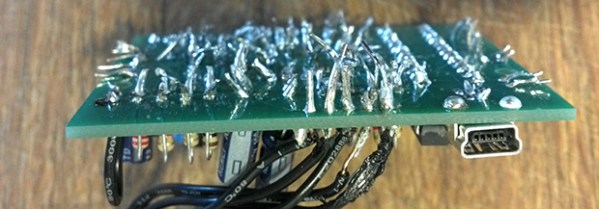
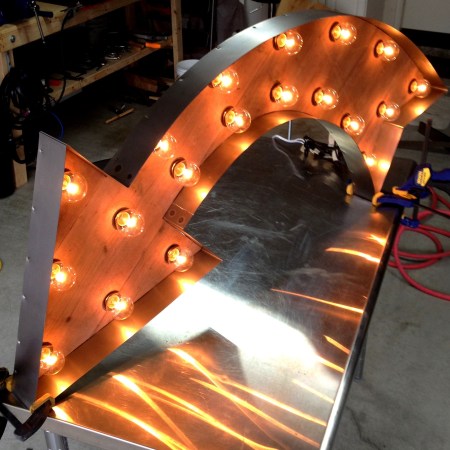
[Multivac] based his design on a Liebherr LR1750 Crawler Crane, which he meticulously pieced together using leftover copper salvaged from an upgrade to his home’s mains wiring. A mountain of solder secures what must include several hundred joints—possibly more. The head of the lamp is an elegant exoskeleton-interpretation of industrial designer Eero Saarinen’s TWA Flight Center. You can see the Cramp in action in the video below.

Continue reading “The Cramp: A MSP430-powered Crane Lamp”

OSH Park Adds Board Sharing Feature

osh-park-board-sharing

OSH Park continues to get better and better. We think the recent addition of Project Sharing is a huge feature! Obviously this lets you order up the open source goodness posted by others with a minimum amount of effort. But to us there are a couple of other things that make this valuable.

First off, the ability to browse through the projects can be a huge inspiration for your own work. Secondly, the board files themselves are available for download, and it looks like you can post links to your repository if you so choose when sharing your project. This makes OSH Park something of a Thingiverse for PCBs. Browse through what’s offered then download the files to etch yourself or just to use as reference to see how others do things when laying out the traces. And of course the rock bottom prices offered make this a no-brainer for shared breakout board designs.

The Twitter post calls this the “early stages” of the feature. We can’t wait to see what they come up with as it matures.

Breakout Board For $11 LCD Module With Small Pitch

breakout-for-strange-pitch-LCD-screen

[Ibrahim] picked this little LCD module out because of its price point and resolution. In single units you can grab one of the 128×32 pixel displays for just $11. The only problem is that the pinout is too small to use with a breadboard. He whipped up a breakout board for it that throws in some extras.

First off, we like it that the board doesn’t add much to the part’s outline. What it does add is a Low-DropOut voltage regulator and a level converter. The upper range of the LCD’s input voltage is 3.3V, and these added parts make it possible to drive the device using 5V hardware like the Arduino Uno pictured above. While he was adding in parts he included a MOSFET to switch the backlight. This way he can use PWM for dimming as well.

We usually hit eBay when looking for LCD screens. A search for the NHD-C12832 part number didn’t turn it up. We tried out FindChips for the first time (owned by Supply Frame who just bought Hackaday) and it works just as well as Octopart which we’re more familiar with since we’ve seen some hacking of that site before.