Not so long ago, “Magic Mirror” builds were all the rage, and we have to admit getting out daily reminders and newsfeeds on an LCD display sitting behind a partially reflective mirror is not without its charms. But styles ebb and flow, so we don’t see too many of those builds anymore. This e-ink daily calendar reminder hearkens back to those Magic Mirrors, only with a double twist of AI.
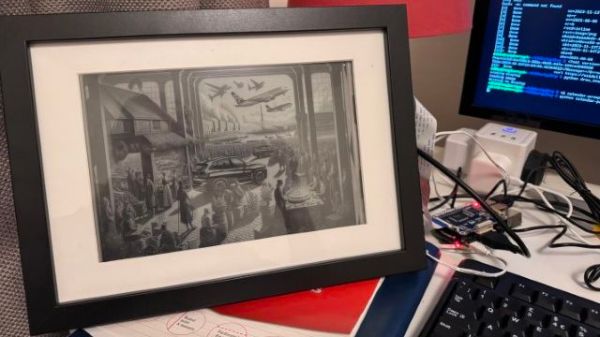
This project is the work of [Ilkka Turunen], and right up front we’ll say the results are just gorgeous. A lot of that has to do with the 10.3″ e-ink display used, but more with the creative use of not one but two machine learning systems. The first is ChatGPT, which [Ilkka] uses to parse the day’s online calendar entries and grab the most significant events to generate a prompt for DALL-E. The generated DALL-E prompt has specific instructions that guide the style of the image, which honestly is where most of the artistry lies. [Ilkka]’s aesthetic choices, like suggesting that the images look like a 19th-century lithograph or a satirical comic from a turn-of-the-(last)-century newspaper. The prompt is then sent off to DALL-E for rendering, and the resulting image is displayed.
It has to be said that the prompts that ChatGPT generates based on the combination of [Ilkka]’s aesthetic preferences and the random events of the day are strikingly complex. The chatbot really seems to be showing some imagination these days; DALL-E is no slouch either in turning those words into images.
Like the idea of an e-ink daily reminder but prefer a less artistic presentation? This should help.
Continue reading “Double-Dose Of AI Turns Daily Tasks Into Works Of Art”