Wii-Motified Laser Cutter Refocuses For Contoured Cutting

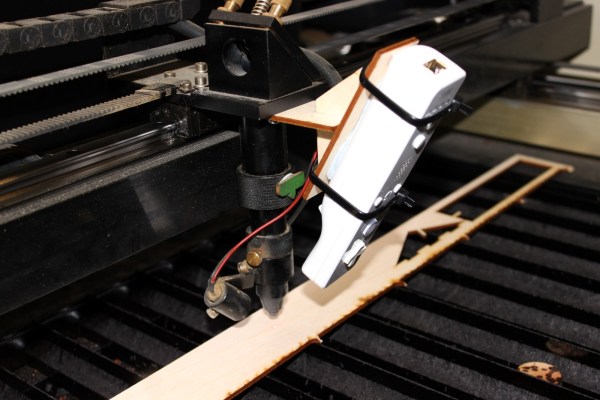
Still laser cutting all of your parts in 2D? Not the folks over at [Just Add Sharks]. With a few lines of code and an in-tact Wii-Mote, they’ve managed to rig their laser cutter to dynamically refocus based on the height of the material.

The hack is cleanly executed by placing the Wii-Mote both at a known fixed distance-and-angle and within line-of-sight of the focused beam. Thankfully, the image-processing is already done onboard by the Wii-Mote’s image sensor, which simply returns the (x,y) coordinates of the four brightest IR points in view. As the beam moves over the material, the dot moves up or down in the camera’s field-of-view, triggering a refocus of the laser as it cuts. Given that the z-axis table needs to readjust with the contour, the folks at [Just Add Sharks] have slowed down the cutting speed. Finally, it’s worth noting that the Wii-Mote was designed to detect IR LEDs, not a 10600-nanometer laser beam, but we suspect that the Wii-Mote is receiving colors produced by the fluorescing material itself, not the beam. Nevertheless, the result is exactly the same–a dynamically refocusing laser!

Now that [Glowforge] has released a continuously-refocusing laser cutter implemented with stereoscopic cameras, it’s great to see the community following in their footsteps with a DIY endeavor. See the whole system in action after the break!

Continue reading “Wii-Motified Laser Cutter Refocuses For Contoured Cutting”

Wii MotionPlus Gyro To Microchip PIC

Sometimes the most mundane products have surprisingly sophisticated internals. What’s in a game controller? If it is a Wii remote, you’ll find a lot inside–an IR sensor, Bluetooth, an accelerometer, and EEPROM. It also has a six pin expansion port that allows I2C peripherals connect to the controller.

[DotMusclera] wanted to experiment with a gyroscope and decided to hook up to the Wii MotionPlus to a Microchip PIC. Using information from the WiiBrew wiki, [DotMusclera] connected a PIC18F4550, an LCD, and a handful of components (mostly to do 3.3V level conversion), he set up the hardware on a breadboard. The only odd part you might have to work around is a Wii breakout board that converts from the breadboard to the Wii interface.

The software is easy to follow since it is written in Hi-TECH C and well-commented. The hardware lacks a schematic, but from the parts list and the video, you can probably figure it out. The setup works well and shows roll, pitch, and yaw on the LCD screen.

The project log is very detailed, with a lot of information about gyroscopes and the communication format the gyro uses. The video demo is worth watching as well.

Continue reading “Wii MotionPlus Gyro To Microchip PIC”

Wii U Laptop

Stuffing A Wii U Into A Laptop

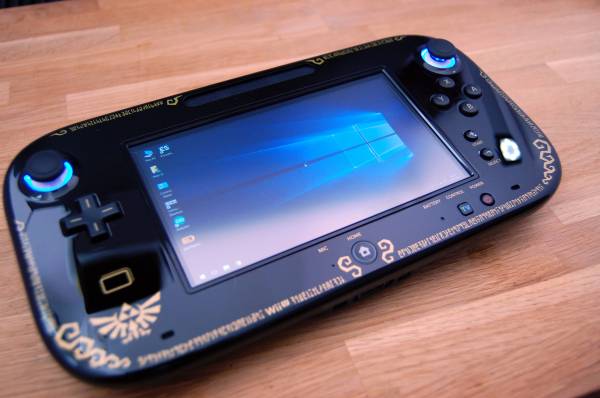
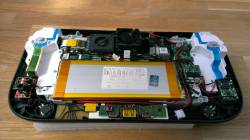
For some reason, a lot of hackers seem to have an obsession with jamming video game consoles into smaller boxes with screens. It’s more portable yes, but be honest — how much use is it actually going to get? Regardless, [RedmagnusX] has just finished up what might be the first Wii U laptop.

He’s using a 17″ laptop screen from a Dell XPS M1730, which he’s combined with a case of his own design that fits the Wii U’s guts. To interface the screen from the Wii, he picked up a driver-board from NJYtouch. He’s also managed to cram the power regulator into the laptop, and a few small speakers for audio output. He also integrated the sensor bar into the top of the unit. Not too shabby!

It reminds us a lot of this older Xbox 360 laptop mod, and looks surprisingly similar. However our favorite case mod still has to be the PlayBox — [Eddie Zarick’s] beautiful combination unit featuring an Xbox One and the PS4 in a single 22″ box.

[Thanks for the tip Jon!]

Multicopters And Their MultiWii Beginnings

With more than five years down the road in this successful hack, [Alexinparis] and his pioneering Nintendo controller hack have been taking eager enthusiasts to the skies with homebrew multicopters armed with MultiWii firmware.

The MultiWii firmware, like most other glorious moments that gloss these pages, was as a hack, and a darn good one. By harvesting the (I²C-based) accel-gyro sensor package in a Nintendo Wii MotionPlus, [Alexinparis] developed control firmware for an Arduino Pro Mini, and, thus: the MultiWii Controller Board was born. With a successful WiiMotion Plus pcb extraction, an Arduino Pro Mini, and some help from the forums, the dedicated hobbyist could build their own flying platform with customizable firmware enabling bi, tri, quad, hex, octo, Y6, and Y4 propeller configurations.

With a working flight controller, [Alexinparis] sent his firmware skyward in a tricopter built from scratch. For a light-but-sturdy shell, he opted for a lost-foam cast hull made from fiberglass and carbon fiber tow. This hull houses most of the electronics safely inside the hollow shell while maintaining the strength to sustain heavy blows from crashes. (The version shown above features additional carbon fiber reinforcement in the center.)

multiwiiLostFoammultiwiiLostFoamHousingmultiwiiDone

More than five years later, MultiWii is a mature open-source project with firmware and wiki under constant update. If you’ve ever considered getting started with multicopters, this project stands as a tested-and-tried road to success. In fact, even RC vendor HobbyKing offers low-cost Multiwii PCBs compatible with the firmware. For more details on the project’s humble beginnings, head on over to the RC Groups thread and followup documentation thread.

We’ve seen MultiWii countless times in the past as the firmware in numerous multicopter builds. It’s about time we give [Alexinparis] some well-deserved credit for paving the way.

Continue reading “Multicopters And Their MultiWii Beginnings”

NES Controller

Turning A Classic NES Controller Into A Bluetooth Controller

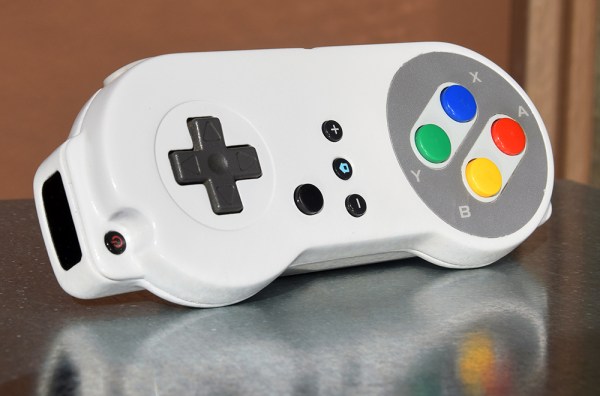
[Pietronet] is like many of us in that he enjoys playing some classic console video games from time to time. He usually plays them on his PC using a Wiimote as a controller. The Wiimote has most of the classic buttons in a comfortable configuration. Plus, it’s got Bluetooth built-in, which makes it easy to pair up to your PC. [Pietronet] decided to take it a step further, though. He managed to cram all of the guts from a Wiimote inside of the original NES controller for a more authentic feel.

The first step was to crack open the Wiimote and locate pads for each button. Once they were located, [Pietronet] used a Dremel to cut the board into a smaller size. He cut off part of the circuit board that contained the directional pad as well as the connector for the nunchuck. Next he had to solder very thin wires to each of the button pads he located earlier.

The original NES controller has a very limited number of buttons, and [Pietronet] wanted to modify the original controller as little as possible. Therefore, he attached a magnetic reed switch to the Wiimote’s sync button. This way if he ever needs to sync the Wiimote to a new console, he can do it by holding a magnet in the right place. This is a function that isn’t often used, so the inconvenience should be negligible.

The next step was to connect the buttons from the original NES controller up to the wires that were added to the Wiimote. [Pietronet] left the original circuit board mostly intact. He did have to cut a small chunk of it away in order to make room for two AAA batteries, but this didn’t affect the functionality of the controller.

The inside of the NES controller had to be cleaned out of various standoffs and plastic bits to make room for all of the extra components. The Wiimote has an LED to indicate that the controller is connected properly. [Pietronet] soldered a red SMD LED in its place on the end of two thin wires. This LED was then placed on the bottom left side of the directional pad. It’s visible through a translucent filter. This allows [Pietronet] to see when the NES controller is synced up properly.

The case fits back together and everything is held in place. The result is what looks and feels like a classic NES controller, only this one has Bluetooth connectivity and a vibration motor. Check out the video demonstration below to get an idea of what it looks like in use. Continue reading “Turning A Classic NES Controller Into A Bluetooth Controller”

Using The Wii U Controller With Everything

It’s been just a bit over a year since the Wii U was released along with the extremely impressive Wii U controller. With a D-pad, analog sticks, accelerometer, gyroscope, magnetometer, camera and 6.2 inch touchscreen, this controller is ripe for a million and one projects ranging from FPV quadcopters and robots to things we can’t even think of yet. At this year’s Chaos Communication Congress, [booto], [delroth], and [shuffle2] demonstrated how they cracked open the Wii U controller’s encryption allowing for Wii U controller ’emulation’ and giving us full documentation on how the whole thing works.

The guys started on their reverse engineering journey by dumping all the flash chips found on the controller’s board. In those binary blobs, they found Nintendo used a truly ingenious way of obfuscating the WiFi keys used to connect the controller to the Wii: rotate left by three. To be fair to Nintendo engineers, it was secure until someone figured it out.

Connecting the controller to a PC over WiFi is only half the battle, though. Initial information from the Wii U launch suggested Nintendo used Miracast for all the I/O between the controller and the console. This isn’t the case; instead the video, audio, camera, and button input are non-standard but very simple protocols. The hardest to break into was the video display for the touchscreen, but the guys discovered it’s pretty much H.264. After getting around some Nintendo weirdness, it’s possible to display video on the controller.

The guys have put together a small, extremely alpha library that comes with all the demos, documentation, and reverse engineering information. There’s a large wish list of what this library should include, but now that the information is public, it might be the time to pick up a Wii U.

Video of the talk below, here’s the presentation slides, and a demo of emulating a Wii U game pad on a PC.

Continue reading “Using The Wii U Controller With Everything”

Wiimote Controlled RPi Robot

Wiimote RPi Robot

[Brian] has brought together a powerful collection of hardware to build a robot. The end goal is to have a robot that’s controlled by a Wiimote.

The Wiimote communicates over Bluetooth with a Raspberry Pi, which is running a Python script. This script uses the CWiid Python module to communicate with the controller, and [Brian] has detailed instructions on getting the Wiimote working with a RPi. The RPi controls an ATmega based development board over SPI, which drives an h-bridge to control the two DC motors that move the robot.

[Brian]’s code for this could be helpful for anyone looking to control their RPi with a Wiimote. Since Wiimotes and Bluetooth dongles are fairly cheap nowadays, this is a great way to drop in wireless control to any RPi project, or even to control your media center from the couch.

After the break, check out a video of the build in action

Continue reading “Wiimote Controlled RPi Robot”