The Ultimate Guide To Artisan USB Cables

If you’ve gone through the trouble of building your own customized mechanical keyboard, the last thing you want to do is plug it into your computer with some plebeian USB cable from the local electronics shop. Your productivity, nay livelihood, depends on all those 1s and 0s being reproduced with the crisp fidelity that’s only possible with a high-end USB cable. Anything less would be irresponsible.
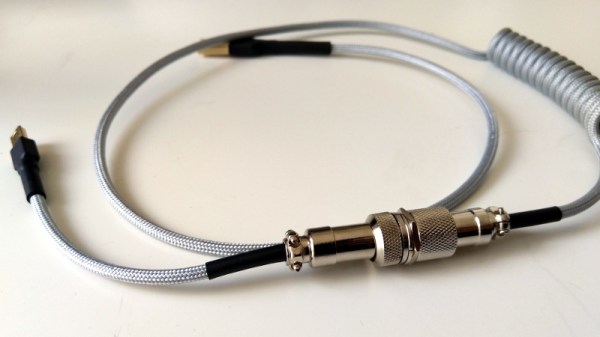
Or at least, that’s what the advertising on the back of the package would say if we tried to sell the custom USB cables built by [Josef Adamčík]. But alas, he’s decided to give away all the details for free so that anyone can build their own delightfully overengineered USB cables. Do you need a paracord USB cable with GX12 aviation connectors in the middle? Of course not. But you still want one, don’t you?

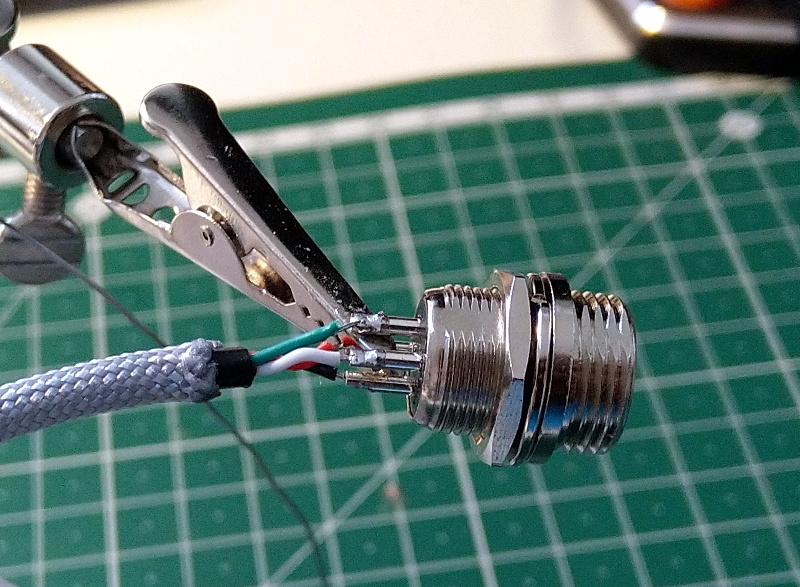
As [Josef] admits in his blog post, there’s nothing particularly special about what he’s doing here. If you can splice wires together, you can build your own bespoke USB cables. But what attracted us to his write-up was the phenomenal detail he goes into. Every step is clearly explained and includes a nice, well-lit, photo to illustrate what he’s doing. Honestly, when the documentation for soldering some USB connectors onto a wire looks this good, there’s no excuse why more substantial projects get little more than a few blurry shots.

Of course, even for those of us who are no stranger to the ways of the soldering iron, there’s likely a few ideas you can pull from this project. We particularly liked his tip for taping the USB connector to the workbench while soldering it rather than trying to get it to stay in a vise, and his method for adding a coil the cable with a wooden jig and a heat gun is definitely something to file away for future use.

Then again in an era where even the lowly-USB cable can potentially be a security threat, or simply not live up to published specifications, rolling your own might not be such a bad idea.
When Project Enclosures Go Bad: A Message From The Trenches

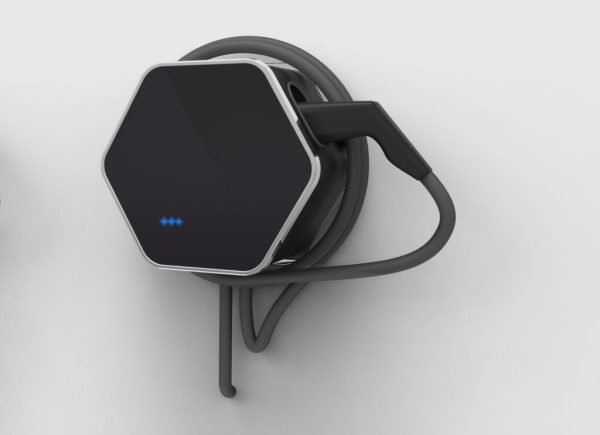
A wall-mounted, electric car charging station doesn’t sound like it’d require the most exciting or complicated enclosure. This was pretty much the assumption [Mastro Gippo] and his team started out with when they decided to turn what came back from a product designer into a real enclosure for the ‘Prism’ charging hardware they had developed. As it turned out, the enclosure proved to be the most challenging part of the project.

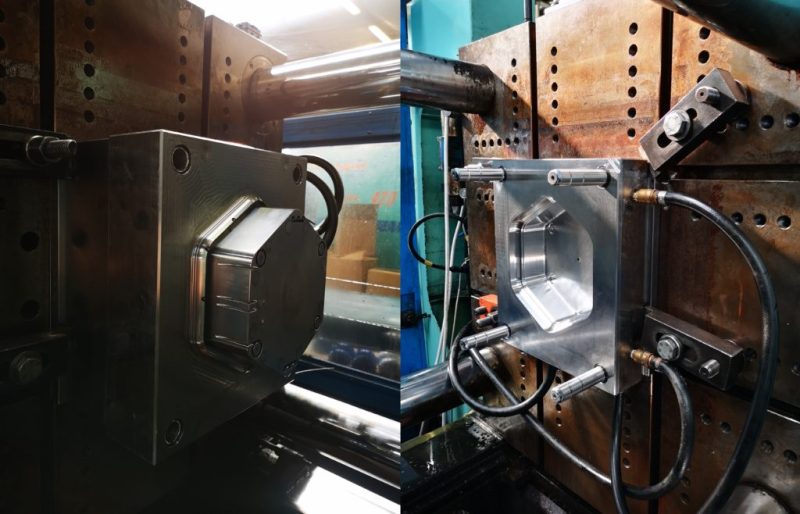
The first thought was to make a cheap, simple prototype enclosure for integration testing. This led them through trying out FDM 3D printed enclosures, wooden enclosures, folded (glued) plastic enclosures, aluminium extruded enclosures, Zamac alloy enclosures, and finally the plastic injection molded enclosure they had been avoiding due to the high costs.

The injection mold used to produce the Prism enclosures with.

Even if it meant taking out a loan to cover the setup costs, the results really do speak for themselves with a well-integrated design and two really happy looking partners-in-business. It does make us wonder how projects lacking this kind of financial leeway can get professional-grade enclosures without breaking the proverbial bank.

FDM 3D printing is always getting better and with a lot of post-processing you can have one enclosure that looks great, but that doesn’t scale. Outsourcing it to a professional 3D printing company like Shapeways is better, but it’s still not injection-molding quality and if the product is successful you’ll eventually invert the cost/benefit you were shooting for in the first place. Where is the middle ground on great-looking enclosures? Please let us know your experiences and thoughts in the comments.

(Mis)use This Part To Attach 3D Printed Stuff To A Shaft

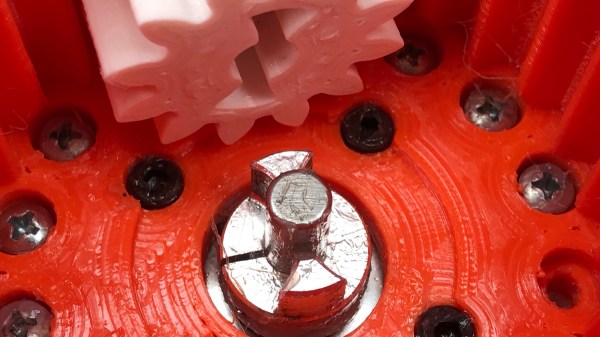
Interfacing a shaft to a 3D printed gear doesn’t have to be tricky. [Tlalexander] demonstrated a solution that uses one half of a spider coupling (or jaw coupling) to create an effective modular attachment. The picture above (and this older link) shows everything you need to know: the bottom of the coupling is mounted to the shaft, and a corresponding opening is modeled into the the 3D printed part. Slide the two together, and the result is a far sturdier solution than trying to mate a 3D printed gear directly to a motor shaft with a friction fit or a screw. This solution isn’t necessarily limited to attaching gears either, any suitable 3D printed part could be interfaced to a shaft in this way.

These couplings are readily available, and fortunately for hobbyists, come in sizes specifically designed for common stepper motors like NEMA 17 and NEMA 23. Ironically, these couplings are often used when building custom 3D printers for those same reasons. With this method interfacing anything at all to a motor shaft becomes mostly a matter of modeling a matching hole out of the part to be 3D printed. One coupling even provides two such attachments, since only one of the two sides is used.

The image up top is from [Tlalexander]’s Rover image gallery, which contains a ton of fantastic pictures of the work that went into the gearboxes, a major part of the Rover’s design that we’ve seen in the past.

Stack Of Plant Saucers, Transformed Into Low Cost Solar Shield

For serious data collection with weather sensors, a solar shield is crucial. The shield protects temperature and humidity sensors from direct sunlight, as well as rain and other inclement weather, without interfering with their operation. [Mare] managed to create an economical and effective shield for under three euros in materials.

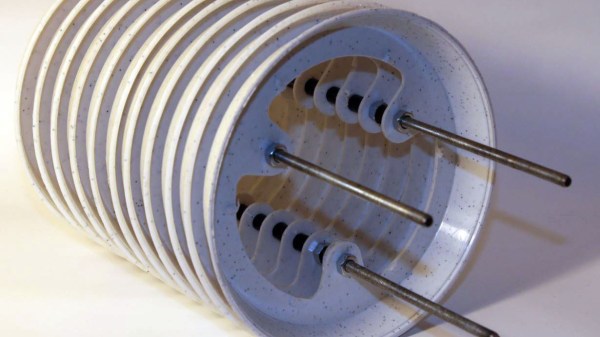
It began with a stack of plastic saucers intended for the bottom of plant pots. Each of these is a lot like a small plate, but with high sides that made them perfect for this application. [Mare] cut the bottom of each saucer out with a small CNC machine, but the cut isn’t critical and a hand tool could also be used.

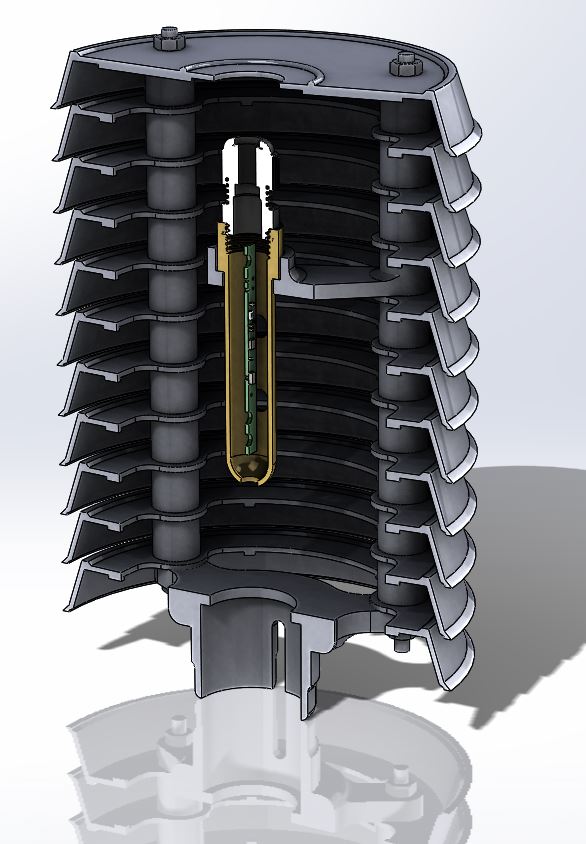
Three threaded rods, nuts, and some plastic spacers between each saucer yields the assembly you see here. When mounted correctly, the sensors on the inside are protected from direct exposure to the elements while still allowing airflow. As a result, the readings are more accurate and stable, and the sensors last longer.

The top of the shield is the perfect place to mount a UV and ambient light sensor board, and [Mare] has a low-cost DIY solution for that too. The sensor board is covered by a clear glass dish on top that protects the board without interfering with readings, and an o-ring seals the gap.

3D printing is fantastic for creating useful components, and has been instrumental in past weather station builds, but projects like these show not everything needs to be (nor should be) 3D printed.

Everything You Want To Know About The Cheapest Processors Available

Those of us who use microprocessors in our work will be familiar with their cost, whether we are buying one or two for a project or ten million on reels for a production run. We’re used to paying tens of cents or maybe even a dollar for a little microcontroller in single quantities, and these are probably the cheapest that we might expect to find.

There is a stratum of cheaper devices though, usually from Chinese manufacturers with scant data in English and difficult to source in Europe or the Americas. These chips cost under ten cents each, a figure which seems barely credible. To shed some light upon this world, [cpldcpu] has produced a run-down of some of the available families that even if you will never work with such an inexpensive option still makes for a fascinating read.

These processors are not the type of component you would use for high intensity tasks so it’s probable that you will not be mining cryptocurrency on a brace of them. Thus their architecture is hardly cutting-edge, with the venerable PIC12 being their inspiration and in some cases their direct copy. These are all write-once devices and some of their toolchains are variable in accessibility, but perhaps they aren’t as terrible as some would have you believe. If you are looking for inspiration, we’ve featured one of them before.

TL;DR: the Padauk PFS173, at just under $0.09, has an open-source toolchain and a decent set of peripherals.

Thanks [WilkoL] for the tip.

Image: A real PIC12 die shot. ZeptoBars [CC BY 3.0]

A Friendly Reminder That You Might Be In Danger

Product recalls are one of those things that most people don’t pay attention to until things get really bad. If it’s serious enough for somebody to get hurt or even die, then the media will pick it up, but most of the time they simply pass by in silence. In fact, there’s a decent chance that you own a recalled product and don’t even know it. After all, it’s not like anyone is actually watching the latest product recalls in real-time.

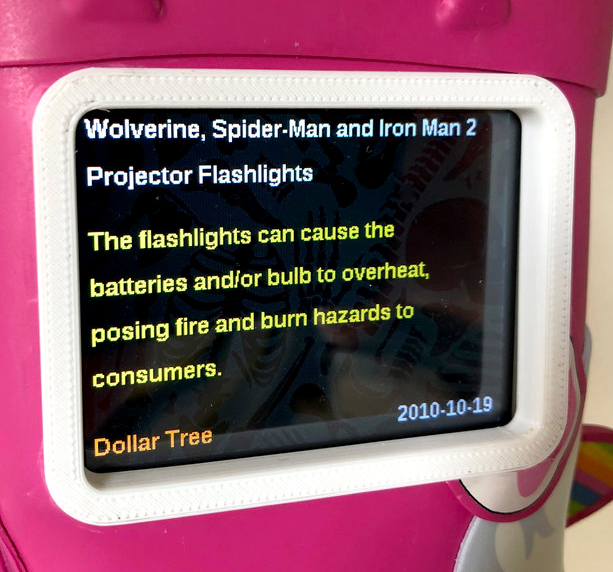
Well actually, there might be one guy. [Andrew Kleindolph] has created a cute and cuddly gadget using CircuitPython on the Adafruit PyPortal to display the latest release from the United States Consumer Product Safety Commission (USCPSC). In a wonderfully ironic touch, the child’s unicorn boot that the device lives in is itself a recalled product; apparently kids could pull off the “horn” and choke on it.

The PyPortal is basically built for this kind of thing, allowing you to easily whip up a display that will scrape data from whatever online source you’re willing to write the code for. All [Andrew] had to do was pair it with a battery so the boot could go mobile occasionally (we’re told they’re made for walkin’), and design some 3D printed accoutrements such as a screen bezel and charging port.

As these recalls (thankfully) don’t come out quite so fast that you need it to update more than once or twice a week, it seems like this could also be an excellent application for an Internet-connected e-ink display.

3D Printed Fan Filter Takes Cues From Costume Scene

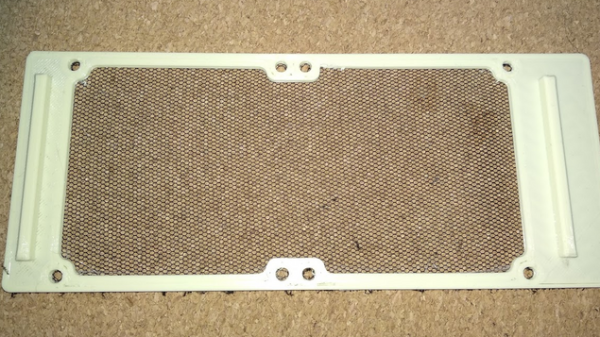
This custom fan filter created by [Kolomanschell] is a clever application of a technique used to create wearable 3D printed “fabrics”, which consist of printed objects embedded into a fine mesh like a nylon weave. The procedure itself is unchanged, but in this case it’s done not to embed 3D printed objects into a mesh, but to embed a mesh into a 3D printed object.

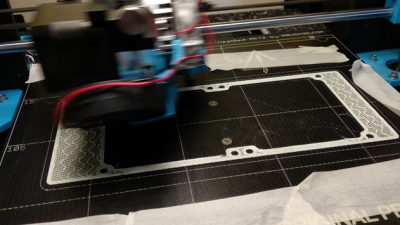
The basic idea is that a 3D print is started, then paused after a few layers. A fine fabric mesh (like tulle, commonly used for bridal veils) is then stretched taut across the print bed, and printing is resumed. If all goes well, the result is 3D printed elements embedded into a flexible, wearable sheet.



The beauty of this technique is that the 3D printer doesn’t need to be told a thing, because other than a pause and resume, the 3D print is nothing out of the ordinary. You don’t need to be shy about turning up the speed or layer height settings either, making this a relatively quick print. Cheap and accessible, this technique has gotten some traction in the costume and cosplay scene.

As [Kolomanschell] shows, the concept works great for creating bespoke filters, and the final result looks very professional. Don’t let the lack of a 3D model for your particular fan stop you from trying it for yourself, we’ve already shared a great resource for customizable fan covers. So if you’ve got a 3D printer and a bit of tulle, you have everything you need for a quick afternoon project.