Add A Second SD Card To The Pi Zero

The Raspberry Pi Zero is a beautiful piece of hardware, fitting an entire Linux computer into a package the size of a pack of gum (don’t chew it, though). However, this size comes with limited IO options, which can be a complication for some projects. In this case, [Hugatry] wanted extra storage, and devised a smart method to add a second SD card to the Pi Zero.

The problem with the Pi Zero is that with only a single USB port, it’s difficult to add any other storage to the device without making things bulkier with hubs or other work arounds. Additionally, the main SD card can’t be removed while the Pi is running, so it makes sense to add an easy-to-use removable storage option to the Pi Zero.

It’s quite a simple hack – all that’s required to pull it off is a few resistors, an SD card connector, and some jumper wires. With everything hooked up, a small configuration change enables the operating system to recognise the new card.

Overall it’s great to see hacks that add further functionality to an already great platform. If you find it’s not powerful enough, you can always try overclocking one. 

Continue reading “Add A Second SD Card To The Pi Zero”

Optogenetics For 100 Euros

Larval zebrafish, Drosophila (fruit fly), and Caenorhabditis elegans (roundworm) have become key model organisms in modern neuroscience due to their low maintenance costs and easy sharing of genetic strains across labs. However, the purchase of a commercial solution for experiments using these organisms can be quite costly. Enter FlyPi: a low-cost and modular open-source alternative to commercially available options for optogenetic experimentation.

One of the things that larval zebrafish, fruit flies, and roundworms have in common is that scientists can monitor them individually or in groups in a behavioural arena while controlling the activity of select neurons using optogenetic (light-based) or thermogenetic (heat-based) tools.

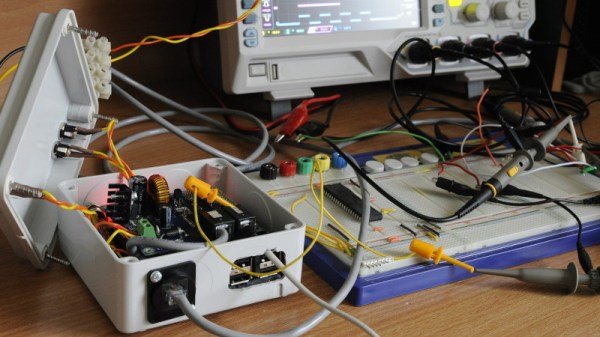
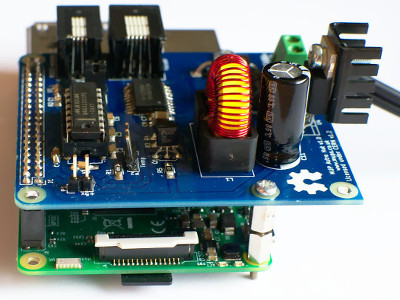
FlyPi is based on a 3D-printed mainframe, a Raspberry Pi computer, and a high-definition camera system supplemented by Arduino-based optical and thermal control circuits. FlyPi features optional modules for LED-based fluorescence microscopy and optogenetic stimulation as well as a Peltier-based temperature simulator for thermogenetics. The complete version with all modules costs approximately €200 with a layman’s purchasing habits, but for those of us who live on the dark side of eBay or the depths of Taobao, it shouldn’t cost more than €100.

Once assembled, all of the functions of FlyPi can be controlled through a graphical user interface. As an example for how FlyPi can be used, the authors of the paper document its use in a series of “state-of-the-art neurogenetics experiments”, so go check out the recently published open access paper on PLOS. Everything considered the authors hope that the low cost and modular nature, as well as the fully open design of FlyPi, will make it a widely used tool in a range of applications, from the classroom all the way to research labs. Need more lab equipment hacks? Don’t worry, we’ve got you covered. And while you’re at it, why not take a spin with the RWXBioFuge.

Raspberry Pi Tracks Office Happiness

It’s always great to see people who haven’t had the opportunity to work with hardware like the Raspberry Pi before come up with a great project and have fun putting it together.  [Katja]’s company has a two-day hackfest where employees can work on some cool non-work-related projects. [Katja]’s team decided to use a Raspberry Pi and some buttons and LEDs to create a ‘happiness tracker‘ for the company.

The resulting project is mounted near the entrance to the office and when they come in or leave, an employee can push one of four buttons to indicate their mood at the time, ‘bad,’ ‘not so good,’ ‘good’ or ‘super.’ The result is tracked and an overall impression of the office’s happiness is the result.

The project consists of the aforementioned Raspberry Pi, four push buttons, five LEDs that animate when a button is pressed and another LED that shows the system is currently up and working. When a user presses a button, the five LEDs animate in the shape of a check mark to show that the button press was successful. A Python script running at startup on the Pi takes care of detecting button pressing, lighting LEDs and sending a message to the server which monitors the level of happiness.

It’s a simple project, but that’s exactly what you need when you start with hardware you haven’t worked with before. It seems like [Katja]’s team had fun building the project and they hope that this can help gauge the overall wellbeing of the office. [Katja]’s blog post has an embedded video of the project in action. In the meantime, check out this bit of facial recognition software that determines how happy you are based on your smile, or this project that lets you know how happy your plant is.

Huge Functionality, Small Package: A Custom Tablet, Raspberry Style

As the adage goes, “if you want something done right, do it yourself.” Desirous of a tablet but preferring to eschew consumer models, [Stefan Vorkoetter] constructed his own compact and lightweight Raspberry Pi tablet, covering several extra miles in the process.

The tablet makes use of a Raspberry Pi 3 and the official touchscreen, with the final product marginally larger than the screen itself. Designed with a ‘slimmer the better’ profile in mind, [Vorkoetter] had to modify several components to fit this precept; most obvious of these are the removal of the Pi’s GPIO headers, USB, and Ethernet ports, and removing the USB power out port from the touchscreen controller board so the two could be mounted side-by-side.

An Adafruit PowerBoost 1000C handles charging the 6200 mAh battery — meaning up to six hours(!) of YouTube videos — via a micro USB, but only after [Vorkoetter] attached a pair of home-made heatsinks due to negligible air flow within the case. A modified USB audio adapter boosts the Pi’s audio capabilities, enabling the use of headphones, a mic, and a built-in speaker which is attached to the tablet’s back cover.

Continue reading “Huge Functionality, Small Package: A Custom Tablet, Raspberry Style”

Innovating A Backyard Solar Battery System

Ever on the lookout for creative applications for tech, [Andres Leon] built a solar powered battery system to keep his Christmas lights shining. It worked, but — pushing for innovation — it is now capable of so much more.

The shorthand of this system is two, 100 amp-hour, deep-cycle AGM batteries charged by four, 100 W solar panels mounted on an adjustable angle wood frame. Once back at the drawing board, however, [Leon] wanted to be able track real-time statistics of power collected, stored and discharged, and the ability to control it remotely. So, he introduced a Raspberry Pi running Raspbian Jessie Lite that publishes all the collected data to Home Assistant to be accessed and enable control of the system from the convenience of his smartphone. A pair of Arduino Deuemilanoves reporting to the Pi control a solid state relay powering a 12 V, 800 W DC-to-AC inverter and monitor a linear current sensor — although the latter still needs some tinkering. A in-depth video tour of the system follows after the break!

Continue reading “Innovating A Backyard Solar Battery System”

Sneak Thieves Beware: A Pi Watcheth

Ever have that strange feeling that somebody is breaking into your workshop? Well, Hackaday.io user [Kenny] has whipped up a tutorial on how to scratch that itch by turning a spare Raspberry Pi you may have kicking around into a security camera system that notifies you at a moment’s notice.

The system works like this: a Raspberry Pi 3 and connected camera module remain vigilant, constantly scanning for motion and recording video. If motion is detected, it immediately snaps and sends a picture to the user’s mobile via PushBullet, then begins recording video. If there is still movement after a few seconds, the process repeats until the area is once again devoid of motion. This also permits a two-way communication with your Pi security system, so you can check in on the live feed whenever you feel the urge.

To get this working for you — assuming that your Pi has been recently updated — setup requires setting up a PushBullet account as well as installing it on your mobile and  linking it with an API. For your Pi, you can go ahead with setting up some Python PushBullet libraries, installing FFmpeg, Pi Camera Notifier, and others. Or, install the ready-to-go image [Kenny] has prepared. He gets into the nitty-gritty of the code in his guide, so check that out or watch the tutorial video after the break.

Continue reading “Sneak Thieves Beware: A Pi Watcheth”

Automating Plant Care

[Daniyal]’s goal is to build an automated garden that allows him to grow plants in any environment he chooses. He’s got a good start with this rig, which is controlled by a Pi Zero connected via serial to an Arduino Mega clone, which  in turn controls a bank of relays and sensors.

Monitoring the environment is a temperature and humidity sensor as well as a series of  six soil moisture sensor spikes. The relays control the water pump(s?) and lights, allowing [Daniyal] to maintain specific conditions depending on what he’s growing.

[Daniyal] has ambitious goals for the project. The Pi has a camera on it, and he hopes to not only maintain the greenhouse from the Internet, but also figure out how to monitor plant growth automatically, so that the Pi can measure plant growth and adjust the conditions without his input.

We’ve covered a lot of very cool horticulture projects here on HaD, including radio-connected soil sensors, using G-cal to create an internet of lawns, and the Garden of Eden watering kit.