Soviet Super 8 Camera Hides Raspberry Pi Zero

A few years ago [Xabier Zubizarreta] got it into his head that he wanted to put a modern digital image sensor into a classic Super 8 camera, but he didn’t want to ruin a gorgeous piece of vintage hardware in the process. After a bit of research, he discovered an export version of the Avrora camera made for the 1980 Summer Olympic Games in Moscow that could be had for cheap. Figuring nobody would miss a camera built with the utilitarian aesthetics you’d expect of a Soviet-era piece of consumer tech, he set off to cram a Raspberry Pi into its film compartment.

On the Hackaday.io page for this project, [Xabier] explains a bit about the optical properties that make this project challenging. Specifically, the miniature sensor used by the official Raspberry Pi camera module is far smaller than the 8 mm film the camera was designed for. So when the sensor placed at the appropriate focal length for the original film, the image will be cropped considerably. As you can see in the video below, this gives the impression of everything being filmed with a fairly tight zoom.

To perform this modification, [Xabier] first had to liberate the sensor of the Pi Camera from the original optics, and then carefully install it in proper position on the Avrora. To make sure he had it aligned, he watched a live feed from the camera while the epoxy holding the sensor down was curing. This allowed him to make slight adjustments before everything was solidified. With the sensor in place, he only had to stuff the Pi Zero and battery pack into the film compartment, and wire the original camera trigger to the GPIO pins so he could read it in software.

Considering the incredible amount of effort some photographers have put in to adapt their vintage cameras to digital, it’s refreshing to see such a straightforward approach. The resulting video might not be up to modern standards, but with projects like this, that’s sort of the point.

Continue reading “Soviet Super 8 Camera Hides Raspberry Pi Zero”

3D Printer Control Board Packs A Raspberry Pi Compute Module 4

Traditionally, 3D printer control boards have used simplistic 8-bit microcontrollers to command the stepper drivers and ultimately move the machine where it needs to go. Newer boards have switched over to 32-bit microcontrollers, but they’re still relatively limited computationally. Because of this, a Raspberry Pi running OctoPrint is usually used to provide more complex features such as remote management and live video.

Looking to combine these different devices into a single all-in-one board, [pkElectronics] developed the Sigmoid S7P. With an STM32 microcontroller, TMC2209 stepper drivers, a Raspberry Pi Compute Module 4, and plenty of room for expansion, it promises to be a drop-in upgrade for essentially any 3D printer running on an open source firmware that could be ported over.

An earlier concept for the Sigmoid

According to [pkElectronics], the idea for the Sigmoid had been floating around for several years, but never got off the ground due to the difficulties in dealing with the SO-DIMM interface used by previous iterations of the Compute Module. But with the switch to smaller and denser connector for the CM4, the board finally started to take shape.

Whether you just used it as a convenient way to integrate OctoPrint into your printer, or want to get into something more advanced like Klipper, the Sigmoid S7P looks like a very exciting project. [pkElectronics] says they are considering producing the board commercially if there’s interest, so if you want one of these for your own custom 3D printer build, let them know.

This DIY Split-Flap Display Does Both Time And Weather

With little more than four economical stepper motors, a Raspberry Pi Zero, and a 3D printer, [Thomas Barlow] made himself an awfully slick Smart Flip Clock that can display not only the time, but also weather data as well. This is done by adding a few extra graphics to some of the split-flaps, so numbers can also be used to indicate temperature and weather conditions succinctly. Displaying the time has to do without a colon (so 5:18 displays as 518), but being able to show temperature and weather conditions more than makes up for it.

32 degrees and a mix of sun and cloud

According to the project’s GitHub repository, it looks as though each split-flap has thirteen unique positions. The first ten are for numerals 0 through 9, and the rest are either blank, or used to make up a few different weather icons with different combinations. A Python script runs on the Raspberry Pi and retrieves weather data from OpenWeather, and the GPIO header drives the display via four geared stepper motors and driver boards. The rest of the hardware is 3D printed, and [Thomas] helpfully provides CAD models in STEP format alongside the STL files.

The basic design of a split-flap display is really quite versatile, and enterprising hackers have been putting delightful new twists on them for years. There has been a split-flap display used as a kind of flip-book animation, and we’ve also had the pleasure of seeing an entire Tarot deck used for esoteric, automated readings.

Run Out Of GPIO On Your Pi? Don’t Despair!

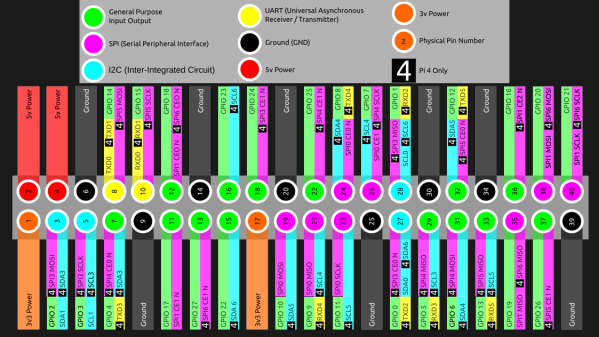
When the first Raspberry Pi rolled off the production line back in 2012 it sported a 26-pin expansion header that seemed to conceal endless possibilities. A later upgrade to the 40-pin header we have today unleashed a few more precious interfaces, but even then it’s still possible to run out. This was the problem faced by [woj], who needed a PWM line to drive a cooling fan  but whose other work had used everything on the header. The solution? Dive into the other connectors on board looking for an unused GPIO.

Every full-sized Pi has a connector for the camera and the LCD screen, and to operate some of the functions of those peripherals they contain a few extra GPIOs that aren’t normally used by end users. If  the camera or LCD is not being used then these lines are potentially up for grabs. In particular there’s a GPIO that turns the camera on or off that’s relatively easy to solder a wire to, and it was this one that fed the PWM line.

There are of course a few other ways to  find some more lines on a Pi and indeed almost any microcontroller, with one of the many types of GPIO expansion chips.  This trick is a particularly simple one though. and perhaps unsurprisingly it has surfaced here before.

Ask Hackaday: Why Make Modular Hardware?

In the movies, everything is modular. Some big gun fell off the spaceship when it crashed? Good thing you can just pick it up and fire it as-is (looking at you, Guardians of the Galaxy 2). Hyperdrive dead? No problem, because in the Star Wars universe you can just drop a new one in and be on your way.

Of course, things just aren’t that simple in the real world. Most systems, be they spaceships or cell phones, are enormously complicated and contain hundreds or thousands of interconnected parts. If the camera in my Samsung phone breaks, I can’t exactly steal the one from my girlfriend’s iPhone. They’re simply not interchangeable because the systems were designed differently. Even if we had the same phone and the cameras were interchangeable, they wouldn’t be easy to swap. We’d have to crack open the phones and carefully perform the switch. Speaking of switches, the Nintendo Switch is a good counterexample here. Joycon break? Just buy a new one and pop it on.

What if more products were like the Nintendo Switch? Is its modularity just the tip of the iceberg?

Continue reading “Ask Hackaday: Why Make Modular Hardware?”

Paper Pi Is An Ergonomic Cyberdeck Meant For Thumbs

What’s the fastest way to master console stuff like screen or emacs? Force yourself to use it exclusively, of course. But maybe you’d be tempted to cheat with a desktop. We know we would be. In that case, you ought to build a console-only cyberdeck like this sweet little thing by [a8skh4].

This cyberdeck serves another purpose as well — the keyboard layout is Miryoku, so [a8ksh4] can get more practice with that at the same time. Fortunately, the layout is built for emacs.

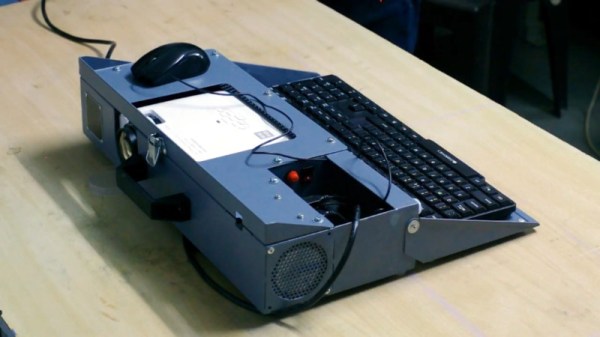
Inside is a Raspberry Pi 4 and what looks to be an Arduino handling the keyboard input. The Paper Pi spotlights a 4.2″ e-ink screen between a split thumb keyboard that’s made of soft, silent, tactile switches.

Since they’re SMD, [a8ksh4] made clever use of header pins to get them to work with protoboard. As much as we love the keyboard, it would be awesome to see a few switches on the shoulders or even the back that make use of the rest of the fingers. Check out more build pictures in the gallery.

We love to see cyberdecks with split keyboards, because you shouldn’t have to sacrifice ergonomics in a portable computer. Here’s one that comes in three pieces, making it easy to get the spacing between the halves just right.

Via r/cyberdeck

Visual Raspberry Pi With Node-Red And TensorFlow

If you prefer to draw boxes instead of writing code, you may have tried IBM’s Node-RED to create logic with drag-and-drop flows. A recent [TensorFlow] video shows an interview between [Jason Mayes] and [Paul Van Eck] about using TensorFlow.js with Node-RED to create machine learning applications for Raspberry Pi visually. You can see the video, below.

The video doesn’t go into much detail since it is only ten minutes long. But it does show how easy it is to do things like identify images using an existing TensorFlow model. There is a more detailed tutorial available, as well as a corresponding video, which you can see below.

Continue reading “Visual Raspberry Pi With Node-Red And TensorFlow”