Chip Transplant Brings Timex 2048 Back From Grave

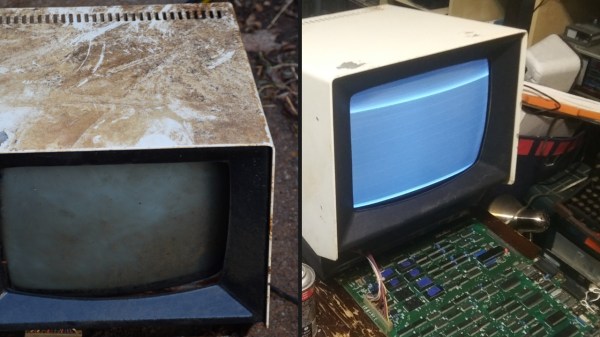
The 1984 Timex Computer 2048 that [Drygol] recently got his hands on was in pretty poor shape. Not only did it have the mangled exterior that comes from several decades of hard use and furious typing, but the internals appeared to be shot as well, with the machine showing nothing but vertical lines when powered up. Thankfully, this retro computer virtuoso was more than up to the challenge of bringing it back from the brink.

After a good cleaning and the installation of a reproduction front panel, the Timex was already looking much better. Unfortunately [Drygol] says he doesn’t currently have the equipment necessary to touch up the graphics and lettering on the key caps, but the fact that he had to qualify that statement with “currently” has us all sorts of excited to see what he’s planning down the line.

A bevy of fresh chips.

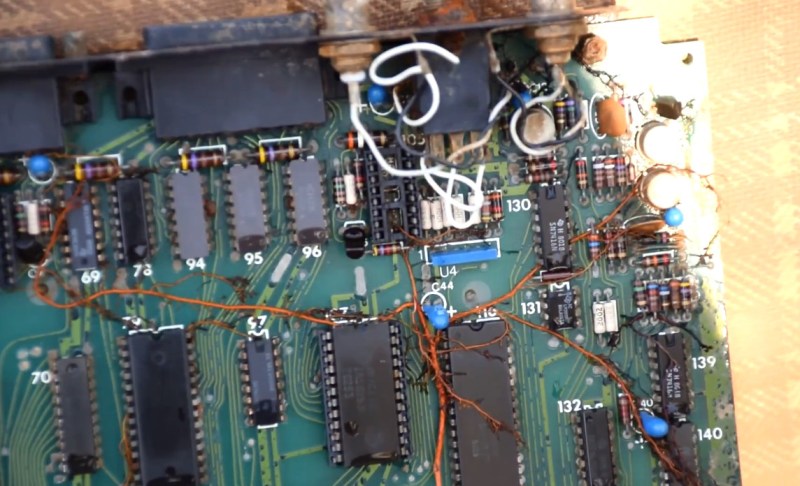
Of course beauty is only skin deep, and this particular TC-2048 was still bad to the bone. [Drygol] had a hunch its Z80 processor was dead, but after swapping it and its socket out, the machine still wouldn’t start. Though he did note that the garbled graphics shown on the screen had changed, which made him think he was on the right track. He then replaced all the RAM on the board, but that didn’t seem to change anything.

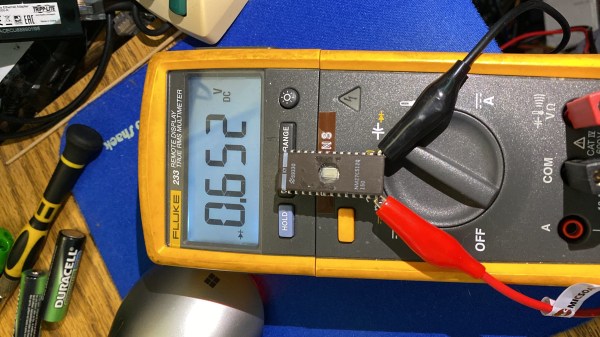
There isn’t a whole lot else to go wrong on these old machines, so the final step was to try and replace the ROM. Sure enough, after installing a new Winbond W27C512 chip with the appropriate software burned onto it, the nearly 40 year old computer sprang back to life.

Another classic computer saved from the trash heap, but it’s all in a day’s work for [Drygol]. Over the years we’ve seen him perform meticulous repairs on computer hardware that any reasonable person would have given up on. Even if you’re not into retro hardware, his restorations are always full of fascinating tips and tricks that can be applied when repairing gadgetry from whatever era happens to tickle your fancy.

Lightwave Multimeter Teardown

You tend to think of test equipment in fairly basic terms: a multimeter, a power supply, a signal generator, and an oscilloscope. However, there are tons of highly-specialized test equipment for very specific purposes. One of these is the 8163A “lightwave multimeter” and [Signal Path] tears one part for repair in a recent video that you can see below.

If you’ve never heard of a lightwave multimeter, don’t feel bad. The instrument is a measuring system for fiber optics and, depending on the plugins installed, can manage a few tests that you’d usually use an optical power meter, a laser or light source, and some dedicated test jigs to perform. Continue reading “Lightwave Multimeter Teardown”

Steady Hand Brings GBA Cart Back From The Grave

The flash chips used in Game Boy Advance (GBA) cartridges were intended to be more reliable and less bulky than the battery-backed SRAM used to save player progress on earlier systems. But with some GBA titles now hitting their 20th anniversary, it’s not unheard of for older carts to have trouble loading saves or creating new ones. Perhaps that’s why the previous owner tried to reflow the flash chip on their copy of Golden Sun, but as [Taylor Burley] found after he opened up the case, they only ended up making the situation worse.

A previous repair attempt left the PCB badly damaged.

When presented with so many damaged traces on the PCB, the most reasonable course of action would have been to get a donor cartridge and swap the save chips. But a quick check on eBay shows that copies of Golden Sun don’t exactly come cheap. So [Taylor] decided to flex his soldering muscles and repair each trace with a carefully bent piece of 30 gauge wire. If you need your daily dose of Zen, just watch his methodical process in the video below.

While it certainly doesn’t detract from [Taylor]’s impressive soldering work, it should be said that the design of the cartridge PCB did help out a bit, as many of the damaged traces had nearby vias which gave him convenient spots to attach his new wires. It also appears the PCB was designed to accept flash chips of varying physical dimensions, which provided some extra breathing room for the repairs.

Seeing his handiwork, it probably won’t surprise you to find that this isn’t the first time [Taylor] has performed some life-saving microsurgery. Just last year he was able to repair the PCB of an XBox controller than had literally been snapped in half.

Continue reading “Steady Hand Brings GBA Cart Back From The Grave”

See Acorn Archimedes Get Repaired And Refurbished, In Glorious Detail

Want to see a 90s-era Acorn Archimedes A3020 home computer get opened up, refurbished, and taken for a test drive? Don’t miss [drygol]’s great writeup on Retrohax, because it’s got all that, and more!

A modern upgrade allowing the use of a CF card in place of an internal hard drive, via a CF2IDE adapter and 3D-printed fixture.

The Archimedes was a line of ARM-based personal computers by Acorn Computers, released in the late 80s and discontinued in the 90s as Macintosh and IBM PC-compatible machines ultimately dominated. They were capable machines for their time, and [drygol] refurbished an original back into working order while installing a few upgrades at the same time.

The first order of business was to open the machine up and inspect the internals. Visible corrosion gets cleaned up with oxalic acid, old electrolytic capacitors are replaced as a matter of course, and any corroded traces get careful repair. Removing corrosion from sockets requires desoldering the part for cleaning then re-soldering, so this whole process can be a lot of work. Fortunately, vintage hardware was often designed with hand-assembly in mind, so parts tend to be accessible for servicing with decent visibility in the process. The keyboard was entirely disassembled and de-yellowed, yielding an eye-poppingly attractive result.

Once the computer itself was working properly, it was time for a few modern upgrades. One was to give the machine an adapter to use a CF card in place of an internal IDE hard drive, and [drygol] did a great job of using a 3D-printed piece to make the CF2IDE adapter look like a factory offering. The internal floppy drive was also replaced with a GOTEK floppy emulator (also with a 3D-printed adapter) for another modern upgrade.

The fully refurbished and upgraded machine looks slick, so watch the Acorn Archimedes A3020 show off what it can do in the video (embedded below), and maybe feel a bit of nostalgia.

Continue reading “See Acorn Archimedes Get Repaired And Refurbished, In Glorious Detail”

Cloned Memory Module Fixes Broken Scopemeter

Finding broken test gear and fixing it up to work again is a time-honored tradition among hackers. If you’re lucky, that eBay buy will end up being DOA because of a popped fuse or a few bad capacitors, and a little work with snips and a soldering iron will earn you a nice piece of test gear and bragging rights to boot.

Some repairs, though, are in a class by themselves, like this memory module transplant for a digital scopemeter. The story began some time ago when [FeedbackLoop] picked up a small lot of broken Fluke 199C scopemeters from eBay. They were listed as “parts only”, which is never a good sign, and indeed the meters were in various states of disassembly and incompleteness.

The subject of the video below was missing several important bits, like a battery and a power connector, but most critically, its memory module. Luckily, the other meter had a good module, making reverse engineering possible. That effort started with liberating the two RAM chips and two flash chips, all of which were in BGA packages, from the PCB. From there each chip went into a memory programmer to read its image, which was then written to new chips. The chip-free board was duplicated — a non-trivial task for a six-layer PCB — and new ones ordered. After soldering on the programmed chips and a few passives, the module was plugged in, making the meter as good as new.

While we love them all, it’s clear that there are many camps of test gear collectors. You’ve got your Fluke fans, your H-P aficionados, the deep-pocketed Keithley crowd — but everyone loves Tektronix.

Continue reading “Cloned Memory Module Fixes Broken Scopemeter”

Repairing A 300W CO2 Laser, One Toasted Part At A Time

A couple months back, [macona] got his hands on a 300 watt Rofin CO2 laser in an unknown condition. Unfortunately, its condition became all too known once he took a peek inside the case of the power supply and was confronted with some very toasty components. It was clear that the Magic Smoke had been released with a considerable bit of fury, the trick now was figuring out how to put it back in.

The most obvious casualty was an incinerated output inductor. His theory is that cracks in the ferrite toroid changed its magnetic properties, ultimately causing it to heat up during high frequency switching. With no active cooling, the insulation cooked off the wires and things started to really go south. Maybe. In any event, replacing it was a logical first step.

If you look closely, you may see the failed component.

Unfortunately, Rofin is out of business and replacement parts weren’t available, so [macona] had to wind it himself with a self-sourced ferrite and magnet wire. Luckily, the power supply still had one good inductor that he could compare against. After replacing the coil and a few damaged ancillary wires and connectors, it seemed like the power supply was working again. But with the laser and necessary cooling lines connected, nothing happened.

A close look at the PCB in the laser head revealed that a LM2576HVT switching regulator had exploded rather violently. Replacing it wasn’t a problem, but why did it fail to begin with? A close examination showed the output trace was shorted to ground, and further investigation uncovered a blown SMBJ13A‎ TVS diode. Installing the new components got the startup process to proceed a bit farther, but the laser still refused to fire. Resigned to hunting for bad parts with the aid of a microscope, he was able to determine a LM2574HVN voltage regulator in the RF supply had given up the ghost. [macona] replaced it, only for it to quickly heat up and fail.

This one is slightly less obvious.

Now this was getting ridiculous. He replaced the regulator again, and this time pointed his thermal camera at the board to try and see what else was getting hot. The culprit ended up being an obsolete DS8922AM dual differential line transceiver that he had to source from an overseas seller on eBay.

After the replacement IC arrived from the other side of the planet, [macona] installed it and was finally able to punch some flaming holes with his monster laser. Surely the only thing more satisfying than burning something with a laser is burning something with a laser you spent months laboriously repairing.

We love repairs at Hackaday, and judging by the analytics, so do you. One of this month’s most viewed posts is about a homeowner repairing their nearly new Husqvarna riding mower instead of sending it into get serviced under the warranty. Clearly there’s something about experiencing the troubleshooting and repair process vicariously, with our one’s own hardware safely tucked away at home, that resonates with the technical crowd.

Riding Mower Repair Uncovers Miniature Culprit

Most people would be pretty upset it the lawn mower they spent $4,000 USD on had a major failure within the first year of owning it. But for [xxbiohazrdxx], it was an excuse to take a peek under the hood and figure out what brought down this state-of-the-art piece of landscaping gear.

It should be said that, at least technically, the Husqvarna TS 348XD in question was still working. It’s just that [xxbiohazrdxx] noticed the locking differential, which is key to maintaining traction on hilly terrain, didn’t seem to be doing anything when the switch was pressed. Since manually moving the engagement lever on the transmission locked up the differential as expected, the culprit was likely in the electronics.

Testing the dead actuator.

As [xxbiohazrdxx] explains, the switch on the dash is connected to a linear actuator that moves the lever on the transmission. The wiring and switch tested fine with a multimeter, but when the actuator was hooked up to a bench power supply, it didn’t move. Even more telling, it wasn’t drawing any power. Definitely not a good sign. Installing a new actuator would have solved the problem, but it was an expensive part that would take time to arrive.

Repairing the dead actuator seemed worth a shot at least, so [xxbiohazrdxx] cracked it open. The PCB looked good, and there were no obviously toasted components. But when one of the internal microswitches used to limit the travel of the actuator was found to be jammed in, everything started to make sense. With the switch locked in the closed position, the actuator believed it was already fully extended and wouldn’t move. After opening the switch itself and bending the contacts back into their appropriate position, everything worked as expected.

A tiny piece of bent metal kept this $4,000 machine from operating correctly.

As interesting as this step-by-step repair process was, what struck us the most is [xxbiohazrdxx]’s determination to fix rather than replace. At several points it would have been much easier to just swap out a broken part for a new one, but instead, the suspect part was carefully examined and coaxed back to life with the tools and materials on-hand.

While there’s plenty of folks who wouldn’t mind taking a few days off from lawn work while they wait for their replacement parts to arrive, not everyone can afford the luxury. Expedient repairs are critical when your livelihood depends on your equipment, which is why manufacturers making it harder and more expensive for farmers to fix their tractors has become such a major issue in right to repair battles all over the globe.