Is It A Game? Or A Calculator?

If you are a certain age, you probably remember the Mattel Football game. No LCD screen or fancy cartridges. Just some LEDs and a way to play football when you should be in class. While these might seem primitive to today’s kids, they were marvels of technology in the 1970s when they came out. [Sean Riddle] looks, well, not exactly at the games, but more like in them. As it turns out, they used chips derived from those made for calculators.

[Sean’s] post is a glimpse into this world of over four decades past. Football was actually the second electronic game from Mattel. The first one was Auto Race. There were also games called Space Alert, Baseball, and Gravity. Inside each are quad in-line packages with 42 pins, a Rockwell logo, and a custom part number.

Continue reading “Is It A Game? Or A Calculator?”

DIY GameTank Game Console Gets Upgraded Cartridge

Over the summer, you might recall seeing a homebrew 6502 game console called the GameTank grace these pages. The product of [Clyde Shaffer], the system was impressively complete, very well documented, and even had a budding library of games.

Recently, [Clyde] took to the r/electronics subreddit to show off the latest improvement to the GameTank: a revised removable cartridge. The biggest change this time around is the addition of 32 KB of battery-backed SRAM that gives games (or any other software that might be on the cartridge) some persistent storage to work with. Continue reading “DIY GameTank Game Console Gets Upgraded Cartridge”

Squeezing A Minimalist 6502 Retrocomputer Onto A Single Breadboard

Over the years, and especially lately, we’ve seen tons of single-board retrocomputer builds. That’s fine with us — the more, the merrier. But they all start to run together a bit, with little to distinguish between them. Not so this about-as-compact-as-possible 6502 computer that fits on a single breadboard.

Now, when you do the math, it seems like there’s no way that [Anders Nielsen] would have been able to fit even a minimal chipset onto a standard solderless breadboard. The 40-pin 6502 alone takes up nearly two-thirds of the connections available; add in equally large but necessary chips like the 6522 interface adapter, ROM and RAM chips, and some support ICs, and one breadboard isn’t going to cut it. Luckily, some frugal engineers at MOS back in the 70s came up with the 6507, a variant on the 6502 in a 28-pin DIP. The other key to this build is the 6532 RAM-I/O-timer chip or RIOT, which puts a tiny amount of RAM and some IO lines on a single 40-pin DIP. Along with a 28-pin ROM, a 14-pin hex inverter, and a little crystal oscillator, the entire chipset just barely fits on a single breadboard.

But what can this minimalist 6502 actually do? As you can see in the video below, anything a 555 timer can do, and maybe a little bit more. That’s not a dig, of course — [Anders] actually calls out his initial blinkenlight application as a little more than a glorified 555, and actually comes up with a marginally more complex application just to prove the point. The interesting part here is dealing with the constraints imposed by the limited resources available on this machine.

We’re looking forward to whatever comes next for this clever build. It’s hard to see how some of the plans [Anders] has for it will still fit on a single breadboard, though — these things tend to spread out as they go.

Continue reading “Squeezing A Minimalist 6502 Retrocomputer Onto A Single Breadboard”

A NABU PC opened up and powered on

NABU PC Gets CPU Upgrade, Emulates A TRS-80

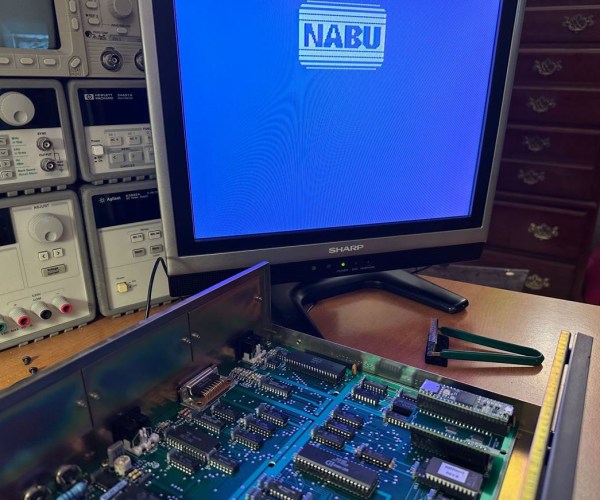
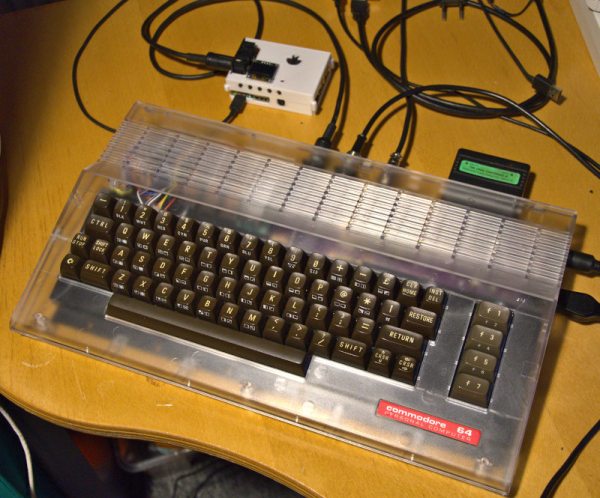
The NABU PC caused a bit of a buzz in the retrocomputing community a couple weeks back. After all, it doesn’t happen often that a huge batch of brand-new computers from the 1980s suddenly becomes available on eBay. Out of the box, the computer itself isn’t that useful: with no internal storage, or any application software whatsoever, it can really only serve as a bare-bones development platform. But since its hardware is quite similar to that of other contemporary home computers, emulating one of those shouldn’t be too difficult, which is exactly what [Ted Fried] did: he managed to turn his NABU into a TRS-80 clone by using his MCLZ8 CPU emulator.

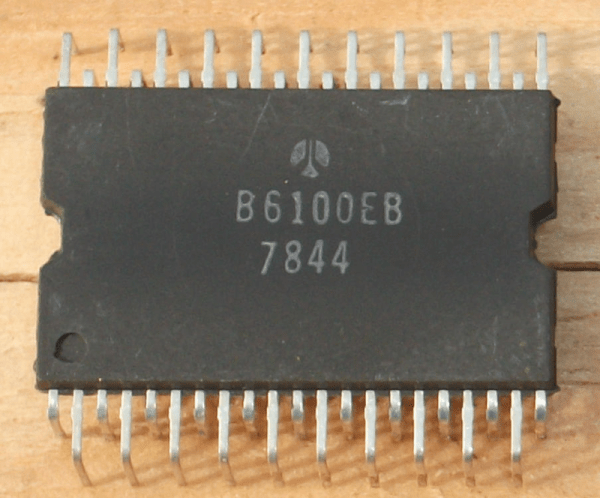
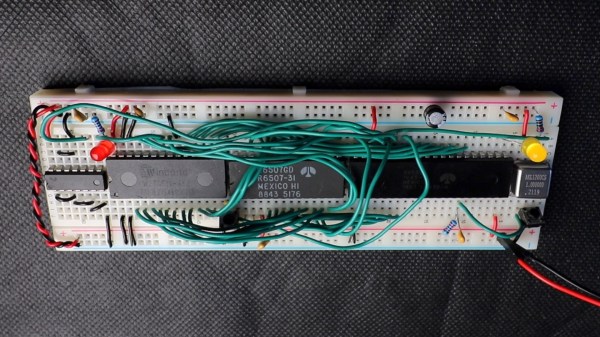
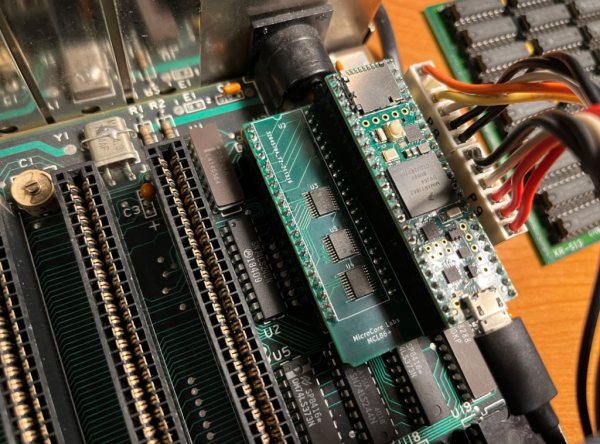
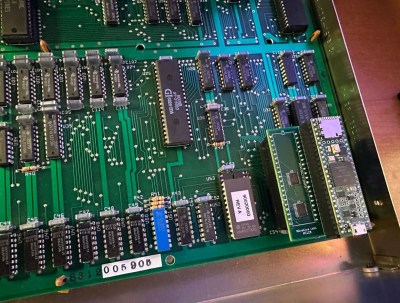
The MCLZ8 is basically an 800 MHz Teensy CPU with an adapter board that allows it to be plugged into a Z80 socket. It emulates the Z80 CPU in real-time, but it also holds the TRS-80 ROM and performs real-time translation between peripherals. On the input side, it reads out the ASCII characters coming in from the NABU’s 8251A UART and stores them in the virtual TRS-80’s keyboard buffer. On the output side, it transfers the TRS-80’s video data to the NABU’s TMS9918 video chip.

The motherboard of a NABU PC with a Teensy-based CPU upgradeOne problem [Ted] ran into was a difference in screen resolution: the NABU has a 40×24 character display, while the TRS-80 generates a 64×16 character image. [Ted] solved the vertical difference by simply keeping the NABU logo on the screen at all times, and decided to just ignore the 24 characters that drop off the right side – it’s not a big issue for a typical BASIC program anyway.

The repurposed NABU might not be a perfect TRS-80 clone, but that’s not the point: it shows how easily the NABU’s hardware can be reprogrammed to do other things. For example, [Ted] has already started work on a new project that doesn’t emulate the Z80, but instead runs code directly on the Teensy’s ARM A9 processor. As you might imagine, this gives the NABU several orders of magnitude more processing power, although the practical use of this is limited because the CPU still has to wait for the NABU’s slow data bus and display chip. [Ted] explains the setup and runs a few impressive demos in the video embedded below.

[Ted]’s NABU experiments are a great example of the Teensy board’s flexibility: we’ve already seen how it can emulate a Z80 as well as an 8088. We’re also curious to see what others will develop with the NABU’s hardwareif they can still buy it, of course.

Continue reading “NABU PC Gets CPU Upgrade, Emulates A TRS-80”

Building A New Commodore 64 In 2022 With All New Components

Call it fake or simply new, but when [DusteD] set out to build a brand-new Commodore 64 with only new parts, it resulted in Project MaxFake64 that is electrically and binary compatible with any genuine C64 out there. While not really ‘fake’ in the sense that a C64 emulator is fake, it is in the sense that it uses no parts produced before this millennium. This might actually be easier than getting a used C64 in fully working condition these days.

In total, the project contains an aftermarket C64 power supply by Electroware, a brand new C64C case, a C64 (ASSY NO 250407) mainboard based on the genuine board, a generic RF modular module, an FPGA-based Kawari VIC-II replacement, a 6502 MPU using a 6502-to-6510 adapter by Monotech PCs, a dual-GAL-based PLA replacement, EPROMs for the kernal, character and BASIC ROMs (with in-socket hacks), and a SinSID Nano as (temporary) SID replacement.

Issues discovered during the process include some cracking on the (transparent) C64C case and lack of availability on CIA replacements like the J6526. The keyboard will also be replaced at some later point, and items like the joystick ports were salvaged from an old C64 rather than purchased brand new. None of which are fundamental problems, and might actually make financial sense when it comes to finding replacement parts in the future.

A 3D-printed case for the ZX Spectrum with a mechanical keyboard

The ZX Spectrum Finally Gets A Proper Keyboard

The Sinclair ZX Spectrum is fondly remembered by many for being their first introduction into the wonderful world of computing. Its advanced capabilities coupled with a spectacularly low price made it one of the great home computers of the 1980s, at least in the UK and nearby countries. What was less spectacular about the Spectrum was its awful keyboard: although a step up from the flat membrane keyboards of earlier Sinclair computers, the Spectrum’s tiny rubbery keys made typing anything more than a few characters a bit of a chore.

If you’re planning to do any serious programming on your Spectrum, you might therefore want to check out [Lee Smith]’s latest project in which he redesigns the Spectrum’s case to include a proper mechanical keyboard. [Lee] got this idea when he was looking for ways to fix a few Spectrums with broken or missing cases, and stumbled upon several projects that aim to recreate classic Sinclair machines using modern components. He took a keyboard PCB meant for the ZX Max 128 project, populated it with some high-quality switches, and added a modified set of keycaps from the ManuFerHi N-Go.

A new ZX Spectrum case, opened to show the keyboard connecting to the mainboard
The new keyboard plugs into the original connectors and doesn’t require any board-level modifications.

Together, those parts formed a modern, comfortable keyboard that still had the proper labelling on all keys. This is rather essential on the Spectrum, since each key is also used to generate symbols and BASIC keywords: for instance, the “K” key also functions as LIST, +, LEN and SCREEN$.

With the keyboard design settled, [Lee] set to work on the rest of the case: he designed and 3D-printed a sleek enclosure that takes the new keyboard as well as an original Spectrum mainboard. The resulting system is called the ZX Mechtrum, and looks fabulous with its matte black exterior and the obligatory four-coloured rainbow. A replaceable rear panel also allows several board-level modifications, like composite video or VGA output, to be neatly incorporated into the design.

We wrote an extensive retrospect on the Spectrum on its 40th anniversary earlier this year. If, somehow, you actually like the Spectrum’s original rubbery keyboard, then you can also modify the whole thing to work with modern computers.

Continue reading “The ZX Spectrum Finally Gets A Proper Keyboard”

Teensy Twofer Of Plug-In Emulated Retro CPUs

[Ted Fried] wrote in with not one but two (2!) new drop-in replacements for widespread old-school CPUs: the Zilog Z80 and the Intel 8088. Both of the “chips” run in cycle-accurate mode as well as in a super turbo mode, which can run so fast that you’ll need to use the Teensy’s internal RAM just to keep up.

Both of these designs have a hardware and software component. The PCBs basically adapt the pinout of the Teensy to the target CPU, with a bunch of 74VLC latches on board to do the voltage level conversion. The rest is a matter of emulating all of the instructions on the Teensy, which is more than fast enough to keep up. If this sounds familiar to you, it’s basically the same approach that [Ted] used last year to bring us his replacement for the 6502 found in the Apple ][ and Commodore 64.

Why would you want an emulated CPU when the originals are still available? [Ted] inherited a busted Osborne I, an ancient Z80 luggable. By replacing the original Z80 with his emulation, he could diagnose the entire system, which led him to discover some bad DRAM chips and get the old beast running again. Or maybe you just want to play IBM XT games at insane speeds?

And it looks like [Ted] has updated his 6502 emulation to include the undocumented C64 opcodes, so if you’re into that scene, you should be covered as well.

If any of this tickles your fancy, head over to [Ted]’s blog, microcore labs, and follow along. Although now that he’s covered most of the famous retrocomputers, we have to ask ourselves what processor is going to be next?