Addressable LEDs From A Z80

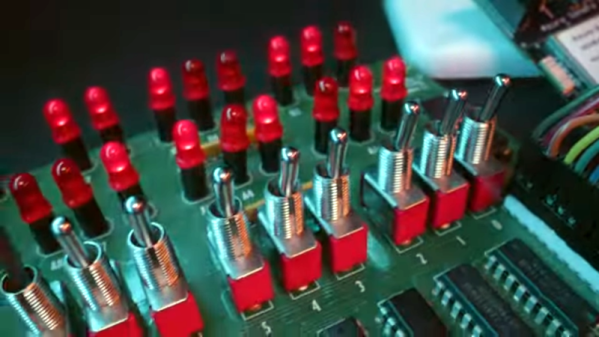
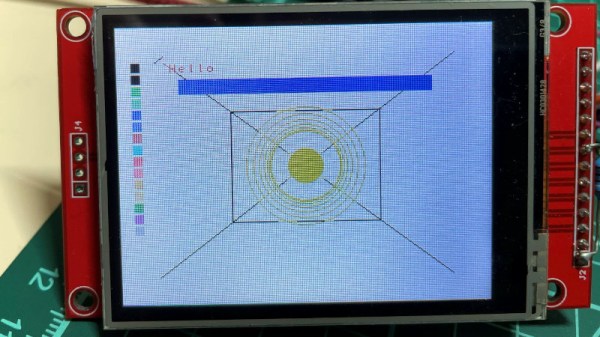
If you buy WS2812s under the Adafruit NeoPixel brand, you’ll receive the advice that “An 8 MHz processor” is required to drive them. “Challenge Accepted!“, says [ShielaDixon], and proceeded to first drive a set from the 7.3 MHz Z80 in an RC2014 retrocomputer, and then repeat the feat from a 3.5 MHz Sinclair ZX Spectrum.

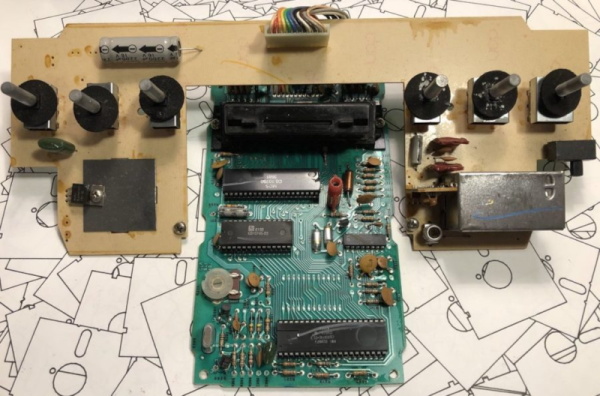
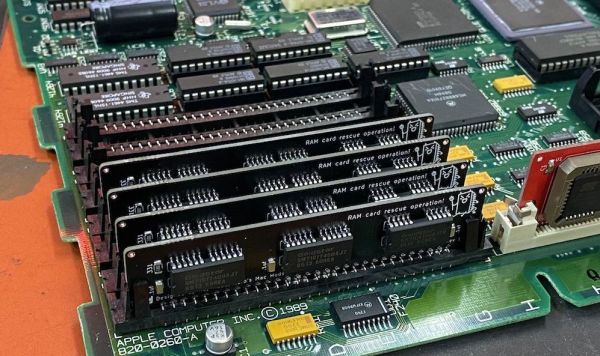
The demos in the videos below the break are all programmed in BASIC, but she quickly reveals that they call a Z80 assembler library which does all the heavy lifting. There’s no microcontroller behind the scenes, save for some glue logic for address decoding, the Z80 is doing all the work. They’re all implemented on a pair of RC2014 extension cards, a bus that has become something of a standard for this type of retrocomputer project.

So the ubiquitous LEDs can be addressed from some surprisingly low-powered silicon, showing that while it might be long in the tooth the Z80 can still do things alongside the new kids. For those of us who had the Sinclair machines back in the day it’s particularly pleasing to see boundaries still being pushed at, as for example in when a Z80 was (almost) persuaded to have a protected mode.

Continue reading “Addressable LEDs From A Z80”

From A 6502 Breadboard Computer To Lode Runner And Beyond

As disruptive and generally unpleasant as the pandemic lockdowns of 2020 were, they often ended up being a catalyst for significant personal growth. That was often literal growth, thanks to stress eating, but others, such as [Eric Badger], used the time to add skills to his repertoire and build a breadboard 6502 computer and so much more.

For those of you looking for a single endpoint to this story, we’re sorry to disappoint — this isn’t really one of those stories. Rather, it’s a tale of starting as a hardware newbie with a [Ben Eater] 6502 breadboard computer kit, and taking it much, much beyond. Once the breadboard computer kit was assembled, [Eric] was hooked, and found himself relentlessly expanding it. At some point, he decided to get the classic game Lode Runner going on his computer; this led to a couple of iterations of video cards, including a foray away from the breadboards and into PCB design. That led to a 6502 emulator build, and a side quest of a Raspberry Pi Pico Lode Runner appliance. This naturally led [Eric] to dip a toe into the world of 3D printing, because why not?

Honestly, we lost track of the number of new skills [Eric] managed to add to his toolkit in this video, and we’re sure this isn’t even a final accounting — there’s got to be something he missed. It’s great stuff, though, and quite inspirational — there’s no telling where you’ll end up when you start messing around with hardware hacking.

Continue reading “From A 6502 Breadboard Computer To Lode Runner And Beyond”

Inside The Atari 2600

The Atari 2600 was an extremely popular yet very simple game console back in the 1970s. They sold, apparently, over 30 million of them, and, of course, these things broke. We’d get calls from friends and — remember, back then normal people weren’t computer savvy — nine times out of ten, we’d ask them to swap the controllers to show them it was a bad controller, and problem solved. But if you did have to open one up, it was surprising how little there was inside, as [Steve] notes in his recent teardown.

The bulk of the circuit board was switches, the power supply, and a TV modulator if you remember those. The circuit board was a tiny thing with a shrunk-down 6502, a 6532 RIOT chip, and a custom chip called a TIA. If you are familiar with those chips, you might wonder if the TIA had any memory in it. It didn’t. Nearly all the ROM and RAM for the game lived in the cartridge itself. Sure, the RIOT has 128 bytes of memory, but that’s not much.

Continue reading “Inside The Atari 2600”

Microsoft Returns To The Altair

The Altair 8800 arguably launched Microsoft. Now [Dave Glover] from Microsoft offers an emulated and potentially cloud-based Altair emulation with CP/M and Microsoft Basic. You can see a video of the project below. One thing that makes it a bit odd compared to other Altair clones we’ve seen is that the emulator runs in a Docker environment and is fully cloud-enabled. You can interact with it via a PCB front panel, or a terminal running in a web browser.

The core emulator is MIT-licensed and seems like it would run nearly everywhere. We were a little surprised there wasn’t an instance in the Azure cloud that you could spin up to test drive. Surely a few hundred Altairs running at once wouldn’t even make a dent in a modern CPU.

Continue reading “Microsoft Returns To The Altair”

Swap The Clock Chip On The Mac SE/30 With An ATTiny85

As [Phil Greenland] explains in the first part of his excellent write-up, the lithium battery used to keep the real-time clock (RTC) going on the Macintosh SE/30 has a nasty habit of exploding and leaking its corrosive innards all over the board. Looking to both repair the damage on a system that’s already had a battery popped and avoid the issue altogether on pristine boards, he started researching how he could replace the battery with something a bit more modern.

Damage from a ruptured RTC battery.

It turns out, the ATtiny85 is pin-compatible with the Mac’s original RTC chip, and indeed, [Andrew Makousky] had already written some code that would allow the microcontroller to emulate it. This is actually a bit more complex than you might realize, as the original RTC chip was doing double-duty: it also held 256 bytes of parameter random access memory (PRAM), which is where the machine stored assorted bits of info like which drive to boot from and the mouse cursor speed.

But after getting the mod installed, the computer refused to start. It turns out the project targeted earlier machines like the Macintosh Plus and SE, and not his higher-performance SE/30. Thanks to community resources like this KiCad recreation of the SE/30’s motherboard, contemporary technical documents, and his trusty logic analyzer, [Phil] was able to figure out that the timing was off — the code was simply struggling to respond to the faster machine. Continue reading “Swap The Clock Chip On The Mac SE/30 With An ATTiny85”

Maxing Out Your MacIntosh With A 4 MB Memory Stick Kit

One fun aspect of retrocomputing is that you get to max out all aspects of these systems without having to take out a bank loan, as tended to be the case when these systems were new. Less fun is that decades after systems like the Apple MacIntosh SE/30 were last sold, the 30-pin SIMMs that form the expandable RAM for these systems has become rather scarce. This has led many to make their own SIMM PCBs, including [Kay Koba] with a PCB for 4 MB SIMMs along with information on which memory and parity ICs are suitable for these SIMMs.

For systems like the MacIntosh SE/30 with 8 30-pin memory slots, the maximum capacity is 128 MB, but this comes with many gotchas due to its ROM being ’32-bit dirty’. While this can be circumvented by swapping in a ROM from a later MacIntosh variant, the less invasive way is to enable the MODE32 system extension and install eight 4 MB SIMMs for a total of 32 MB RAM. RAM chips for such 30-pin SIMMs can be scavenged from the far more common 72-pin SIMMs, along with any old new stock one may come across.

These 4 MB SIMM PCBs are offered for sale by [Kay] with optionally the SMD components (capacitors, resistors and LED) included in the package. The original PCB card edge design is credited to work by [Zane Kaminski] whose GitHub profile also leads to e.g. this 30-pin SIMM project.

Have you modded your MacIntosh or other retro system yet to the maximum RAM and storage limits?

Classic Video Chip Drives A Modern TFT

A lot of us have a soft spot for retrocomputers, and there’s nothing quite like running original hardware. Unfortunately if you’re after the truly original touch then that means carrying along the family TV from 1982, and that’s where life becomes annoying. What if there were a way you could easily drive an LCD panel from a classic video controller? Help is at hand for owners of TI TMS9928A video chips, courtesy of [umaker], with a clever interface board that drives an SPI or parallel TFT.

At its heart is not the FPGA you might expect, but an STM32G4 microcontroller on an STM Nucleo board. This digitizes the R-Y and Y components from the TMS chip which would originally have been destined for an NSC or PAL encoder, does the color conversion through its algorithm, and transfers the result to the screen. This is a task which would back in the day when NTSC or PAL were king have been seen as extremely computationally intensive, so it’s a mark of just how capable an STM can be that a few dollar microcontroller can do it.

We can see this technique proving to be extremely useful across a lot of different retro color graphic applications. We’re not sure whether its lag would be too much for a light gun game, but it would be nice to think that it would result in handheld retro machines.

We encountered this project previously, when as part of its development he needed a sync separator.