Software Controlled Hard Drive Solenoid Engine

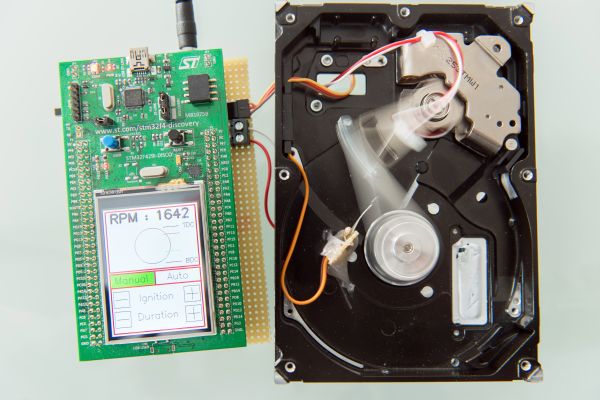
[Fabien-Chouteau] submitted his interesting solenoid engine. In an internal combustion, steam, or pneumatic piston engine, the motive force is produced by expanding gas. In [Fabien]’s little engine it is produced by the arm of a hard drive. Solenoid engines are usually just for show, and come in all shapes and sizes. If you want to move something using electricity an axial motor is probably a better bet. But if you want a challenge and a learning experience, this is hard to beat.

[Fabien] had some problems to solve before his motor made its first revolution. Just like a piston engine the timing needed to be exact. The arm firing at the wrong time could cause all sorts of trouble, the equivalent of backfire in a combustion engine. A STM32f4 discovery board was coupled with a Hall-effect sensor and a MOSFET. When the board read that the arm has moved back to the most efficient position for firing it sent a pulse through the coil. Just like a regular engine, getting the timing right makes all the difference. Once [Fabien] got it tuned up his motor could spin around at a steady 3000 rpm.

Continue reading “Software Controlled Hard Drive Solenoid Engine”
Failaffle

Fail Of The Week: Not All Mold Releases Release All Molds.

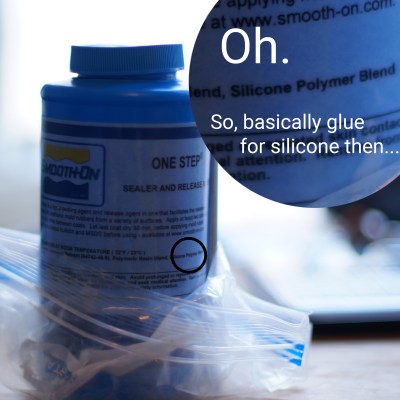
I’m writing a series of articles on resin casting as an extension to my experiences with the instructions found in the wonderful Guerrilla Guide. However, mistakes were made. Having run out of my usual mold release I went to a back-up jar that was lying around from a casting project long, long ago in a workshop far, far away.

GLUE
Never much for readin’ the nutrition facts myself.

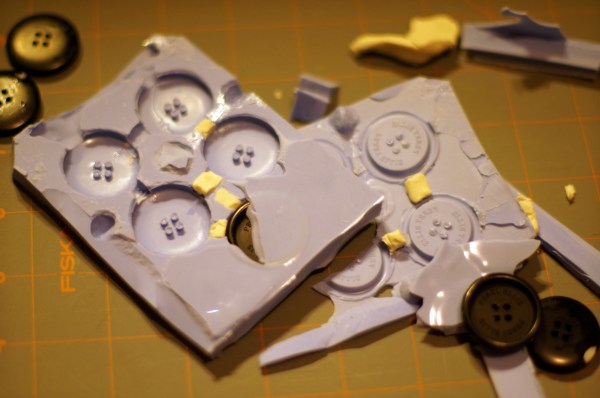
I’m refining a technique of making a mold the quick and dirty way. Everything was going well, the sprues looked good and the master released from the silicone. It was time to do the second half of the mold. As usual I applied a generous amount of mold release. Since it was the first time this mold was to be used I went ahead and did all the proper steps. Rubbing off the dried release and applying a few more coats just to be sure.

I was completely unaware that I was applying mold release designed for urethane molds only. In other words I thoroughly covered my silicone mold in silicone bonding agents. I remained unaware until trying to separate the halves of the mold and found them thoroughly joined. After going through the stages of grief I finally figured out where it all went wrong.

Oh well. I’m ordering some of my regular pick, Stoner A324, and that should do the trick. There’s also Mann- Ease Release 200. While having probably the best name a release agent can have, it doesn’t work as well and needs approximately 100 years to dry. After this setback I’d rather just, grudgingly, learn my lesson and order the correct thing.

I wonder if the smooth-on description can say URETHANE RUBBER a few more times.
Oh. Yes I see. Urethane… Urethane…

So now that we know the right way to fix this is to order the right product, is there a hack to get around it? Does anyone have a homebrew trick for release agent that can be used in a pinch? Leave your comments below.

My Payphone Runs Linux

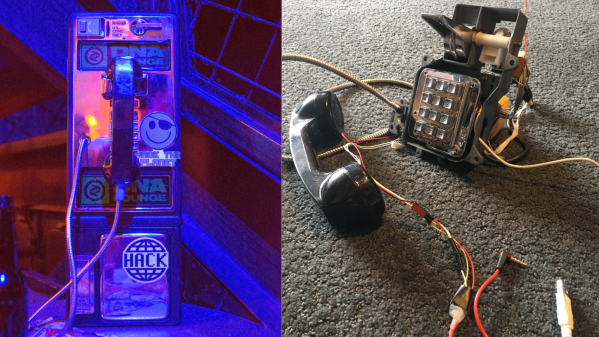
For the 20th anniversary of the Movie “Hackers” [Jamie Zawinski], owner of DNA Lounge in San Francisco, threw an epic party – screening the movie, setting up skating ramps and all that jazz. One of the props he put up was an old payphone, but he didn’t have time to bring it alive. The one thing he didn’t want this phone to do was to be able to make calls. A couple of weeks later, he threw another party, this time screening “Tank Girl” instead. For this gathering he had enough time to put a Linux computer inside the old payphone. When the handset is picked up, it “dials” a number which brings up a voice mail system that announces the schedule of events and other interactive stuff. As usual, this project looked simple enough to start with, but turned out way more complicated than he anticipated. Thankfully for us, he broke down his build in to bite sized chunks to make it easy for us to follow what he did.

This build is a thing of beauty, so let’s drill down into what the project involved:

Continue reading “My Payphone Runs Linux”

Hams In Space: Project OSCAR

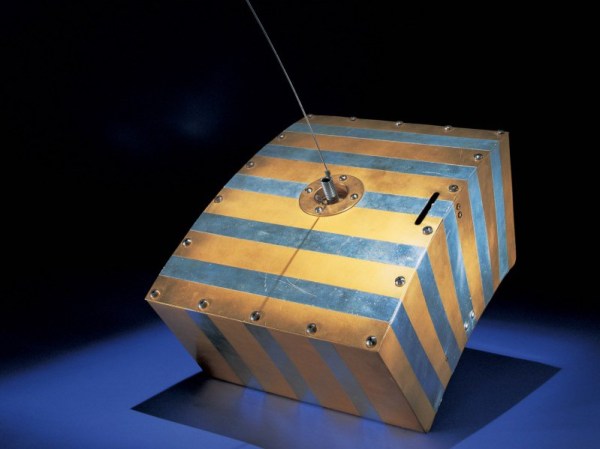
In early December 1961, a United States Air Force rocket took off from Vandenberg Air Force Base in California carrying a special payload. The main payload was a Corona surveillance satellite, but tucked just aft of that spacecraft was a tiny package of homebrew electronics stuffed into something the looked like a slice of cake. What was in that package and how it came to tag along on a top-secret military mission is the story of OSCAR 1, the world’s first amateur radio satellite.

Continue reading “Hams In Space: Project OSCAR”

Inject Packets With An ESP8266

[Kripthor] sent us a link to his blog where he writes the Hello World of low-level networking. Basically he’s constructing his own packet and sending it. By itself this isn’t a bad thing. You could use this power for all sorts of networks-diagnostic good. And so, despite the ominous name of his blog post “ESP8266 Jamming”, he’s not really doing anything that bad — he’s just creating many fake WiFi beacon frames and sending them out every so often.

Which can apparently do bad things to some vulnerable routers. Who knew? Want to test yours?

Naturally we wanted to see how he was doing it, and we opened up the Arduino code in GitHub. It turns out that Espressif has written a wifi_send_pkt_freedom() function that just sends out whatever packet you’d like to the network. That was easy.

It also turns out that the ESP8266 will enter monitor mode, where it listens to all WiFi traffic regardless of the MAC address that it’s directed toward. [Pulkin] seems to have done the work for us and posted the code in his GitHub. Now things get nasty. Combining promiscuous monitor mode with some carefully constructed management frames can end up with a classic WiFi deauth denial-of-service attack on a $2 piece of hardware.

We think it’s tremendously cool that the ESP8266 packs such power, and we beg you all to use it responsibly. The last thing we want to see is the world littered with WiFi-DOS throwies. And the last thing you’d want is a visit from the FCC.

PS/2 Keyboard For Raspberry Pi

A lot of people can bake a cake. Sort of. Most of us can bake a cake if we have a cake mix. Making a cake from scratch is a different proposition. Sure, you know it is possible, but in real life, most of us just get a box of cake mix. The Raspberry Pi isn’t a cake (or even a pie), but you could make the same observation about it. You know the Raspberry Pi is just an ARM computer, you could program it without running an available operating system, but realistically you won’t. This is what makes it fun to watch those that are taking on this challenge.

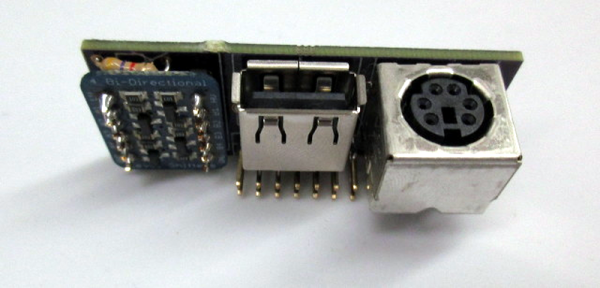
[Deater] is writing his own Pi operating system and he faced a daunting problem: keyboard input. Usually, you plug a USB keyboard into the Pi (or a hub connected to the Pi). But this only works because of the Linux USB stack and drivers exist. That’s a lot of code to get working just to get simple keyboard input working for testing and debugging. That’s why [Deater] created a PS/2 keyboard interface for the Pi.

Even if you aren’t writing your own OS, you might find it useful to use a PS/2 keyboard to free up a USB port, or maybe you want to connect that beautiful Model-M keyboard without a USB adapter. The PS/2 keyboard uses a relatively simple clock and data protocol that is well-understood. The only real issue is converting the 5V PS/2 signals to 3.3V for the Pi (and vice versa, of course).

Continue reading “PS/2 Keyboard For Raspberry Pi”

3D Printing Metal From Rust

It seems backwards, but engineers from Northwestern University have made 3D printing metal easier (and eventually cheaper) by adding extra production steps to the procedure. (Paper available in PDF).

Laser sintering works by laying down a thin layer of metal powder and then hitting it with a strong enough laser to sinter the particles together. (Sintering sticks the grains together without getting the metal hot enough to melt it.) The rapid local heating and cooling required to build up 3D objects expands and cools the metal, and can result in stresses inside the resulting object.

The Northwestern team still lays down layers of powder, but glues the layers together with a quick-drying polymer instead of fusing them with a laser. Once the full model is printed, they then sinter it in one piece in an oven.

anewwaytopri_tn
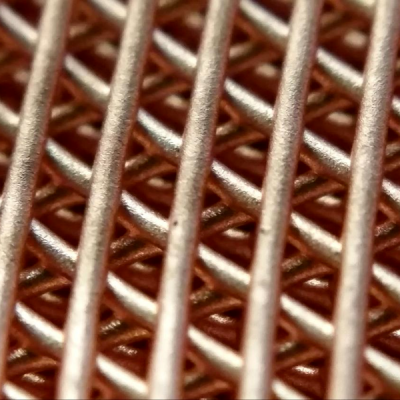
3D-printed copper lattice. Credit: Ramille Shah and David Dunand

The advantages of adding this extra step are higher printing speed — squirting the liquid out of syringe heads can be faster than fusing metal particles with a laser — and increased structural integrity because the whole model is heated and cooled at one time. A fringe benefit is that the model is still a bit flexible before firing, opening up possibilities for printing a flat model and then bending it into shape before sintering.

And if that weren’t enough, the team figured that they’d add a third step to the procedure to allow it to be used with rust (iron oxide) as the starting powder. They print the rust and polymer model, then un-rust the iron using hydrogen, and then fire it as before. Why rust? Do you know anything cheaper to use as a raw material?

What do you think? The basic idea may even be DIYable — glue metal particles together and heat them up enough to stick. Not in my microwave oven, though. We’d love to see a more energy-efficient 3D metal printer.

Thanks to [Joe] for the tip!