We love it when a community grabs hold of an idea and runs wild with it despite obvious practicality issues. Gridfinity by YouTuber [Zach Freedman] is one of those concepts. For the unaware, this is a simple storage system standard, defining boxes to hold your things. These boxes can be stacked and held in place in anything from a desk drawer to hanging off the side of a 3D printer. [Georgs Lazdāns] is one such Gridfinity user who wanted to create tool-specific holders without leaving the sofa. To do so, they made a web application using node.js and OpenCV to extract outlines for tools (or anything else) when photographed on a blank sheet of paper.
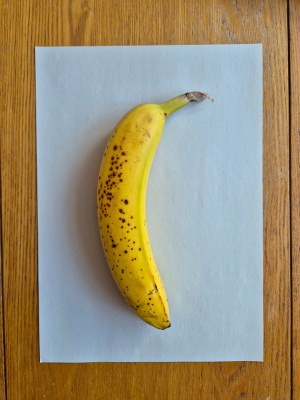
The OpenCV stack assumes that the object to be profiled will be placed on a uniformly colored paper with all parts of its outline visible. The first part of the stack uses a bilateral filter to denoise the image whilst keeping edge details.
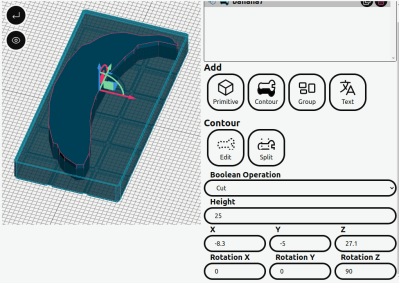
Next, the image is converted to greyscale, blurred, and run through an adaptive threshold. This converts the image to monochrome, again preserving edge details. Finally, the Canny algorithm pulls out the paper contour. The object outline can be given an accurate scale with the paper contour and paper size specified. The second part of the process works similarly to extract the object outline. The second contour should follow the object pretty accurately. If it doesn’t, it can be manually tweaked in the editor. Once a contour is captured, it can be used to modify a blank Gridfinity base in the model editor.
Continue reading “Create Custom Gridfinity Boxes Using Images Of Tools”