Hexagonal Mirror Array Hides Hidden Message

[Ben Bartlett] recently got engaged, and the proposal had a unique bit of help in the form of a 3D-printed hexagonal mirror array, whose mirrors are angled just right to spell out a message with the reflections. A small test is shown above projecting a heart, but the real deal was a bigger version reflecting the message “MARRY ME?” into sand at sunset. Who could say no to something like that? Luckily for all of us, [Ben] shared all the details of what went into designing and building such a thoughtful and fascinating device.

Mirrors on the 3D-printed array are angled just right to reflect light into a message.

Essentially, the array of mirrors works a bit like a projector. Each individual reflection can be can be thought of as a pixel, and the projected position of each can be modified by the precise angle of each mirror. With the help of some Python code, [Ben] calculated the exact angles needed to spell out “MARRY ME?” and generated the necessary 3D model. A smaller-scale test (shown in the header image above) was successful, and after that it was just a matter of printing the array and gluing on some mirrors.

Of course, that’s the short version. In practice there were quite a few troublesome issues that demonstrated the value of using early tests to discover hidden problems. For one thing, mirror angle and alignment is crucial, which meant that anything that could affect the shape of the array was a potential problem. Glue that expands or otherwise changes shape as it dries or cures could slightly change a mirror’s angle, so cyanoacrylate (CA) glue was preferred. However, the tiniest bit of CA glue will mess up a mirror’s surface in a hurry, so care was needed during assembly.

The gleaming hexagonal mirrors are reminiscent of the James Webb Space Telescope.

Another gotcha was when [Ben] suddenly realized, twenty hours into printing the final assembly, that the message needed to be reversed! As designed, the array he was printing would project “?EM YRRAM” and this wasn’t caught during testing because the test pattern (a heart) was symmetrical. Fortunately there was time to correct the error and start again, but it was close. [Ben]’s code has an optional visualization function, which was invaluable for verifying that things would actually turn out as expected. As it happens, the project took right up to the last minute to complete and there wasn’t quite time to check everything 100% before the big moment, but it all turned out alright. What’s life without a little mystery and danger, anyway?

The pictures are great, but you won’t regret taking the time to read through the project page (don’t miss the annotated Python code) because [Ben] goes into just the right level of detail. The end result looks fantastic, and makes an excellent keepsake with a charming story.

OpenGL Machine Learning Runs On Low-End Hardware

If you’ve looked into GPU-accelerated machine learning projects, you’re certainly familiar with NVIDIA’s CUDA architecture. It also follows that you’ve checked the prices online, and know how expensive it can be to get a high-performance video card that supports this particular brand of parallel programming.

But what if you could run machine learning tasks on a GPU using nothing more exotic than OpenGL? That’s what [lnstadrum] has been working on for some time now, as it would allow devices as meager as the original Raspberry Pi Zero to run tasks like image classification far faster than they could using their CPU alone. The trick is to break down your computational task into something that can be performed using OpenGL shaders, which are generally meant to push video game graphics.

An example of X2’s neural net upscaling.

[lnstadrum] explains that OpenGL releases from the last decade or so actually include so-called compute shaders specifically for running arbitrary code. But unfortunately that’s not an option on boards like the Pi Zero, which only meets the OpenGL for Embedded Systems (GLES) 2.0 standard from 2007.

Constructing the neural net in such a way that it would be compatible with these more constrained platforms was much more difficult, but the end result has far more interesting applications to show for it. During tests, both the Raspberry Pi Zero and several older Android smartphones were able to run a pre-trained image classification model at a respectable rate.

This isn’t just some thought experiment, [lnstadrum] has released an image processing framework called Beatmup using these concepts that you can play around with right now. The C++ library has Java and Python bindings, and according to the documentation, should run on pretty much anything. Included in the framework is a simple tool called X2 which can perform AI image upscaling on everything from your laptop’s integrated video card to the Raspberry Pi; making it a great way to check out this fascinating application of machine learning.

Truth be told, we’re a bit behind the ball on this one, as Beatmup made its first public release back in April of this year. It might have flown under the radar until now, but we think there’s a lot of potential for this project, and hope to see more of it once word gets out about the impressive results it can wring out of even the lowliest hardware.

[Thanks to Ishan for the tip.]

Using VHDL To Generate Discrete Logic PCB Designs

VHDL and Verilog are hardware description languages, used to describe and define logic circuits. They’re typically used to design ASICs and to program FPGAs, essentially using software to define hardware. However, [Tim] has done something altogether quite creative, creating tools to take VHDL and Verilog and spit out PCB designs for discrete logic. 

Yes, you read that correctly. The basic idea is to take VHDL source code, and then make a PCB layout that implements the desired logic using resistor-transistor logic. From there, the PCB design files can be shipped off to a manufacturer for pick-and-place assembly at a fraction of the cost of producing a bespoke ASIC.

The drawbacks are obvious; tons of individual discrete parts are required, the size penalty is hilariously bad, and power usage is almost certainly orders of magnitude higher than doing the same logic on an ASIC or even FPGA. Oh, and everything’s much slower, too.

However, as an academic exercise or simply for fun, it’s an awesome bit of work. The idea that one can define a complicated logic circuit and have a PCB implementing the logic whipped up by automated tools is amazing, and we absolutely want to see more of this type of thing.

We’ve seen similar work done with VHDL synthesis into 74-series logic design. If you’ve been developing your own fancy digital-logic-fu, be sure to drop us a line!

[Thanks to Yann Guidon for the tip!]

M5Paper Gets Open Source Weather Display Firmware

We know you like soldering irons, we’re quite fond of them ourselves. But the reality is, modular components and highly capable development boards allow the modern hardware hacker to get things done with far less solder smoke then ever before. In fact, sometimes all you need to finish your project is the right code.

Case in point, check out the slick electronic paper weather display that [Danko Bertović] shows off in the latest Volos Projects video. While it certainly fits the description of a DIY project, he didn’t have to put any of the hardware together himself. The M5Paper is an ESP32 development kit designed around a crisp 4.7″, 960 x 540 e-paper panel that includes everything from environmental sensors to an internal 1150 mAh battery. To make your handheld e-paper dreams come true, the only thing you need to provide is the software.

The weather display code provided by [Danko] should certainly get you going in the right direction. Now don’t get us wrong, there’s certainly no shame in just flashing his code to the device and plunking it on your desk. It’s a gorgeous looking interface, and we all know that a sprinkling of open source code is often all it takes to make a standard consumer device extraordinary. But by using the code he’s provided as a launching point, you can take this turn-key device and really make it your own.

Continue reading “M5Paper Gets Open Source Weather Display Firmware”

Pumpkin OS running on x86

Palm OS: Reincarnate

[pmig96] loves PalmOS and has set about on the arduous task of reimplementing PalmOS from scratch, dubbing it Pumpkin OS. Pumpkin OS can run on x86 and ARM at native speed as it is not an emulator. System calls are trapped and intercepted by Pumpkin OS. Because it doesn’t emulate, Palm apps currently need to be recompiled for x86, though it’s hoped to support apps that use ARMlets soon. Since there are over 800 different system traps in PalmOS, he hasn’t implemented them all yet.

Generally speaking, his saving grace is that 80% of the apps only use 20% of the API. His starting point was a script that took the headers from the PalmOS SDK and converted them into functions with just a debug message letting him know that it isn’t implemented yet and a default return value. Additionally, [pmig96] is taking away some of the restrictions on the old PalmOS, such as being limited to only one running app at a time.

As if an x86 desktop version wasn’t enough, [pmig96] recompiled Pumpkin OS to a Raspberry Pi 4 with a ubiquitous 3.5″ 320×480 TFT SPI touch screen. Linux maps the TFT screen to a frame buffer (dev/fb0 or dev/fb1). He added a quick optimization to only draw areas that have changed so that the SPI writes could be kept small to keep the frame rate performance.

[pmig96] isn’t the only one trying to breathe some new life into PalmOS, and we hope to see more progress on PumpkinOS in the future.

The Linux X86 Journey To Main()

Have you ever had a program crash before your main function executes? it is rare, but it can happen. When it does, you need to understand what happens behind the scenes between the time the operating system starts your program and your first line of code in main executes. Luckily [Patrick Horgan] has a tutorial about the subject that’s very detailed. It doesn’t cover statically linked libraries but, as he points out, if you understand what he does cover, that’s easy to figure out on your own.

The operating system, it turns out, knows nothing about main. It does, however, know about a symbol called _start. Your runtime library provides this. That code contains some stack manipulation and eventually calls __libc_start_main which is also provided by the library. Continue reading “The Linux X86 Journey To Main()”

In Search Of The First Comment

Are you writing your code for humans or computers? I wasn’t there, but my guess is that at the dawn of computing, people thought that they were writing for the machines. After all, they were writing in machine language, and whatever bits they flipped into the electronic brain stayed in the electronic brain, unless punched out on paper tape. And the commands made the machine do things, not other people. Code was written strictly for computers.

Modern programming practice, on the other hand, is aimed firmly at people. Variable and function names are chosen to be long and to describe what they contain or do. “Readability” of code is a prized attribute. Indeed, sometimes the fact that it does the right thing at all almost seems to be an afterthought. (I kid!)

Somewhere along this path, there was an important evolutionary step, like the first fish using its flippers to walk on land. Comments were integrated into programming languages, formalizing the notes that coders of old surely wrote by hand in the margins of the paper first-drafts before keying it in. So I went looking for the missing link: the first computer language, and ideally the first program, with comments. I came up empty handed.

Or rather full handed. Every computer language that I could find had comments from the beginning. FORTRAN had comments, marked by a “C” as the first character in a line. APL had comments, marked by the bizarro rune ⍝. Even the custom language written for the Apollo 11 guidance computers had comments — the now-commonplace “#”. I couldn’t find an early programming language without comments.

My guess is that the first language with a comment must have been an assembly language, because I don’t know of any machines with a native comment instruction. (How cool and frivolous would that be?)

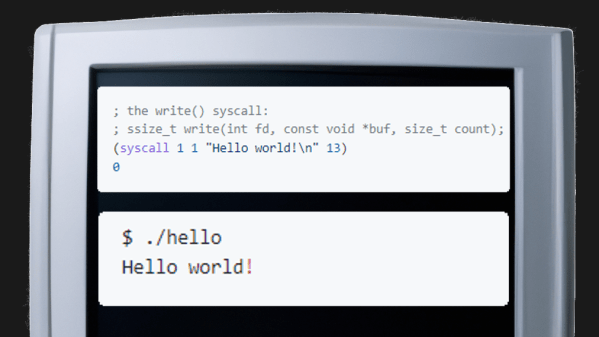
Assemblers simply translate mnemonic names to their machine instruction counterparts, but this gives them the important freedom to ignore anything starting with, traditionally, a semicolon. Even though you’re just transferring the contents of register X to the memory location pointed to in register Y, you can write that you’re “storing the height above ground (meters)” in the comments.

The crucial evolutionary step, though, is saving the comments along with the code. Simply ignoring everything that comes after the semicolon and throwing it away doesn’t count. Does anyone know? What was the first code to include comments as part of the code itself, and not simply as marginalia?