Junk Bin Spin Coater Uses Modded Case Fan

We’ve all been there: you need a specific tool or gadget to complete a project, but it’s not the kind of thing you necessarily want to fork over normal retail price for. It could be something you’re only going to use once or twice, or maybe you’re not even sure the idea is going to work and don’t want to invest too much money into it. You cast a skeptical towards the ever-growing pile of salvaged parts and wonder…
Inspiration and a dig through the junk bin is precisely how [Nixie] built this very impressive spin coater for use in his ongoing homemade semiconductor project. If you’ve never had first hand experience with a spin coater, don’t worry, not many people have. Put simply, it’s a machine that allows the user to deposit a thin layer of material on a disc by way of centrifugal force. Just place a few drops in the center of the disc, then spin it up fast enough and let physics do the rest.

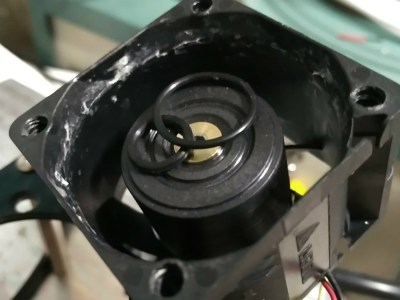
[Nixie] only needs to spin up a fairly tiny disc, and realized the hub of a 40x40mm brushless case fan was just about the perfect size. A quick pass through the lathe stripped the hub of its blades and faced off the front. Once he found a tube that was the exact same diameter of the fan’s axle, he realized he could even use a small vacuum pump to hold his disc in place. A proper seal is provided by 10 and 16 mm OD o-rings, installed into concentric grooves he machined into the face of the hub.

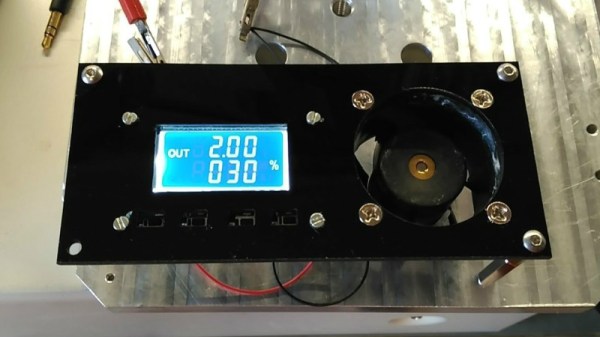
With a way to draw a vacuum through the hub of the spinner he just needed the pump. As luck would have it, he didn’t have to wait for one to make the journey from China, as he had one of those kicking around his junk bin from a previous project. The only thing he ended up having to buy was the cheap PWM fan controller which he mounted along with the modified fan to a piece of black acrylic; producing a fairly professional looking little piece of lab equipment. Check out the video after the break for a brief demonstration of it in action.

This isn’t the first specialized piece of gear [Nixie] has produced in his quest for DIY chips. We’ve previously covered his DIY tube oven as well as his vacuum chamber complete with magnetically controlled manipulator arm.

Continue reading “Junk Bin Spin Coater Uses Modded Case Fan”

Wolfram Alpha Electronic Tips

Electronics takes a lot of math. Once you’ve mastered all the algebra and calculus, though, it is sometimes a drag to go through the motions. It also can be error-prone. But these days, you have Wolfram Alpha which will do all the work for you and very easily. I use it all the time when I’m too lazy to solve an equation or do an integral by hand. But did you know it actually has some features specifically for electronics?

If you want to do a lot with electronics — or nearly any technical field — you are going to have to learn some math and you shouldn’t just rely on tools like Wolfram to skirt understanding the math. Unfortunately, schools often teach us that the point to math is to get a correct answer. For bookkeepers and at the very final stage of engineering, that may be true. But the real value to math for engineers and scientists is to develop intuition about things. If you increase a capacitor’s value does that make its reactance go up or down? Does a little change in load resistance make a corresponding small change in power consumption or is it a lot more? So you should understand why math works. But once you do, using a tool like Wolfram can free you to focus on the abstract questions instead of the detailed “grunt work.”


Tip #1: Split Personality

Wolfram can’t seem to decide if it is a symbolic math program or a search engine. Sometimes just putting a topic name in can lead to some interesting calculations. For example, look what happens when you enter the word opamp: Continue reading “Wolfram Alpha Electronic Tips”

Specialized Knife Sharpener From Old Airplane

“Surely sharpening a knife can’t be that hard” one might think, as they destroy the edge on their pocket knife by flailing it wildly against a whetstone of indeterminate grain. In reality, knife sharpening is as nuanced a practice as virtually any other field, and getting a quality finish is much harder than it seems. It also gets increasingly complex with different blades, as [Turbo Conquering Mega Eagle] shows with is customized knife sharpening jig.

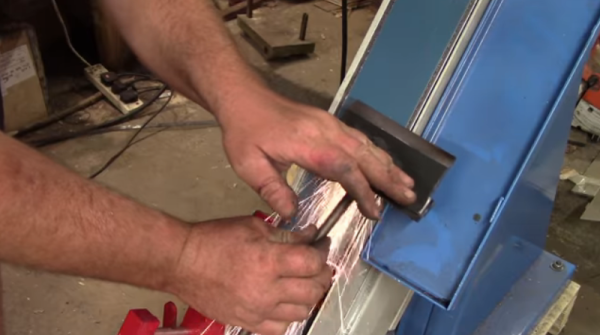
The hardest part in any blade sharpening is getting the proper bevel angle. A heavy angle is good for heavy-duty tools like axes, but for fine work like shaving a more sharp angle is required. Usually, a table-mounted jig is required but due to production constraints, a handheld one was used. It’s made with push rods and a cam follower from an airplane engine (parts are plentiful since this particular engine breaks all the time) and can impart very specific bevel angles on blades. For example, machetes have a heavy angle near the handle but a finer point towards the tip, and this tool helps streamline sharpening many knives quickly.

If you want to try your hand at another project that’s not as straightforward as it might seem, you might want to build a knife from scratch before you make an attempt at a sharpening tool. It’s just as nuanced a process, but with a little practice can be done with only a few tools.

Continue reading “Specialized Knife Sharpener From Old Airplane”

Monoprice Mini Converted To Pick And Place (Kinda)

Would you believe that you can take a cheap 3D printer and easily convert it into a full function pick and place machine to help assemble your PCBs? No? Well good, because you can’t. A real pick and place needs all kinds of sensors and logic to identify parts, rotate them, make sure everything is aligned, etc, etc. There’s no way you could just bolt all that onto a cheap 3D printer, and let’s not even talk about the lack of closed loop control.

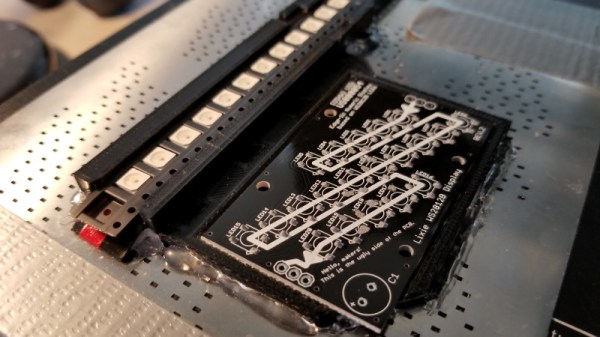
But if you have a very specific use case, namely a PCB that only has a relatively large single part that doesn’t need to be rotated, [Connor Nishijima] might have a solution for you. He bought a $150 USD Monoprice Mini, and with the addition of a few printed parts, was able to build a machine that drastically cuts down the time it takes for him to build his LED boards. Best of all the modification doesn’t involve any permanent changes to the printer, he can just pop off the vacuum attachment when he wants to print something.

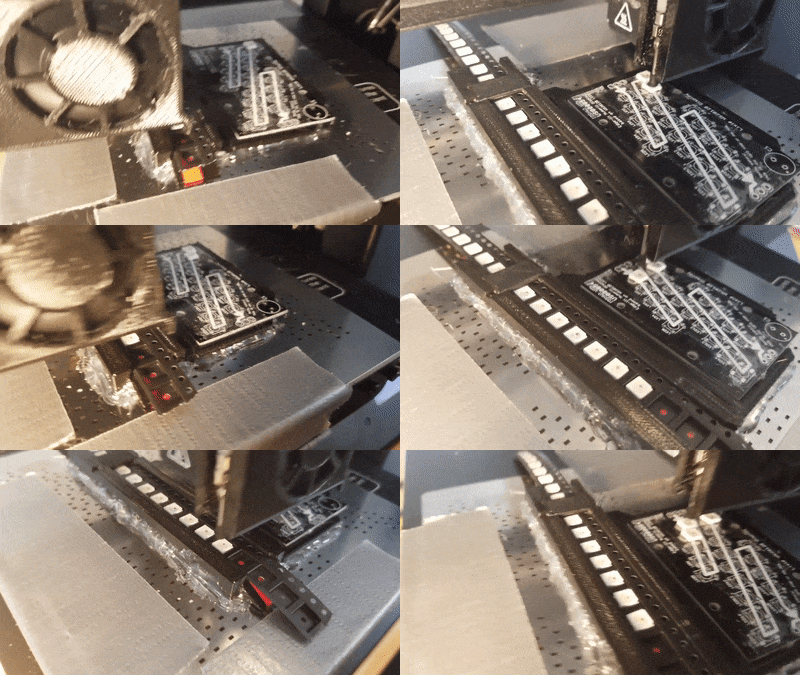
Beyond the 3D printed parts (which were made on the printer itself), the only thing you need to make the modification is the vacuum pump. [Connor] is using a hot air station that includes a vacuum pump for picking up SMD components, but he mentions that you’d probably better off just modifying an aquarium pump and using that. A printed holder snaps over the cooling fan of the Monoprice Mini to hold the vacuum pickup tool, and another printed piece holds the strip of LEDs and the PCB. It’s worth noting that the machine has no ability to control the vacuum pump, and doesn’t need to. The pickup tool is so weak that when the LED lands in the solder paste it sticks to the board well enough that the tool can’t lift it back off.

The real genius in this build comes from the manually written G-Code. You load it from the printer’s built in menu system as if it was a normal 3D print, and it instructs the printer to move the vacuum tool over the line of LEDs, pick one up, and drop it in place on the PCB. It then uses a small peg built into the vacuum tool holder to advance the line of LEDs before starting the cycle all over again. Incredibly, it does this whole complex dance 20 times for each PCB without ever having any kind of feedback or alignment check. It only works because [Connor] was willing to go through the trial and error of getting the calibration and G-Code down as close to perfect as can be expected for such a cheap machine.

This isn’t the first time we’ve seen the Monoprice Mini converted into something a bit more impressive than a cheapo 3D printer. Seems that for whatever the machine lacks in the printing department, it more than makes up for in hackability.

Continue reading “Monoprice Mini Converted To Pick And Place (Kinda)”

Blinkbox: addressable LED testing tool

BlinkBox: Debugging Tool For Addressable LEDs

How often do you find yourself having to pause a project to make a test circuit or write some test code to find the source of a problem? Do enough variations of the same test and you’ll eventually make a dedicated test tool. That’s just what [Devon Bray] found himself doing.

[Devon] does a lot of work with addressable LEDs of different types and after much experience, created the BlinkBox, a dedicated test tool for addressable LEDs. It supports multiple LED chipsets, you can give it a count of the LEDs you want to light up, and you can choose a test animation.  It even writes your settings to an EEPROM so you that don’t have to repeat yourself when you next turn it on.

He’s also done a very nice job packaging it all up, creating a 3D printed case, using backlit buttons for working in the dark, and even added a contrast knob for the LCD screen. Kudos to him for all the effort he’s put making this polished. Everything you need to duplicate it is available on his webpage, along with the schematic for the curious. Watch it in action, or just admire his handiwork in the video below.

Continue reading “BlinkBox: Debugging Tool For Addressable LEDs”

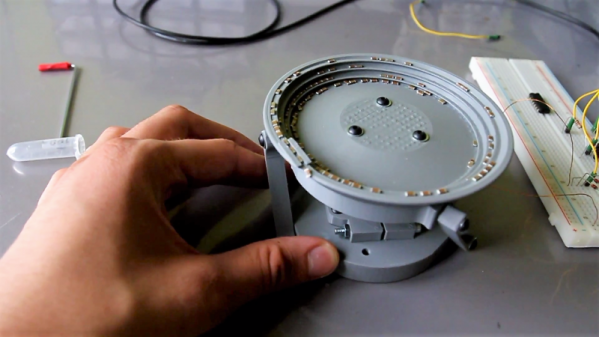
A 3D-Printed Bowl Feeder For Tiny SMD Parts

[Andrzej Laczewski] has something big in mind for small parts, specifically SMD resistors and capacitors. He’s not talking much about that project, but from the prototype 3D-printed bowl feeder he built as part of it, we can guess that it’s going to be a pretty cool automation project.

Bowl feeders are common devices in industrial automation, used to take a big pile of parts like nuts and bolts and present them to a process one at a time, often with some sort of orientation step so that all the parts are the right way around. They accomplish this with a vibratory action through two axes, which [Andrzej] accomplishes with the 3D-printed ABS link arms supporting the bowl. The spring moment of the arms acts to twist the bowl slightly when it’s pulled down by a custom-wound electromagnet, such that the parts land in a slightly different place every time the bowl shifts. For the parts on the shallow ramp spiraling up the inside of the bowl, that means a single-file ride to the top. It’s interesting to see how changing the frequency of the signal sent to the coil impacts the feed; [Andrzej] used a function generator to find the sweet spot before settling on a dedicated circuit. Watch it in action below.

We’re really impressed with the engineering that went into this, even if we wonder what the vibration will do to the SMD components. Still, we can’t wait to see this in a finished project – perhaps it’ll be integrated like this Arduino-fied bowl feeder.

Continue reading “A 3D-Printed Bowl Feeder For Tiny SMD Parts”

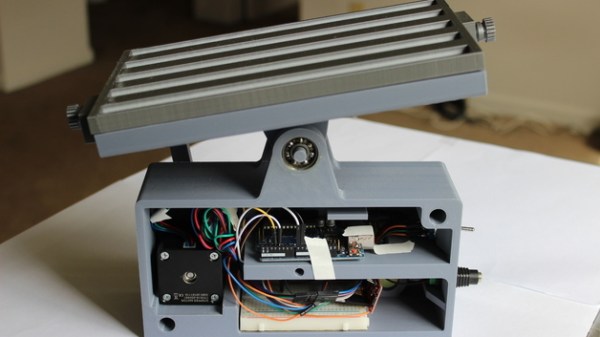
Open Source Laboratory Rocker Is Super Smooth

Lab equipment is often expensive, but budgets can be tight and not always up to getting small labs or researchers what they need. That’s why [akshay_d21] designed an Open Source Lab Rocker with a modular tray that uses commonly available hardware and 3D printed parts. The device generates precisely controlled, smooth motion to perform automated mild to moderately aggressive mixing of samples by tilting the attached tray in a see-saw motion. It can accommodate either a beaker or test tubes, but since the tray is modular, different trays can be designed to fit specific needs.

Source code and schematics are available from [akshay_d21]’s Google Drive and the 3D models are also available from the National Institute of Health’s 3D Print Exchange. A demonstration video is embedded below, in which you can see how smooth and controlled the motions are.

Continue reading “Open Source Laboratory Rocker Is Super Smooth”