The Bluetooth LCD Sniffer You Didn’t Know You Needed

At one time or another, we’ve all suffered through working with a piece of equipment that didn’t feature a way to export its data to another device. Whether it was just too old to offer such niceties, or the manufacturer locked the capability behind some upgrade, the pain of staring at digits ticking over on a glowing LCD display and wishing there was a practical way to scrape what our eyes were seeing is well known to hackers.

That was precisely the inspiration for DoMSnif, the dot matrix LCD sniffer that [Blecky] has been working on. Originally the project started as a way to record the temperature of his BRTRO-420 reflow oven, but realizing that such a device could have widespread appeal to other hardware hackers, he’s rightfully decided to enter it into the 2019 Hackaday Prize. If perfected, it could be an excellent way to bolt data capture capabilities to your older devices.

The first phase of this project was figuring out how to capture and parse the signals going into the device’s KS0108 LCD. Getting the data was certainly easy enough, he just had to hook a logic analyzer up between the display and the main board of the device. Of course, figuring out what it all means is a different story.

After running the oven for a bit with the analyzer recording, [Blecky] had more than enough data to get started on decoding it. Luckily, the layout of this fairly common 128×64 pixel display is well documented and easy enough to understand. With a little work, he was able to create a tool that would import the captured data and display it on a virtual LCD.

Unfortunately, the Bluetooth part is where things get tricky. Ultimately, [Blecky] wants to ditch the logic analyzer and use a Adafruit Feather nRF52 Bluefruit to capture the signals going to the LCD and pipe them to a waiting device over Bluetooth. But his testing has found that the nRF52’s radio is simply too slow. The display is receiving data every 14us, but it takes the radio at least 50us to send a packet.

[Blecky] is looking at ways around this problem, and we’re confident he’ll crack it. The solution could be in buffering and compressing the data before sending it out, though you’d lose the ability to monitor the display in real-time. Even if he has to abandon the Bluetooth aspect entirely and make the device wired, we still think there would be a market for an easy to use hardware and software solution for scraping LCD data.

Printed It: Hand Cranked Photography Turntable

Even a relatively low-end desktop 3D printer will have no problems running off custom enclosures or parts for your latest project, and for many, that’s more than worth the cost of admission. But if you’re willing to put in the time and effort to become proficient with necessary CAD tools, even a basic 3D printer is capable of producing complex gadgets and mechanisms which would be extremely time consuming or difficult to produce with traditional manufacturing techniques.

Printable bearing cross-section

Once you find yourself at this stage of your 3D printing career, there’s something of a fork in the road. The most common path is to design parts which are printed and then assembled with glue or standard fasteners. This is certainly the easiest way forward, and lets you use printed parts in a way that’s very familiar. It can also be advantageous if you’re looking to meld your own printed parts with existing hardware.

The other option is to fully embrace the unique capabilities of 3D printing. Forget about nuts and bolts, and instead design assemblies which snap-fit together. Start using more organic shapes and curves. Understand that objects are no longer limited to simple solids, and can have their own complex internal geometries. Does a hinge really need to be two separate pieces linked with a pin, or could you achieve the desired action by capturing one printed part inside of another?

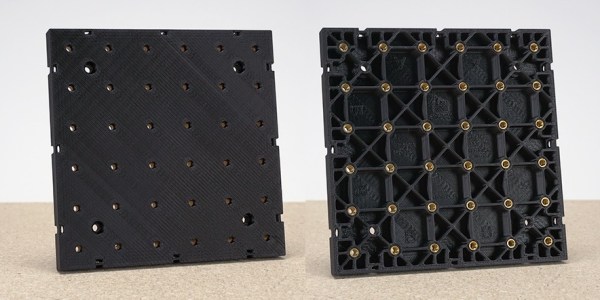
If you’re willing to take this path less traveled, you may one day find yourself creating designs such as this fully 3D printed turntable by Brian Brocken. Intended for photographing or 3D scanning small objects without breaking the bank, the design doesn’t use ball bearings, screws, or even glue. Every single component is printed and fits together with either friction or integrated locking features. This is a functional device that can be printed and put to use anywhere, at any time. You could print one of these on the International Space Station and not have to wait on an order from McMaster-Carr to finish it.

With such a clever design, I couldn’t help but take a closer look at how it works, how it prints, and perhaps even some ways it could be adapted or refined going forward.

Continue reading “Printed It: Hand Cranked Photography Turntable”

A Drop-In Upgrade Module For Cheap Rotary Tools

We’ve all seen them, the rotary tools that look almost, but not quite exactly, like a Dremel. They cost just a fraction of the real thing, and even use the same bits as the official Bosch-owned version. At first glance, they might seem like a perfect solution for the hacker who’s trying to kit out their workshop on a tight budget. There’s only one problem: the similarities between the two are only skin deep.

Recovering components from the original controller

As [Vitaly Puzrin] explains, one of the big problems with these clones are the simplistic electronics which have a tendency to stall out the motor at low RPM. So he’s developed a drop-in replacement speed controller for his particular Dremel clone that solves this problem. While the module design probably won’t work on every clone out there in its current form, he feels confident that with help from the community it could be adapted to other models.

Of course, the first step to replacing the speed controller in your not-a-Dremel is removing the crusty old one. But before you chuck it, you’ll need to recover a few key components. Specifically the potentiometer, filter capacitor, and the motor terminals. You could possibly source the latter components from the parts bin, but the potentiometer is likely going to be designed to match the tool so you’ll want that at least.

The microprocessor controlled upgrade board uses back EMF to detect the motor’s current speed without the need for any additional sensors; important for a retrofit module like this. [Vitaly] says that conceptually this should work on any AC brushed motor, and the source code for the firmware is open if you need to make any tweaks. But hacker beware, the current version of the PCB doesn’t have any AC isolation; you’ll need to take special care if you want to hook it up to your computer’s USB port.

On the other hand, if you’re willing to buy a cheap rotary tool just to crack it open and replace the electronics, you might as well just build your own. If you’re feeling particularly adventurous, you can always abandon the electric motor and spin it up with a tiny turbine. Continue reading “A Drop-In Upgrade Module For Cheap Rotary Tools”

Hydraulic Bench Vise A Masterpiece Of Scrap Metal And Angle Grinding

For most of us, a vise is the sort of thing you clamp onto the edge of a workbench and crank down by hand. It might even be made of plastic, depending on the kind of work you find yourself doing with it. But it’s safe to say that [WorkshopFromScratch] won’t be soldering any PCBs in the jaws of this nearly 100 lb hydraulic vise that he built from, well… scratch.

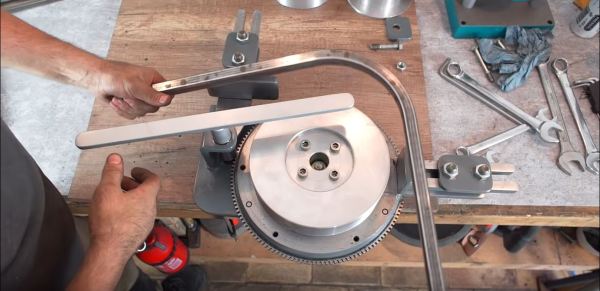
In the video after the break, he takes an array of scrap metal including what appears to be a chunk of racking from the Home Depot and a rusted plate that looks like it could be peeled off the hull of a sunken ship, and turns it into a monsterous vise with five tons of clamping force. Outside of a handful of bolts, a couple of gas struts, and the hydraulic bottle jack that that provides the muscle, everything is hand-cut and welded together. No fancy machining here; if you’ve got an angle grinder, a welder, and of course the aforementioned stock of scrap metal, you’ve got the makings of your own mega vise.

The piece of racking is cut down the center to form the base of the vise, but most everything else is formed from individual shapes cut out of the plate and welded together. Considering the piecemeal construction methods, the final result looks very professional. The trick is to grind all the surfaces, including the welds, down until everything looks consistent. Then follow that with a coat of primer and then your finish color.

While the whole build is very impressive, our favorite part has to be the hand-cut cross hatching on the jaws. With the workpiece in one hand and angle grinder in the other, he cuts the pattern out with an accuracy that almost looks mechanical. If we didn’t know better, we might think [WorkshopFromScratch] was some kind of metalworking android from the future.

Being able to work with metal is a fantastic skill to have, and we’re always impressed to see what folks can produce with a welder and some scrapyard finds. Especially when they build tools and equipment that can be put to practical use.

Continue reading “Hydraulic Bench Vise A Masterpiece Of Scrap Metal And Angle Grinding”

Create A Low-Cost, High-Accuracy LCR Meter With An STM32 MCU

Having a good LCR meter was something which [Adil] had wanted for his personal lab, so as any good university student (and former Hackaday contributor) does, he ended up building his own. Using a Nucleo-F446RE board for the MCU side and a custom PCB for the side that does the actual measuring, he created a meter that reportedly comes pretty close to commercial meters, and for the low price of £55.

Running through some of the theory behind the design as well some design choices, the resulting product is then presented. The choice to not using a standard current shunt, but instead a transimpedance amplifier (TIA) is explained as well. Unfortunately there are no schematics or source code, and the text is somewhat unclear on some points, failing to explain some acronyms that’d make it hard for someone who is not active in this field to understand the full design.

We hope that [Adil] can address those points and provide design files and source code, as it does look like a very interesting project!

Review: Shi Yi Tool Sy365-8 Desoldering Iron, Second Cheapest You Can Find

Is the second cheapest tool you can find any better than the cheapest one?

Readers with long memories will recall there was a time when I amused myself by tacking inexpensive tools or electronic devices to my various orders from the Chinese electronic Aladdin’s Cave. Often these inexpensive purchases proved to be as disastrous or ineffective as you might expect, but sometimes they show unexpected promise, true diamonds in the rough. It’s been a while and life has intervened over the last year, but it’s time to resume this harmless diversion.

Memories Of An Explosive Conclusion

A particularly memorable review came in April 2018, when I bought a five pound ($6.30) desoldering iron. I described it then as an “unholy lovechild of a cheap solder sucker and an even cheaper soldering iron“, and while that was an accurate portrayal it also showed promise as a useful tool that would fill a niche in my requirements. Desoldering is always slightly annoying, and a heated desolder pump genuinely does make a difference. Unfortunately for me, the cheap desoldering tool was not a product I’d recommend that anyone try for themselves. A combination of questionable electrical safety and a propensity to explosively deconstruct itself meant it has languished unused in my big box of cheap junk, and I’m still without a decent desoldering solution. It is time to buy something better, and in the rich tradition of reviewing inexpensive stuff I decided to pick up the next cheapest desoldering iron I could find. Eight pounds ($10) secured me a Shi Yi Tool Sy365-8, and I set to on this review. Continue reading “Review: Shi Yi Tool Sy365-8 Desoldering Iron, Second Cheapest You Can Find”

A Drop-In Controller Replacement For Commercial Reflow Ovens

If you need a reflow oven, you can very easily head down to Walmart or Target and pick up a toaster oven for fifteen bucks or so. Even without any control electronics, a bone-stock toaster oven works well enough for reflow soldering, but if you want to do it right you’ll also want to add a themocouple, a microcontroller, and maybe a fancy display. That’s option one.

If you value your time more than your money, you’ll probably just plonk down a few hundred bucks for a T-962A reflow oven, the standard infrared oven that’s meant for reflowing solder. It’s a good oven, but as with all bargain basement tools from China, the user interface isn’t great. [PhillyFlyers] is working on a drop-in controller for what is probably the most popular reflow oven on the planet, and this thing looks good.

This is a controller for the T-962A oven that includes all the connectors as the stock control board. We’ve seen a few of these projects to improve cheap tools, from 3D printer controllers to a replacement board for the ubiquitous K40 laser cutter. Now the most popular reflow oven is getting the same treatment.

The specs for this replacement board include a five-inch, 800 x 480 display, powered by an STM32H7 microcontroller. All of the usual functionality of the oven is retained, but it adds the ability to hand-draw reflow profiles, save reflow profiles to an SD card, and support for four K-type thermocouples. Basically, it’s what you would expect from an upgraded version of the T-962 oven.

Most importantly, this is a direct drop-in replacement for the stock electronics. Grab one of these boards, and all you have to do for installation is break out a screwdriver. It makes a great tool even better, which is exactly what this very popular reflow oven needs.