We’re all used to temperature controlled soldering irons, and most of us will have one in some form or other as our soldering tool of choice. In many cases our irons will be microprocessor controlled, with thermocouples, LCD displays, and other technological magic to make the perfect soldering tool.
All this technology is very impressive, but how simply can a temperature controlled iron be made? If you’re of an older generation you might point to irons with bimetallic or magnetic temperature regulation of course, so let’s rephrase the question. How simply can an electronic temperature controlled soldering iron be made? [Bestonic lab] might just have the answer, because he’s posted a YouTube video showing an extremely simple temperature controlled iron. It’s not the most elegant of solutions, but it does the job demanded of it, and all for a very low parts count.
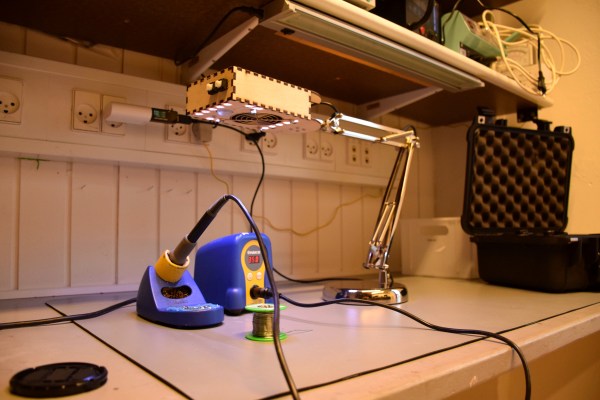
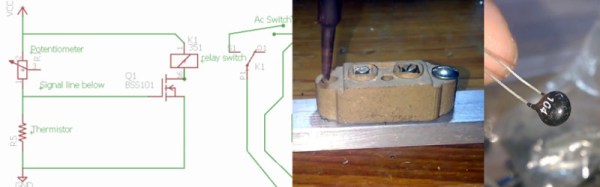
He’s taken a ceramic housing from a redundant fuse holder, and mounted it on a metal frame to make a basic soldering iron holder into which the tip of his unregulated iron fits. To the ceramic he’s fitted a thermistor, which sits in the gate bias circuit of a MOSFET. The MOSFET in turn operates a relay which supplies mains power to the iron.
Temperature regulation comes as the iron heats the ceramic to the point at which the thermistor changes the MOSFET and relay state, at which point (with the iron power cut) it cools until the MOSFET flips again and restarts the process. You may have spotted a flaw in that it requires the iron to be in the holder to work, though we suspect in practice the thermal inertia of the ceramic will be enough for regulation to be reasonably maintained so long as the iron is returned to its holder between joints. Nobody is claiming that this temperature controlled iron is on a par with its expensive commercial cousins, instead it represents a very neat hack to conjure a useful tool from very few components. And we like that. Take a look at the full video below the break.
Continue reading “Probably The Simplest Electronic Temperature Controlled Soldering Iron” →