We probably don’t have to tell the readers of Hackaday that LEGO isn’t just for kids; we’ve seen plenty of projects that live in an enclosure made of the multi-color bricks, and let’s not even get started on the Mindstorms builds we’ve seen over the years. But while LEGO (and especially the Technic product line) is fine for prototyping and putting together quick projects, the stock electronic components aren’t exactly top of the line. Which is why [Jason Kirsons] has been working on bridging the gap between LEGO and “real” parts.
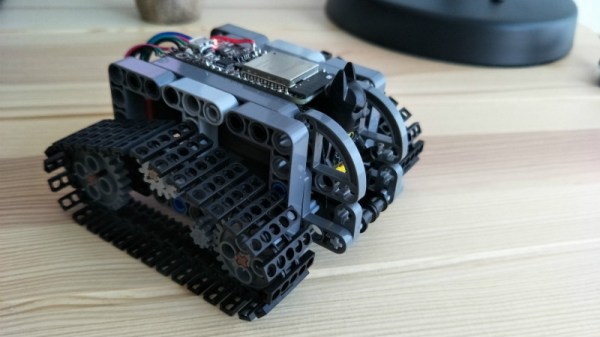
 His LEGO Technic tank is a perfect example of this principle. While the tank design itself is standard LEGO fare, he’s gone all in on the electronics. With an Adafruit Feather ESP32, custom motor controller board, and NEMA 8 steppers with 3D printed Technic adapters, this little tank has a lot more going on under the hood than you might expect. While this project is more a proof of concept than anything, the methods [Jason] demonstrates might be something to consider the next time you’re building with Billund’s best.
[Jason] chose the Feather ESP32 because of its small size, but you could get away with a generic board if you’re not trying to compress everything down into such a small footprint. Of course, if you go with another board you won’t be able to use the PCB he’s designed which attaches to the Feather and holds four Pololu DRV8835 motor drivers.
Easily the most broadly applicable element of this project is the work [Jason] has done designing adapter plates that let you use NEMA 8 motors with LEGO Technic parts. He’s put the adapters up on Thingiverse, for anyone looking for a drop-in solution to give their Technic creations a bit more oomph (technical term).
LEGO has a long history with hackers and makers. We’ve covered some absolutely incredible projects built with the famous construction set, and we don’t see any sign of it slowing down in the future.
Continue reading “Mini LEGO Technic Tank Patrols Your Desk Under ESP32 Control”