The Era Of Orville Props Has Officially Begun

Over a decade after the last Star Trek show warped off of television, we finally have a new series in the form of Star Trek: Discovery. But much to the chagrin of many old school Trek fans, Discovery has gone all in on the gritty and hyper-serialized storytelling that’s taken over TV since Starfleet last patrolled the airwaves. But for those who are looking for somewhat more lighthearted space adventures, Seth MacFarlane (of Family Guy fame) has created a show which is essentially a love-letter to Star Trek: The Next Generation called The Orville. Some have gone as far as to claim that The Orville is the true continuation of the Trek legacy, though such discussion sounds awfully close to a Holy War to us so we’ll steer clear.

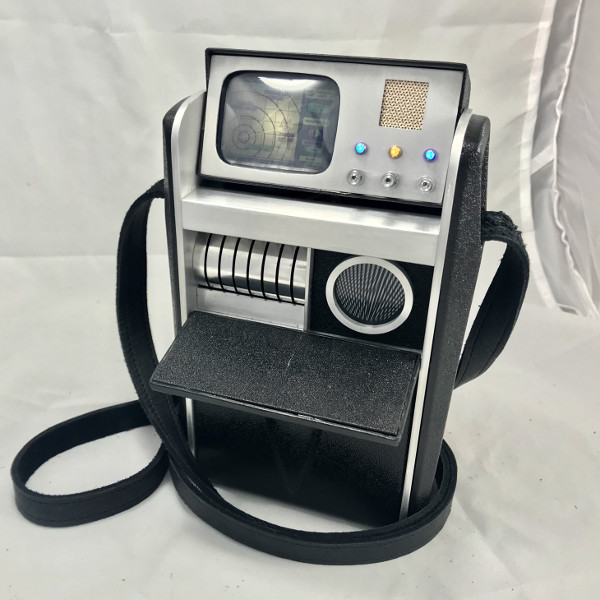
Unfortunately for The Orville fans, the series doesn’t have nearly the commercial draw of Trek. Accordingly, the market for things like replica uniforms and props from the show is still in its infancy, meaning fans of the show have to go the DIY route. [JohnSmallBerries] is one such fan, and his 3D printed “Comscanner” from The Orville is a shot across the bow to the well established Trek prop-making scene.

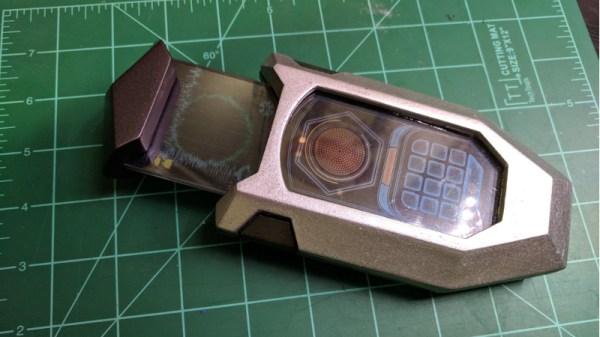
Without so much as an official toy version of the device, [John] was forced to do his initial 3D rendering based completely on screenshots from the show. Even the scale of the device had to be guessed, as it’s usually only seen being held in a crew member’s hand. In the end he reasoned it’s probably supposed to be about the size of a large smartphone.

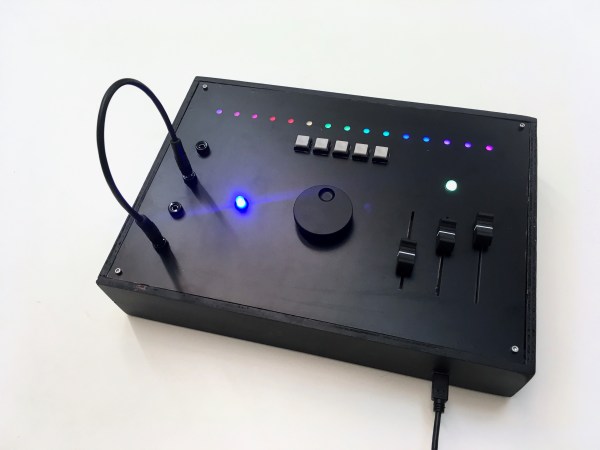
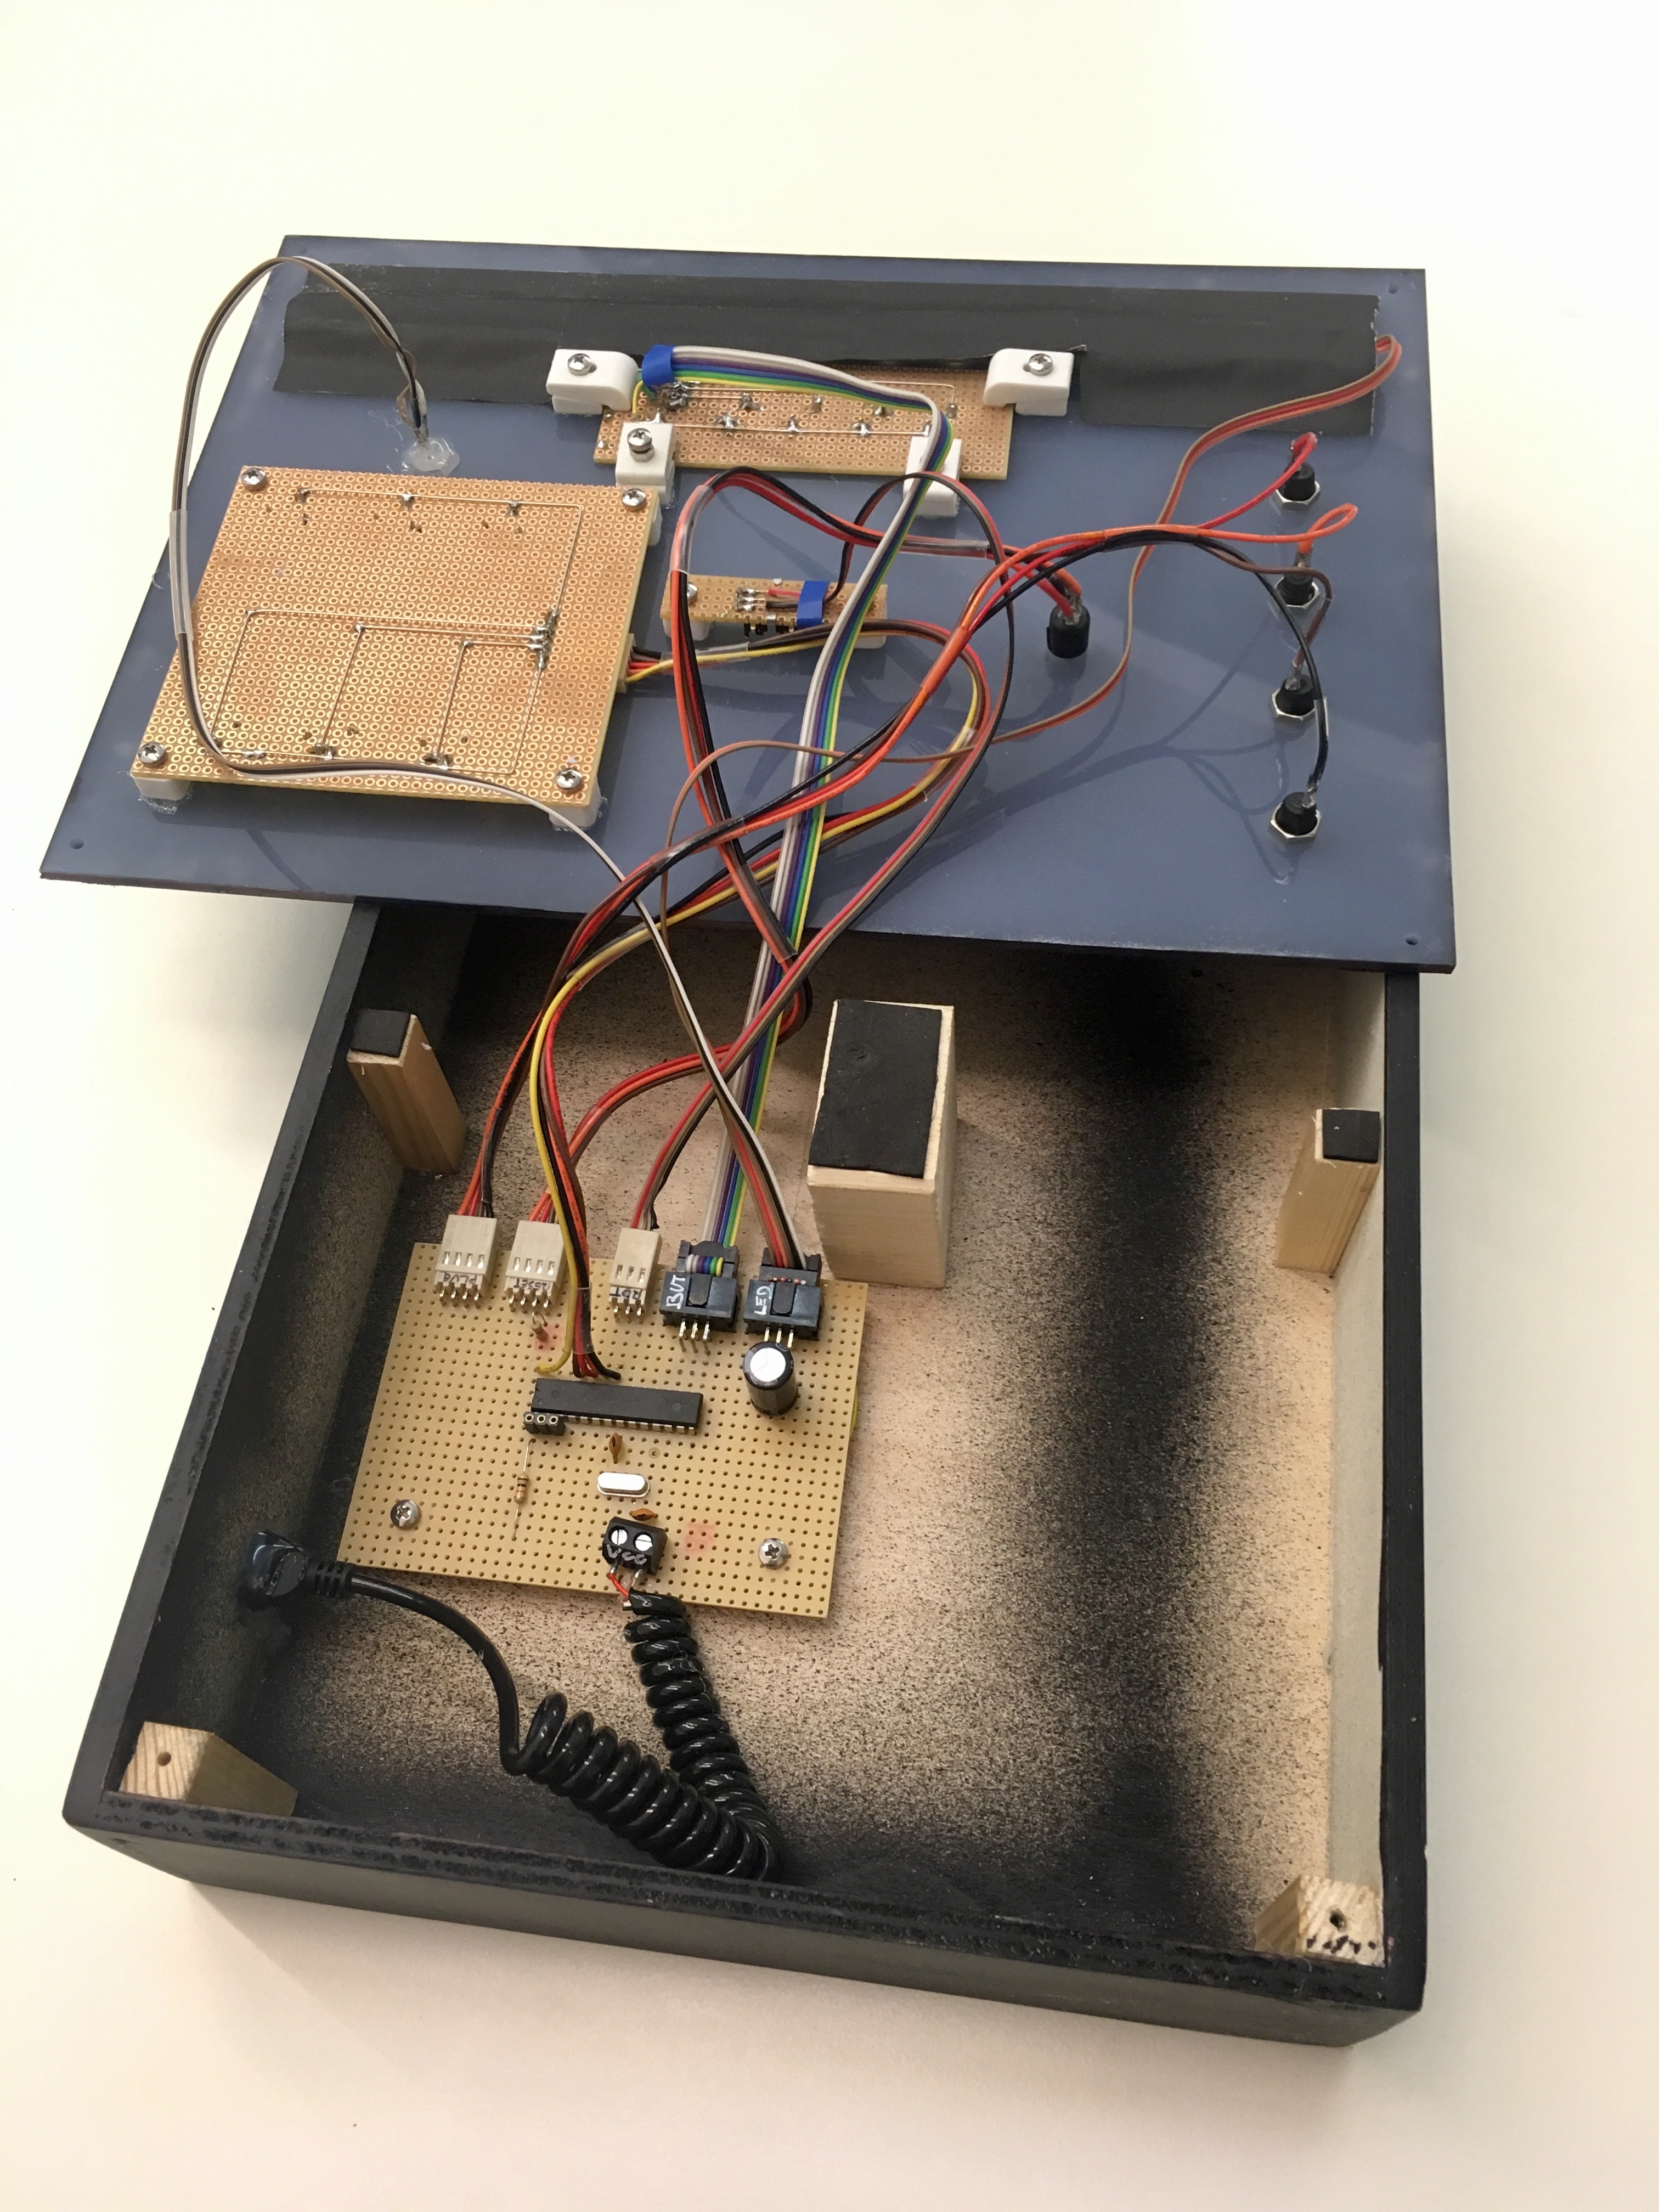
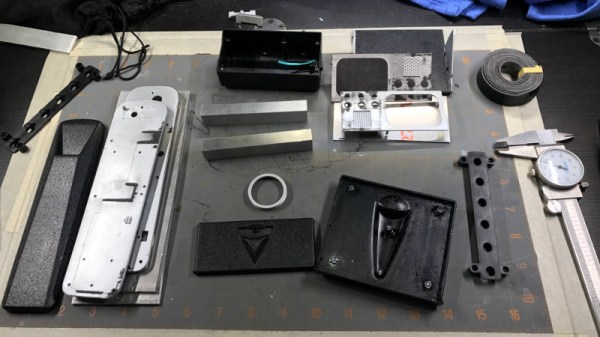
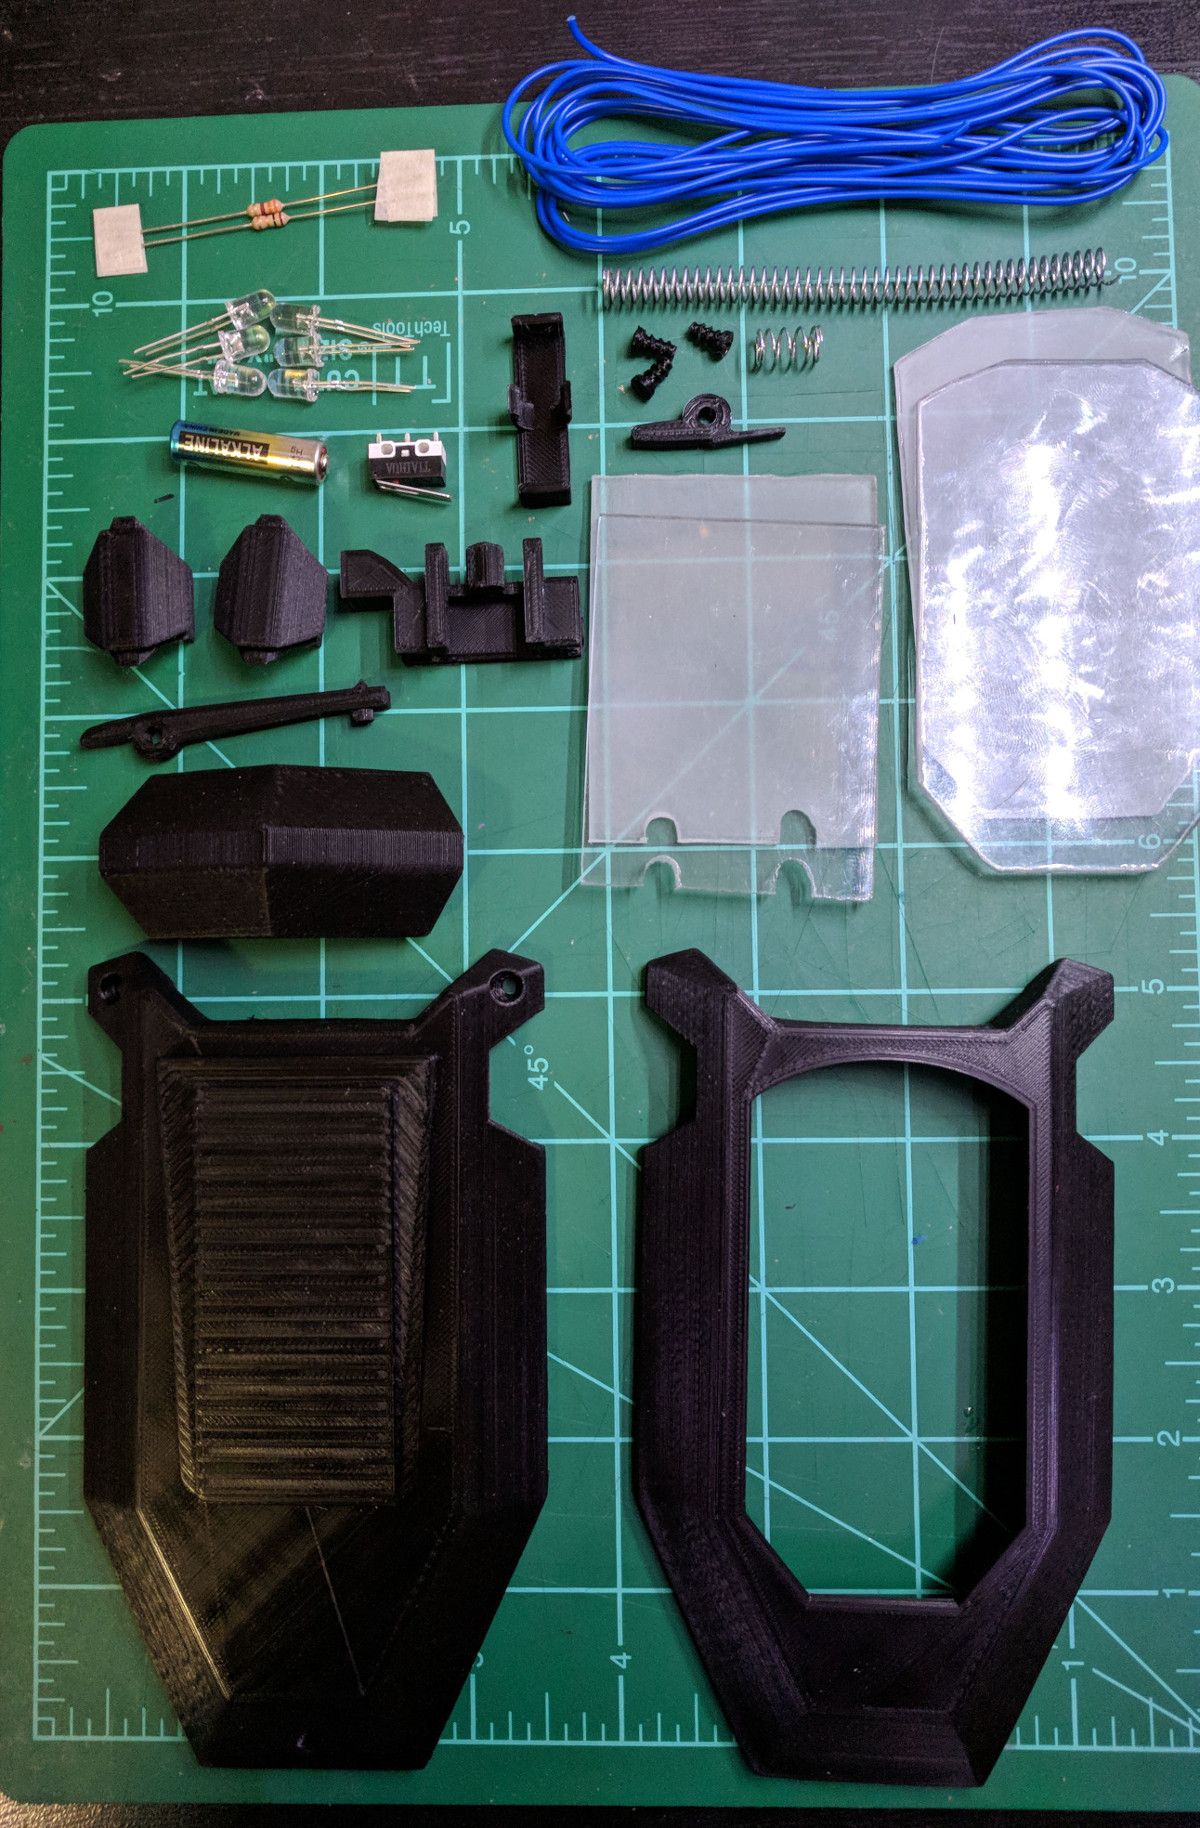
Not content with just a static prop, [John] managed to integrate not only the spring-assisted retractable display of the scanner from the show, but also some LED backlit panels complete with a screen-accurate user interface. Judging by the internal shots of the scanner, it looks like there’s still plenty of room inside to add some more advanced electronics. The next evolution of this prop will surely be to add in a microcontroller and potentially even a real screen to add some more elaborate effects and (relatively) practical functions.

We’ve seen plenty of impressive builds of Star Trek gadgets, arguably bringing the devices much closer to reality than the original show runners ever did. It will be interesting to see if The Orville inspires a new generation of engineers to bring their favorite fictional pieces of kit into the real world.

The Lichtspiel: Not A Simple Child’s Toy.

For his niece’s second birthday, [Stefan] wondered what a toddler would enjoy the most? As it turns out, a box packed with lights, dials and other gadgets to engage and entertain.

For little Alma’s enjoyment, three potentionmeters control a central LED, a row of buttons toggle a paired row of more lights, a rotary encoder to scroll the light pattern of said row left and right, and some sockets to plug a cable into for further lighting effects. Quite a lot to handle, so [Stefan] whipped up a prototype using an Arduino — although he went with an ATmega 328 for the final project — building each part of the project on separate boards and connected with ribbon cables to make any future modifications easier.

[Stefan] attempted to integrate a battery — keeping the Lichtspiel untethered for ease of use — and including a standby feature to preserve battery life. A power bank seemed like a good option to meet the LED’s needed 5V, but whenever the Lichtspiel switched to standby, the power bank would shut off entirely — necessitating the removal of the front plate to disconnect and reconnect the battery every time. The simpler solution was to scrap the idea entirely and use the charging port as a power port instead — much to the delight of his niece who apparently loves plugging it in.

Continue reading “The Lichtspiel: Not A Simple Child’s Toy.”

Terrible RC Transmitter Made Less Terrible

It should probably go without saying that we’ve got nothing against the occasional bout of elaborate troubleshooting and repair, in fact it’s one of the most common things we cover here. As it turns out, people aren’t overly fond of being fleeced, and there are a lot of smart people out there who will put a lot of work in to keep from having to toss a favorite piece of gear into the trash. We can’t fault them for that.

But we have to say, we generally don’t see those kind of elaborate repairs for something brand new. Unfortunately, that’s exactly what [Marek Baczynski] had to do when trying to review the new iRangeX transmitter for his YouTube channel “dronelab”. He found a transmitter that was so poorly designed and constructed that he had to address a laundry list of issues to make the thing halfway tolerable. As you might expect, he’s not suggesting anyone go run and pick this one up.

The biggest problem is a fundamental flaw with how the gimbals are constructed. Due to poorly mated surfaces between the potentiometer and the stick itself, the accuracy of the controller is very low. The potentiometers don’t even return to zero when the sticks are released. Some tape was used to tighten up the connection and make the controller usable, but such poor tolerances are hard to forgive when accurate control is essentially the whole point of the device.

The other issues took a bit more debugging to figure out. The TX made an absolutely terrible screeching sound when turned on, but [Marek] was sure he was hearing a little bit of melody under the din. Putting the signal through the oscilloscope, he was able to confirm his suspicions. As it turns out, the buzzer used in the TX has a built in tone generator that was overriding the intended melody. Switching it out for a basic buzzer fixed the issue. Similarly, an issue where the radio wouldn’t turn on if it was recently turned off was tracked back to a resistor of the wrong value. Putting a higher lower value resistor in its place sorted that out as well.

It’s hard to imagine how this device made it out of the factory with so many wrong or unsuitable components, but here we are. Not that this would be acceptable at any price point, but as [Marek] points out in the video, it isn’t as if this radio is even all that cheap. For nearly $90 USD, it doesn’t seem unreasonable to expect something that actually works.

This isn’t the first time he’s put “cheap” RC hardware through the wringer. We recently covered his efforts to quantify latency in different transmitters. As the RC transmitter world gets increasingly competitive, detailed analysis like these help separate the real gear from the toys.

Continue reading “Terrible RC Transmitter Made Less Terrible”

Geoffrey The Giraffe’s Last Call Of Toys For Hacking

Many of us in the United States frequently browse the shelves of Toys R Us for things to hack on. Sadly that era will soon end with the chain’s closing. In the meantime, the entire store becomes the clearance shelf as they start liquidating inventory. Depending on store, the process may begin as soon as Thursday, March 22. (Warning: video ads on page.)

While not as close to hacker hearts as the dearly departed Radio Shack or Maplin, Toys R Us has provided the hacker community with a rich source of toys we’ve repurposed for our imagination. These toys served various duties including chassis, enclosure, or parts donor. They all had low prices made possible by the high volume, mass market economics that Toys R Us helped build. Sadly it was not able to keep its head above water in the low margin cutthroat competition of retail sales in America.

As resourceful consumers, we will find other project inspirations. Many projects on this site have sourced parts from Amazon. In commercial retail, Target has started popping up in increasing frequency. And no matter where new toys are sold, wait a few years and some fraction will end up at our local thrift store.

We’ll always have some nostalgia for Geoffrey the Giraffe, but toy hacking must go on.

Building A Tricorder Prop Worthy Of Mr Spock

We’ve all been there. You want to assemble a proper Star Trek: The Original Series landing party prop set, but the TOS tricorders you can find on the market are little more than overpriced toys. Imagine the embarrassment of beaming down to Cestus III with a plastic tricorder. The Metrons wouldn’t have even bothered with the trial by combat with such a sorry showing.

Unhappy with the state of Star Trek props, [Dean O] decided to take matters into his own hands. He purchased a TOS tricorder from Diamond Select Toys and set out to modify it into something a bit closer to Starfleet standards. Anything painted metallic silver on the toy was replaced with a machined aluminum duplicate, adding some much needed heft. He even spruced up the controls and display.

To start, [Dean] stripped the tricorder down, separating all of the silver plastic parts and finding aluminum stock that was close enough to the desired dimensions. This ended up being .125″ plate for the sides, and .500″ bars for the horizontal dividers. To make the side panels he placed the original plastic parts over the aluminum, marked the mounting holes with a punch, and used the belt sander to shape them.

[Dean] then put in a more screen accurate Moire disc, and went as far as to get real watch crowns for the buttons (just like the prop used in the show). In a particularly bold move, he even drilled out the center of watch crowns to install plastic light pipes for LED illumination.

Last year we saw a build that crammed a Raspberry Pi into the same Diamond Select tricorder toy to excellent effect. Now somebody just needs to combine both projects and they’ll have the slickest tricorder in the Alpha Quadrant.

Traction Control Gets More Power To The Road For Tot-Sized Lamborghini

We’ve all heard the complaints from oldsters: “Cars used to be so simple that all you needed to fix them was a couple of wrenches and a rag. Now, you need a computer science degree to even pop the hood!” It’s true to some extent, but such complexity is the cost of progress in the name of safety and efficiency. And now it seems this complexity is coming way down-market, with this traction control system for a Power Wheels Lamborghini.

While not exactly an entry-level model from the Power Wheels line of toddler transportation, the pint-sized Lamborghini Aventador [Jason] bought for his son had a few issues. Straight from the factory, its 6-volt drivetrain was a little anemic, with little of the neck-snapping acceleration characteristic of an electric drive. [Jason] opted to replace the existing 6-volt drive with a 12-volt motor and battery while keeping the original 6-volt controller in place. The resulting rat’s nest of relays was unsightly but sufficient to see a four-fold increase in top speed.

With all that raw power sent to only one wheel, though, the Lambo was prone to spinouts. [Jason] countered this with a traction control system using optical encoders on each of the rear wheels. A NodeMCU senses speed differences between the wheels and controls the motor through an H-bridge to limit slipping. As a bonus, a smartphone app can connect to the Node for in-flight telemetry. Check out the build and the car being put through its paces by the young [Mr. Steal Your Girl] in the video below.

The Power Wheels platform is infinitely hackable – from repairs to restorations to enhancements of questionable sanity, it seems like there’s nothing you can’t do with these little electric vehicles.

Continue reading “Traction Control Gets More Power To The Road For Tot-Sized Lamborghini”

RV paintball shooting tank

RC Car Hacked Into Paintball Shooting Tank

What’s more fun, driving RC cars around on rugged terrain, or having a paintball battle? How about doing both at the same time by making an RC controlled, paintball firing tank? [Nate] from the King of Random YouTube channel did just that by mounting a modified paintball gun to a stripped-down RC car, adding an RC trigger to remotely fire the gun, and covering it all in EVA foam armor in the shape of a tank. And then he did it again so that he’d have someone to battle against.

RC car with paintball gun attached

He walks through the full build in the first video below, but here are some things that stood out for us. It took some fiddling to get a servo to pull the gun trigger but how could he remotely control the servo? For that, he took over the car’s RC receiver signal for controlling audio and made it turn on and off the servo instead. We also like his use of aluminum bar. This stuff is available in the hardware section at stores like Home Depot and is easy to cut and bend. You can see it used here for mounting Wimshurst machine parts to a bicycle, and in this hack, [Nate] used it to mount the paintball gun rigidly to the car frame. He did surprise us when he used rivets instead of nuts and bolts to hold the frame together. That’s not something you see often, and it worked great.

As we said, he made two of them. In the second video below, watch the tanks in action as [Nate] and fellow YouTuber [Stuart Edge] have a tank battle in the desert.

Continue reading “RC Car Hacked Into Paintball Shooting Tank”