One of the greatest challenges for a hardware hacker relying only on a bicycle for transport lies in the regular need to carry more than can be slung from the handlebars or on the luggage rack of your trusty steed. One of our favourite YouTube creators in our sphere, [Laura Kampf], has addressed this problem with a trailer for her electric bike made from a pair of second-hand wheelbarrows. She uses their buckets to make a clamshell box, and their wheels alongside a custom steel chassis to make the rest of the trailer.
As always with Laura’s work it’s a delight to watch, with some careful use of the cutting wheel to install hinges and vents in the upper bucket. Finishing touches are a chequer plate top for the trailer and a spare wheel mounted on the back for that extra-rugged look. Experience with wheelbarrow wheels suggests to us that the slightly more expensive ones with ball bearings are worth the investment over the plastic ones, but either way this is a bike trailer that means business.
We don’t see as many bike trailers as we’d like here at Hackaday, and those few we have are old enough to have succumbed to link-rot. Perhaps this project might tempt a few people to try their hand?
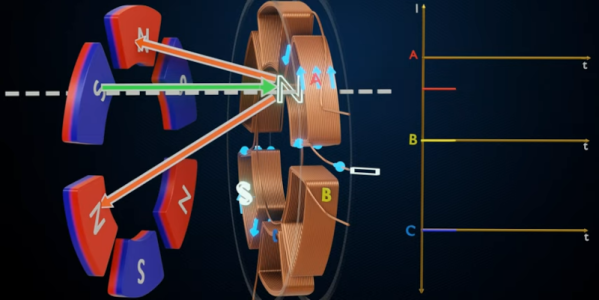
In the everything old is new again folder, [Lesics] has a good overview of axial flux motors. These are promising for electric vehicles, especially aircraft, since the motors should have high torque to weight ratio. The reason this is actually something old is that the early generators built by Faraday were actually of the axial flux type. Soon, though, radial flux generators and motors became the norm.
The simple explanation is that in a radial system, the magnetic flux lines are perpendicular to the axis of rotation. In the axial system, the flux lines are parallel to the axis of rotation. There’s more to it than just that of course, and the video below has nice animations showing how it all works.
While these are not very common, they do exist even today. The Lynch motor, for example, is a type of axial flux motor that dates back to 1979. Usually, the impetus for using an axial flux motor is the ease of construction, but with the right design, they can be quite efficient (up to 96% according to the video).
We’ve seen plenty of PCB motors and most of those are axial in design. Not all of them, though.
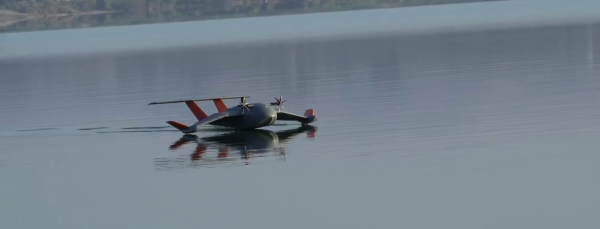
Ground effect vehicles, or ekranoplans, have the advantage of being more efficient than normal aircraft and faster than boats, but so far haven’t been developed beyond experimental prototypes. Fortunately, this doesn’t stop companies from trying, which has led to a collaboration between [ThinkFlight] and [rctestflight] to create a small-scale demonstrator for the Flying Ship Company.
The Flying Ship Company wants to use unmanned electric ekranoplans as high-speed marine cargo carriers that can use existing maritime infrastructure for loading and unloading. For the scale model, [rctestflight] was responsible for the electronics and software, while [ThinkFlight] built the airframe. As with his previous ekranoplan build, [ThinkFlight] designed it in XFLR5, cut the parts from foam using a CNC hot wire cutter (which we still want a better look at), and laminated it with Kevlar for strength. One of the challenges of ground effect vehicles is that the center of pressure will shift rearward as they leave a ground effect, causing them to pitch up. To maintain control when moving into and out of ground effect, these crafts often use a large horizontal stabilizer high up on the tail, out of ground effect.
A major feature of this demonstrator is automatic altitude control using a LIDAR sensor mounted on the bottom. This was developed by [rctestflight] using a simple foam board ekranoplan and [Think Flighs]’s previous airframe, with some custom code added to ArduPilot. It works very well on smooth, calm water, but waves introduce a lot of noise into the LIDAR data. It looks like they were able to overcome this challenge, and completed several successful test flights in calm and rough conditions.
The final product looks good, flies smoothly, and is easy to control since the pilot doesn’t need to worry about pitch or throttle control. It remains to be seen if The Flying Boat will overcome the challenges required to turn it into a successful commercial craft, and we will be following the project closely.
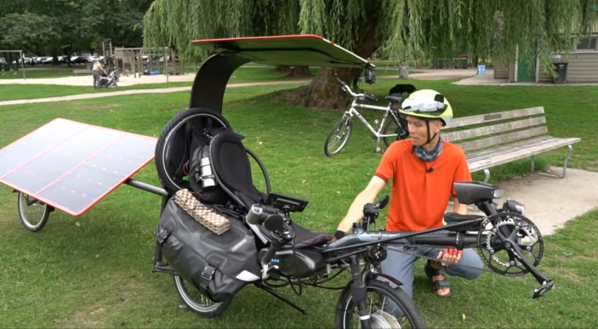
[Mark Havran] is on a mission to complete a solo trip around the world on his bicycle. For such a long and arduous trip, unsupported by anything other than what he and his bike can carry, he has devised a unique vehicle with everything he needs to accomplish his journey. This bike has plenty of things we’ve seen before, such as solar panels and an electric motor, but plenty of things that are completely novel as well.
For such long-distance trips, the preferred style of bike for most is a recumbent. This allows the rider to take a more relaxed position while riding and is much more efficient than an upright bike as well. [Mark]’s bike also uses a hub motor in the front wheel powered by a set of lithium ion battery packs. The bike also utilizes four solar panels with three charge controllers (to reduce the impacts of panel shading) laid out with three of the panels on a trailer and a single panel above the bike to give him some shade while riding. [Mark] also built solar tracking abilities into each of the two arrays, allowing the solar panels to automatically rotate around the trailer and bike to more efficiently capture sunlight than a statically-mounted set of panels would be able to. They can also be manually controlled in case of high winds.
From the video linked below, we can see a number of other added features to the bike that will enable it to make such a long trip. First, he is getting a new motor which has a number of improvements over his old one, which he put over 30,000 kilometers on. Second, there are some safety features that deserve a mention such as his lighting setup borrowed from emergency response vehicles, and even includes a fire extinguisher for any catastrophic electrical failures. Of course, if you aren’t optimizing your recumbent electric bike for long distance there are some other modifications you could make to it as well to improve its off-road abilities. Best of luck, Mark!
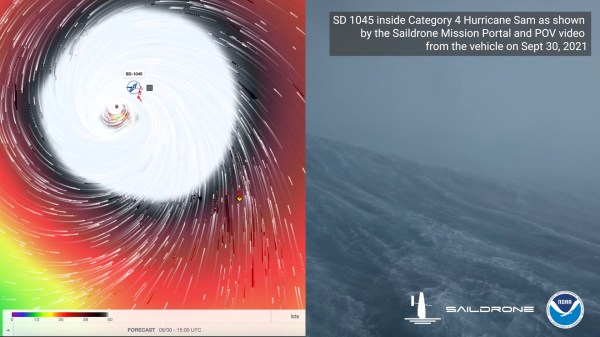
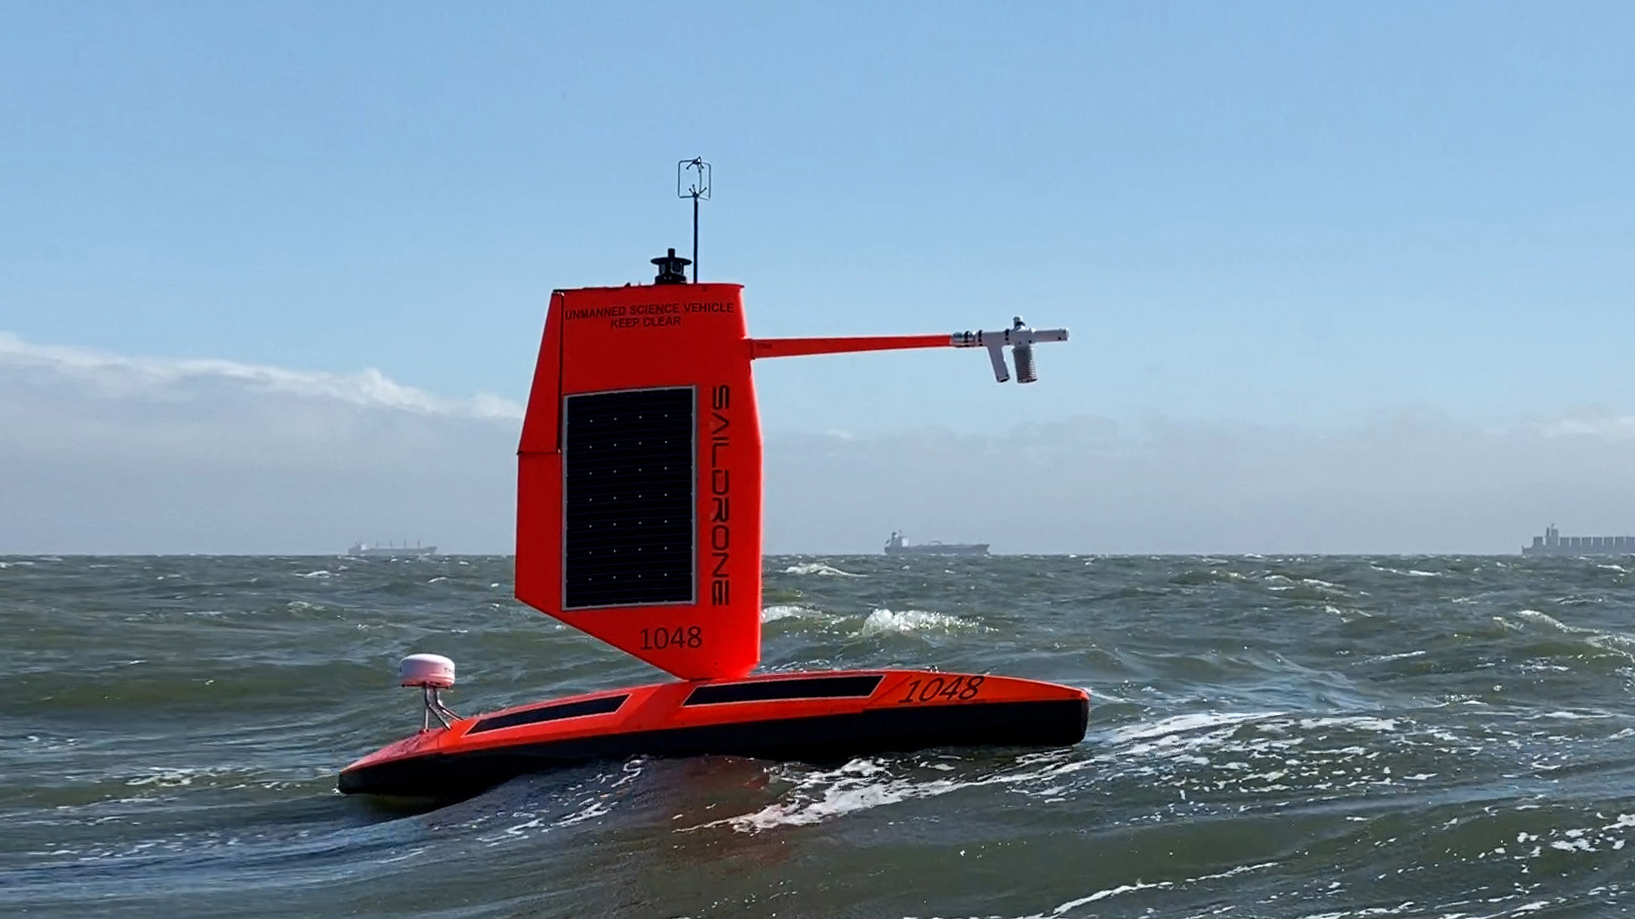
It is unlikely that as a young lad [Richard Jenkins] would had have visions of sailing into the eye of a Category-4 hurricane. Yet that’s exactly what he’s done with the Explorer 1045, an uncrewed sailing vehicle built by his company, Saildrone. If that weren’t enough, footage from the vessel enduring greater than 120 MPH (almost 200 km/h) winds and 50 foot (15 M) waves was posted online the very next day, and you can see it below the break. We’re going to take a quick look at just two of the technologies that made this possible: Advanced sails and satellite communication. Both are visible on Explorer 1045’s sibling 1048 as seen below:
Saildrone Explorer 1048, a sibling of Explorer 1045, each one of five vessels equipped with a “hurricane wing”
The most prominent feature of course is the lack of a traditional sail. You see, from 1999-2009, [Richard Jenkins] was focused on setting the land world speed record for a wind powered vehicle. He set that record at 126.1 mph by maturing existing sail wing technology. [Richard] did away with conventional rigging and added a boom with a control surface on it, much like the fuselage and empennage of a sailplane.
Instead of adjusting rigging, the control surface could be utilized to fly the wing into its optimal position while using very little energy. [Richard] has been able to apply this technology at his company, Saildrone. The 23 foot Explorer vessel and its big brothers are the result.
How is it that the world was treated to the view from inside the eye of a hurricane only a day after the video was recorded? If you look at the stern of the vessel, you can see a domed white cylinder. It is a satellite communication base station called the Thales VesseLINK. Thales is one of the partner companies that built the satellites for the Iridium NEXT fleet, which has 66 operational satellites in Low Earth Orbit. The Iridium Certus service uses its L-Band (1.6 GHz) signal to provide up to 352 kbps of upload speed and 704 kbps down. While not blazing fast, the service is available anywhere in the world and is reliable because it is not prone to rain fade and other weather based interference.
With just these two recent innovations, the Explorer 1045 was able to sail to the eye of a hurricane, record footage and gather data, and then ship it home just hours later. And we’re hardly exploring the tip of the iceberg. More than just sailboat based cameras, these scientific instruments are designed to survive some of the harshest environments on the planet for over a year at a time. They are a marvel of applied engineering, and we’re positive that there are some brilliant hacks hiding under that bright orange exterior.
The steampunk aesthetic can take on many forms, and while pipes, valves, and boilers can look great, having complicated machinery with lots of moving parts really makes your project shine. A team of steampunk enthusiasts over at Tampere Hacklab did this by building a vehicle named Maakrapu. It’s a two-wheeled buggy that looks like it’s being pulled forward by some kind of five-legged creature. The extremely smooth motion of its legs conjures up images of lobsters or crabs (“Maakrapu” means “land crab” in Finnish), and is also reminiscent of Theo Jansen’s Strandbeesten.
The wooden legs are linked together with a metal crankshaft, which was welded together from plasma-cut parts. A steering wheel is included to orient the legs in the direction of travel, although the actual steering of the vehicle is done through differential braking. An earlier version had no propulsion and was meant for downhill riding only, but this latest model comes with an electric motor and a battery, making it actually somewhat useful as an urban runabout.
The video embedded below shows the design of the Maakrapu as well as a long drive from the center of Tampere back to the Hacklab. If you like vehicles with lots of little moving legs like this, check out the Strandbeest Bicycle. For a more literal “steam”-punk experience, try this steam-powered bike.
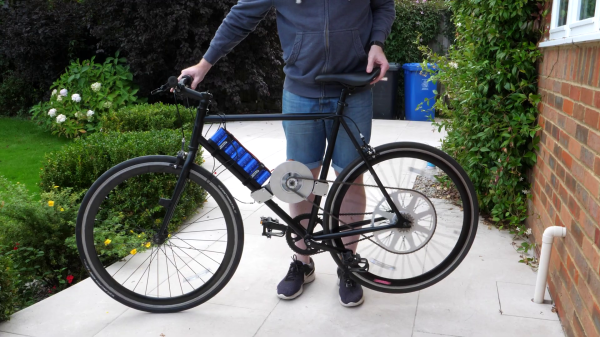
Supercapacitor technology often looks like a revolutionary energy storage technology on the surface, but the actual performance numbers can be rather uninspiring. However, for rapid and repeated charge and discharge cycles, supercaps are hard to beat. [Tom Stanton] wanted to see if supercaps have any practical use on e-bikes, and built a DIY electric motor in the process.
One of the problems with supercaps is the rapid voltage drop during discharge compared to batteries, which can limit the amount of usable energy. In an attempt to get around the voltage limitation, [Tom] built his own axial flux motor for the bike, using 3D printed formers for the coils and an aluminum rotor with embedded magnets. He expected torque to be severely limited, so he also machined a large sprocket for the rear wheel. He built a capacitor bank using six 2.7V 400F supercaps, only equivalent to the capacity of a single AA cell. Although it worked, the total range was only around 100 m at low speed. When he hooked the motor up to a conventional battery, he did find that it was quite usable, if a bit underpowered.
The controller for the DIY motor was not capable of doing regenerative braking, so he fitted the capacitors to another e-bike that does have regenerative braking. Using this feature, he was able to reclaim some power while slowing down or going downhill. Since this type of charging cycling is what supercaps are suited for, it worked, but not nearly to the level of being practical.