Virgin Orbit Readies First Launch

Ever since the Pan Am “Space Clipper” first slid into frame in 1968’s “2001: A Space Odyssey”, the world has been waiting for the day that privately funded spaceflight would become as routine as air travel. Unfortunately, it’s a dream that’s taken a bit longer to become reality than many would have hoped. The loss of Challenger and Columbia were heartbreaking reminders that travel amongst the stars is not for the faint of heart or the ill-equipped, and pushed commercial investment in space back by decades.

Although Pan Am has since folded, we now have a number of companies working hard towards making the dream of commercial spaceflight a reality. SpaceX and Rocket Lab have shown private companies developing and operating their own orbital class vehicles is a concept no longer limited to science fiction. Now that private industry has a foot in the door, more companies are coming forward with their own plans for putting their hardware into orbit. In many ways we’re seeing the dawn of a second Space Race.

If all goes according to plan, a new challenger should be entering the ring in the very near future. Scheduled to perform their first test launch before the end of the year, Virgin Orbit (a spin-off of the passenger carrying Virgin Galactic) promises to deliver small payloads to Earth orbit faster and cheaper than their competitors. But while most other commercial space companies are using fairly traditional booster rockets to do their heavy lifting, Virgin Orbit is opting for a the less common air launched approach. Before Virgin joins the ranks of commercial companies exploring the final frontier, lets take a look at their plan for getting into space and the advantages it offers compared to the competition.

Continue reading “Virgin Orbit Readies First Launch”

The Electric Vehicles Of Electromagnetic Field: The Dustbin 7

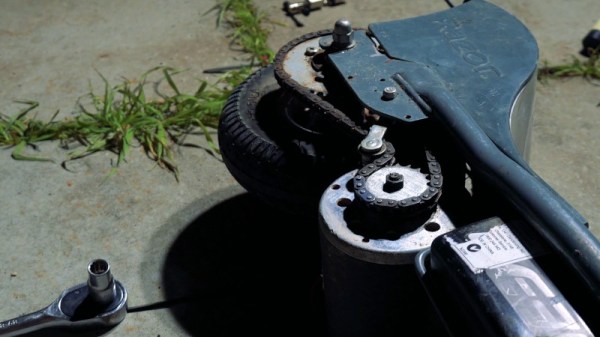
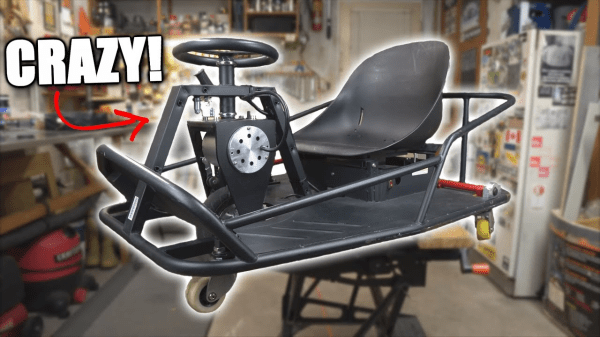
We’re producing an occasional series following some of the miniature electric vehicle builds currently underway at a feverish pace to be ready for the upcoming Electromagnetic Field hacker camp in the UK. Today we’re going down to Somerset, where [Rory] has produced a very serviceable machine he calls the Dustbin 7.

The Hacky Racers series stipulates a £500 budget along with a few rules covering vehicle safety and dimensions, so he had to pick his components carefully to allow enough cash for the pile of LiPo batteries he’d have to buy new in the absence of a convenient surplus source. The motor he picked was a 2kW brushless scooter motor, and that he mated to a 48V e-bike controller

Running gear came from a surplus school project race car but looks suspiciously similar to the wheels you’d see on a typical electric wheelchair. His chassis is welded box section steel, and the bodywork has a classic car feel to it as he comes from a family of Triumph owners. The name “Dustbin 7” comes from the affectionate nickname for the popular pre-war British Austin 7 people’s car.

In use, as you can see below it appears to have a fair turn of speed without displaying too alarming a handling characteristic. If this is the standard of vehicles in the competition then we can imagine that racing will be an exciting spectacle!

For more EMF electric vehicle tomfoolery, take a look at this modified Sinclair C5.

Continue reading “The Electric Vehicles Of Electromagnetic Field: The Dustbin 7”

Electric Bike From The Ground Up

Electric vehicles are getting more traction these days, but this trend is rolling towards us in more ways than just passenger vehicles. More and more bikes are being electrified too, since the cost of batteries has come down and people realize that they can get around town easily without having to pay the exorbitant price to own, fuel, and maintain a car. Of course there are turnkey ebikes, but those don’t interest us much around here. This ebike from [Andy] is a master class in how to build your own ebike.

Due to some health issues, [Andy] needed a little bit of assistance from an electric motor on his bike, but found out that the one he wanted wouldn’t fit his current bike quite right. He bought a frame from eBay with the right dimensions and assembled the bike from scratch. Not only that, but when it was time to put the battery together he sourced individual 18650 cells and built a custom battery for the bike. His build goes into great detail on how to do all of these things, so even if you need a lithium battery for another project this build might be worth a read.

If you’ve never been on an electric bike before, they’re a lot of fun to ride. They’re also extremely economical, and a good project too if you’re looking for an excuse to go buy a kit and get to work. You can get creative with the drivetrain too if you’d like to do something out of the box, such as this bike that was powered by AA batteries and a supercapacitor.

Printed Part Gets Classic Truck Rolling

When working on classic vehicles, and especially when modifying them outside of their stock configurations, things can get expensive. It’s a basic principle in economics: the rarer something is the more money somebody can charge you for it. But if you’ve got the skills and the necessary equipment, you can occasionally save yourself money by custom-fabricating some parts yourself.

After changing the gear ratio in his 1971 Ford F100, [smpstech] needed to adjust his speedometer to compensate. Unfortunately, a commercial speedometer reducer and the new cables to get it hooked up to his dash would have run into the hundreds of dollars, so he decided to try designing and 3D printing his own gearbox. The resulting development process and final product are a perfect example of how even a cheap desktop 3D printer, in the hands of a capable operator, can do a lot more than print out little toy boats.

The gearbox contains a large ring gear driven by a smaller, offset, spur gear. This compact inline package drops the speed of the input shaft by 25.5%, which [smpstech]  mentions is actually a bit slower than necessary, but it does give him some wiggle room if he decides to change his tire size.

Even if you’re not looking for a speedometer reducer for a nearly 50 year old truck, there are some lessons to be learned here in regards to 3D printed car parts. The first version of his gearbox, while functional initially, ended up looking like a deflated balloon after being exposed to the temperatures inside the F100’s engine bay. His cheapo PLA filament, which is probably fine for the aforementioned toy boats, simply wasn’t the right material for the job.

[smpstech] then reprinted the gadget in HTPLA, which needs to be annealed after printing to reach full strength. Usually this would involve a low-temperature bake in the oven, but he found that simmering the parts in a pot of water on the stove gave him better control over the temperature. Not only did the HTPLA version handle the under-hood conditions better, it was also strong enough that he was able to use a standard die on the connections for the speedometer cables to create the threads instead of having to model and print them. Definitely a material to keep an eye on if regular PLA isn’t cutting it for you.

This isn’t the first time we’ve seen 3D printed parts used to get a vintage vehicle back on the road. Building these custom parts would have been possible without a 3D printer, of course, but it’s a good example of how the technology can make these types of repairs faster and easier.

[via /r/functionalprint]

More Suspension Than Necessary

The triangular frame of a traditional mountain bike needs to be the most rigid structure, and a triangle can be a very sturdy shape. So [Colin Furze] throws a spanner in the works, or, in this case, a bunch of springs. The video is below the break, but please try to imagine you are at a party, eyeballing some delicious salsa, yet instead of a tortilla chip, someone hands you a slab of gelatin dessert. The bike is kind of like that.

Anyone who has purchased springs knows there are a lot of options and terminology, such as Newton meters of force, extension, compression, and buckling. There is a learning curve to springs so a simple statement, for example “I want to make a bicycle of springs,” doesn’t have any easy answers. It is a lot like saying, “I want to make a microprocessor out of transistors“. This project starts with springs roughly the diameter of the old bike tubes, and it is a colossal failure. Try using cooked spaghetti noodles to make a bridge.

The first set of custom springs are not up to the task, but the third round produces something rideable. The result seems to be a ridiculous way to exercise your abs and is approximately a training unicycle mated with a boat anchor.

What makes this a hack? The video is as entertaining as anything [Colin] has made, but that does not make it a hack by itself. The hack is that someone asked a ridiculous question, possibly within reach of alcohol, and the answer came by building the stupid thing. A spring-bicycle could have been simulated six ways from Sunday on an old Android phone, but the adventure extracted was worth the cost of doing it in real life.

Continue reading “More Suspension Than Necessary”

Voltage Monitor Relay Is More Than Meets The Eye

Automotive components that have a hidden secondary function are usually limited to cartoons and Michael Bay movies, but this project that [Jesus Echavarria] created for a client is a perhaps as close as we’re likely to get in the near future. The final product certainly looks like a standard automotive relay, but a peek inside the 3D printed case reveals a surprisingly complex little device. It’s still technically a relay, but it uses a PIC microcontroller to decide when it should activate.

[Jesus] was given the task of creating a device that would fit into the relay box of a vehicle, and serve as a battery monitor to fire off at different voltage set points. The client also wanted the ability to configure such things as how long the device would wait before enabling and disabling the alarms once the voltage threshold has been passed. After showing the client an oversize prototype using a PIC16F88 and switching regulator, he got the OK to move on to a smaller and more cost-effective version.

The final hardware makes use of a 78M05 500 mA linear regulator, a PIC16F1824 microcontroller, and a pair of AQY211EH solid state relays. The standard five pin layout used for automotive relays allows the monitor to get power from the vehicle’s battery while providing two output channels that can be switched on and off from the microcontroller. [Jesus] says an agreement with the client prevents him from sharing some elements of the project (like the firmware source code), but he gives enough information that it shouldn’t be too hard to spin up your own version.

With the addition of something like an ESP8266, this could be an easy way to retrofit an older vehicle with “smart” features. As an example, it could potentially allow for controlling the car’s headlights and horn over Wi-Fi. Or you could hack together a theft deterrent system that refuses to power on the starter or fuel pump unless your smartphone enables the relay first.

Quadcopter Hardware Gets Classic Lake Bed Test

You’d be hard pressed to find an aircraft that wasn’t designed and tested without extensive use of simulation. Whether it’s the classic approach of using a scale model in a wind tunnel or more modern techniques such as computational fluid dynamics, a lot of testing happens before any actual hardware gets bolted together. But at some point the real deal needs to get a shakedown flight, and historically a favorite testing ground has been the massive dry lake beds in the Western United States. The weather is always clear, the ground is smooth, and there’s nobody for miles around.

Thanks to [James] and [Tyler] at Propwashed, that same classic lake bed approach to real-world testing has now been brought to the world of high performance quadcopter gear. By mounting a computer controlled thrust stand to the back of their pickup truck and driving through the El Mirage dry lake bed in the Mojave Desert, they were able to conduct realistic tests on how different propellers operate during flight. The data collected provides an interesting illustration of the inverse relationship airspeed has with generated thrust, but also shows that not all props are created equal.

The first post in the series goes over their testing set-up and overall procedure. On a tower in the truck’s bed a EFAW 2407 2500kV motor was mounted on a Series 1520 thrust stand by RCBenchmark. This stand connects to the computer and offers a scripted environment which can be used to not only control the motor but monitor variables like power consumption, RPM, and of course thrust. While there was some thought given to powering the rig from the truck’s electrical system, in the end they used Turnigy 6000mAh 4S battery packs to keep things simple.

A script was written for the thrust stand which would ramp the throttle from 0% up to 70% over 30 seconds, and then hold it at that level for 5 seconds. This script was run when the truck was at a standstill, and then repeated with the truck travelling at increasingly faster speeds up to 90 MPH. This procedure was repeated for each of the 15 props tested, and the resulting data graphed to compare how they performed.

The end result was that lower pitch props with fewer blades seemed to be the best overall performers. This isn’t a huge surprise given what the community has found through trial and error, but it’s always good to have hard data to back up anecdotal findings. There were however a few standout props which performed better at high speeds than others, which might be worth looking into if you’re really trying to push the envelope in terms of airspeed.

As quadcopters (or “drones”, if you must) have exploded in popularity, we’re starting to see more and more research and experimentation done with RC hardware. From a detailed electrical analysis of hobby motors to quantifying the latency of different transmitters.