If we asked you to name Alexander Graham Bell’s greatest invention, you would doubtless say “the telephone”; it’s probably the only one of his many, many inventions most people could bring to mind. If you asked Bell himself, though, he would tell you his greatest invention was the photophone, and if the prolific [Nick Bild] doesn’t agree he’s at least intrigued enough to produce a replica of this 1880-vintage wireless telephone. Yes, 1880. As in, only four years after the telephone was patented.
It obviously did not catch on, and is not the sort of thing that comes to mind when we think “wireless telephone”. In contrast to the RF of the 20th century version, as you might guess from the name the photophone used light– sunlight, to be specific. In the original design, the transmitter was totally passive– a tube with a mirror on one end, mounted to vibrate when someone spoke into the open end of the tube. That was it, aside from the necessary optics to focus sunlight onto said mirror. [Nick Bild] skips this and uses a laser as a handily coherent light source, which was obviously not an option in 1880. As [Nick] points out, if it was, Bell certainly would have made use of it.
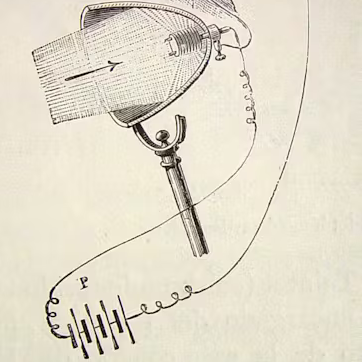
The receiver is only slightly more complex, in that it does have electronic components– a selenium cell in the original, and in [Nick’s] case a modern photoresistor in series with a 10,000 ohm resistor. There’s also an optical difference, with [Nick] opting for a lens to focus the laser light on his photoresistor instead of the parabolic mirror of the original. In both cases vibration of the mirror at the transmitter disrupts line-of-sight with the receiver, creating an AM signal that is easily converted back into sound with an electromagnetic speaker.
The photophone never caught on, for obvious reasons — traditional copper-wire telephones worked beyond line of sight and on cloudy days–but we’re greatful to [Nick] for dredging up the history and for letting us know about it via the tip line. See his video about this project below.
The name [Nick Bild] might look familiar to regular readers. We’ve highlighted a few of his projects on Hackaday before.
Continue reading “Replica Of 1880 Wireless Telephone Is All Mirrors, No Smoke”