We are all used to Fused Deposition Modeling, or FDM, 3D printers. A nozzle squirts molten material under the control of a computer to make 3D objects. And even if they’re usually rather expensive we’re used to seeing printers that use Stereolithography (SLA), in which a light-catalysed liquid monomer is exposed layer-by layer to allow a 3D object to be drawn out. The real objects of desire though are unlikely to grace the average hackspace. Selective Laser Sintering 3D printers use a laser on a bed of powder to solidify a 3D object layer by layer.
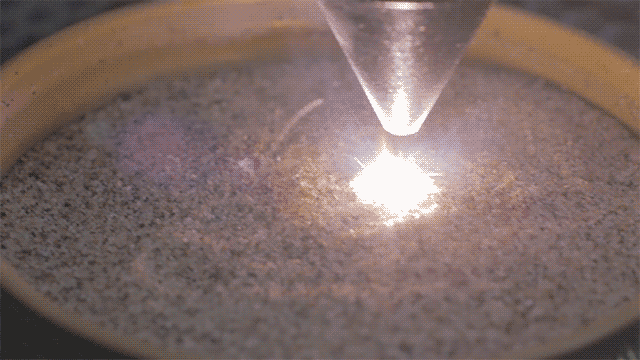
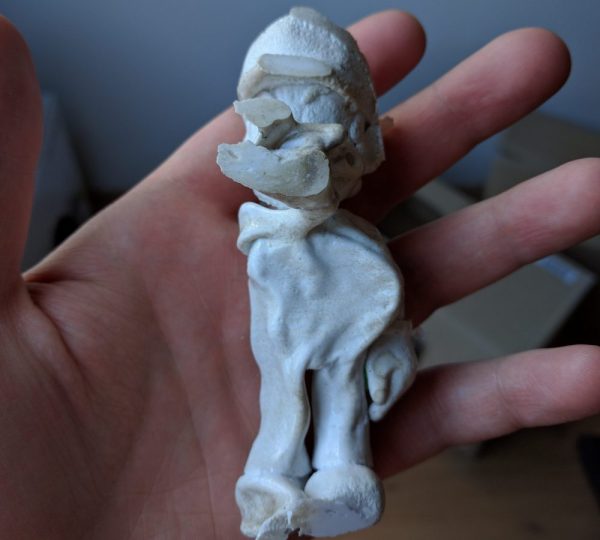
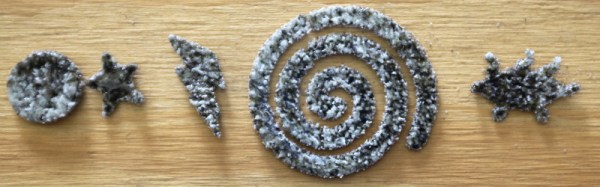
While an SLS printer may be a little beyond most budgets, it turns out that it’s not impossible to experiment with the technology. [William Osman] has an 80 W laser cutter, and he’s been experimenting with it sintering beach sand to create 2D objects. His write-up gives a basic introduction to glassmaking and shows the difference between using sand alone, and using sodium carbonate to reduce the melting point. He produces a few brittle barely sintered tests without it, then an array of shapes including a Flying Spaghetti Monster with it.
The results are more decorative than useful at the moment, however it is entirely possible that the technique could be refined. After all, this is beach sand rather than a carefully selected material, and it is quite possible that a finer and more uniform sand could give better results. He says that he’ll be investigating its use for 3D work in the future.
We’ve put his video of the whole process below the break, complete with worrying faults in home-made laser wiring. It’s worth a watch.