Tracked RC Vehicle Is (Mostly) 3D Printed

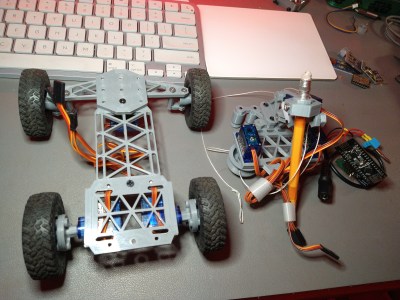
While wheels might seem like a foundational technology, they do have one major flaw: they typically need maintained roads in order to work. Anyone who has experience driving a Jeep or truck off-road likely knows this first-hand. For those with extreme off-road needs the track is often employed. [Let’s Print] is working on perfecting his RC tracked vehicle to take advantage of these perks using little more than 3D printed parts and aluminum stock.

This vehicle doesn’t just include the 3D printed tracks, but an entire 3D printed gearbox and drivetrain to drive them. Each track is driven by its own DC motor coupled to a planetary gearbox to give each plenty of torque to operate in snow or mud. The gearbox is mated to a differential which currently shares a shaft, which means that steering is currently not possible. The original plan was to have each motor drive the tracks independently but a small mistake in the build meant that the shaft needed to be tied together. [Let’s Print] has several options to eventually include steering, including an articulating body or redesigning the drivetrain to be able to separate the shaft.

While this vehicle currently has no wheels in order to improve traction, [Let’s Print] does point out that a pair of wheels could complement this vehicle when he finished the back half of it since wheels have a major advantage over tracks when it comes to steering. A vehicle with both could have the advantages of both, so we’re interested to see where this build eventually goes.

Thanks to [Joonas] for the tip!

Continue reading “Tracked RC Vehicle Is (Mostly) 3D Printed”

Cool Mechanism Day: Two-Way To One-Way

The internal mechanisms that are used in timepieces have always been fascinating to watch, and are often works of art in their own right. You don’t have to live in the Watch Valley in Switzerland to appreciate this art form. The mechanism highlighted here (from Mechanistic on YouTube) is a two-way to one-way geared coupler (video, embedded below) which can be found at the drive spring winding end of a typical mechanical wristwatch.  It is often attached to a heavily eccentrically mounted mass which drives the input gear in either direction, depending upon the motion of the wearer. Just a little regular movement is all that is needed to keep the spring nicely wound, so no forgetting to wind it in the morning hustle!

The idea is beautifully simple; A small sized input gear is driven by the mass, or winder, which drives a larger gear, the centre of which has a one-way clutch, which transmits the torque onwards to the output gear. The input side of the clutch also drives an identical unit, which picks up rotations in the opposite direct, and also drives the same larger output gear. So simple, and watching this super-sized device in operation really gives you an appreciation of how elegant such mechanisms are. Could it be useful in other applications? How about converting wind power to mechanically pump water in remote locations? Let us know your thoughts in the comments down below!

If you want to play with this yourselves, the source is downloadable from cults3d. Do check out some of the author’s other work!

We do like these super-sized mechanism demonstrators around here, like this 3D printed tourbillon, and here’s a little thing about the escapement mechanism that enables all this timekeeping with any accuracy.

Continue reading “Cool Mechanism Day: Two-Way To One-Way”

The 3D Printed Car Tire Rim Finally Hits The Road, Sorta

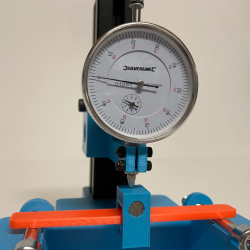
When you think of “car rim” you probably think stamped steel or machined alloy with a sturdy drum to withstand the arduous life of the road, not something 3D printed out of ABS. That would be crazy, right? Not to [Jón Schone] from Proper Printing, who’s recently released an update about his long-term quest to outfit his older sedan with extruded rims.

There were a few initial attempts that didn’t go as well as hoped. The main issue was layer separation as the air pressure would stretch the piece out, forming bubbles. He increased the thickness to the absolute maximum he could. A quick 3D scan of the brake caliper gave him a precise model to make sure he didn’t go too far. He also couldn’t make the rim any bigger to fit a bigger wheel to clear the caliper, as he was already maxing out his impressive 420 mm build volume from his modified Creality printer.

A helpful commenter had suggested using a threaded rod going all the way through the print as a sort of rebar. After initially discounting the idea as the thickness of the rim gets really thin to accommodate the caliper, [Jón] realized that he could bend the rods and attach the two halves that way. Armed with a paper diagram, he cut and bent the rods, inserting them into the new prints. It’s an impressive amount of filament, 2.7 kg of ABS just for one-half of the rim.

It didn’t explode while they inflated the tire and it didn’t explode while they did their best to abuse it in the small alley they had selected for testing. The car was technically no longer road legal, so we appreciate their caution in testing in other locations. In a triumphant but anti-climatic ending, the rim held up to all the abuse they threw at it.

We’ve been following this project for several months now, and are happy to see [Jón] finally bring this one across the finish line. It sounds like there’s still some testing to be done, but on the whole, we’d call the experiment a resounding success.

Continue reading “The 3D Printed Car Tire Rim Finally Hits The Road, Sorta”

Pop Goes The Mechanical Ping Pong Sculpture

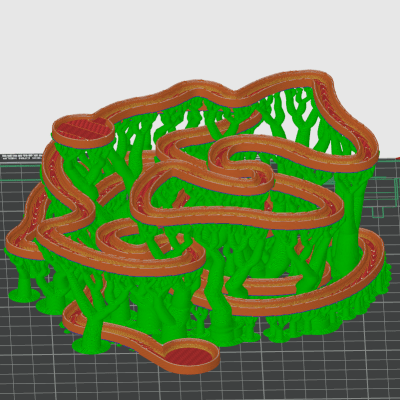
In the waiting rooms of some dentists or doctors, you might have seen a giant metal ball rolling around in a large glass case. While it sure beats looking through those magazines, the sculpture can’t have come cheap. But not all of us want to pay high-end prices for fun toys. As a more cost-effective alternative, [JBV Creative] built an awesome 3D-printed ping pong sculpture.

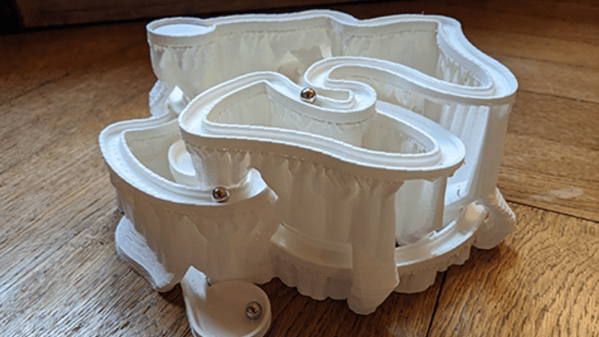
The basic concept is the same as those fancy sculptures: a ball goes up, moves through some sort of impressive range of motion as it makes its way back down, and some sort of drive mechanism pushes it back to repeat the cycle anew. The design of this particular art piece is no different. A ping-pong ball falls down a funnel into a queue where balls are slowly loaded via a 12-way Geneva mechanism. An Archimedes spiral cam charges an elastic band that yeets the ball up and out of the track and sends it sailing through the air and down inside the funnel mentioned earlier. Everything on this sculpture is 3D-printed aside from the rubber bands and the ping pong balls.

What’s tricky about these sorts of things is the precision required both in printing and in design. It needs to run for hundreds if not thousands of hours and make no mistake. Making something work correctly 99% of the time is hard, but that last 1% can be almost as much work as that first 99%. [JBV Creative]’s first attempt had a catapult mechanism and he printed and tried out several scoops, but none gave the trajectory that he was looking for.

[JBV Creative] tried a plunger mechanism, but without a counterbalance weight providing the power, it just didn’t have enough oomph to launch the ball. Luckily, holes were included in the design, so it was relatively easy to adapt what had already been printed to use rubber bands instead. An additional goal was to have no visible fasteners, so everything needed to be mounted from the back. Check it out in action after the break.

It’s an incredible project that took serious thought, dedication, and in [JBV Creative]’s words, plenty of CAD twirling. It’s a great lesson in iterating and experimentation. If your talents are more soldering-based rather than CAD-based, perhaps a circuit sculpture is more up your alley?

Continue reading “Pop Goes The Mechanical Ping Pong Sculpture”

Make Your Own Tabletop Game Organizers With Online Tool

There is a vibrant cottage industry built around selling accessories to improve the storage and organization of tabletop games, but the more DIY-minded will definitely appreciate [Steve Genoud]’s deckinabox tool, which can create either 3D-printable designs, or ones more suited to folded paper or cardstock. Making your own organizer can be as satisfying as it is economical, and [Steve]’s tool aims to make customization simple and easy.

The tool can also generate models for folded paper or cardstock.

The interface for customizing the 3D-printable token tray, for example, begins with a simple filleted receptacle which one can split into additional regions by adding horizontal or vertical separators. The default is to split a given region down the middle, but every dimension can of course be specified.  Things like filleting of edges (for easier token scooping) and other details are all handled automatically. A handy 3D view gives a live render of the design after every change.

[Steve] has a blog post that goes into some added detail about how the tool was made, and it makes heavy use of replicad, [Steve]’s own library for generating browser-based 3D models in code. Intrigued by the idea of generating 3D models programmatically, and want to use it to make your own models? Don’t forget to also check out OpenSCAD; chances are it’s both easier to use and more capable than one might think.

DIY Float Valve For Passive Hydroponics Leverages 3D Printing

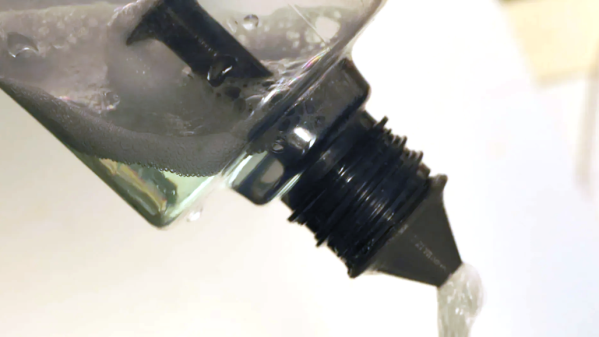
[Billy] has a special interest in passive hydroponics (also known as the Kratky method), which is a way of growing plants in nutrient-rich water that does not circulate. As the plant grows and liquid level drops, only the tips of the roots remain submerged while more and more of the root surface is exposed to oxygen in a harmonious balance. However, “thirsty” plant types (tomatoes, for example) throw off this balance, and the system needs to be modified. To address this, [Billy] designed and printed a passive float valve system that takes care of topping up the reservoir only when needed, without using pumps or any other electrical equipment.

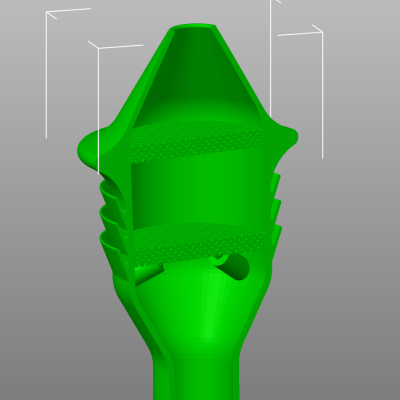
Commercial or industrial float valves are too big to use in his small tanks, which led [Billy] to test dozens of DIY designs. He used everything from plastic water bottles to pipe ends, but nothing quite measured up. With 3D printing, [Billy] was able to create a sealed, lightweight float that exactly matched the housing and tube locations.

A strip of silicone works as a sealing agent.

The way [Billy]’s float valve works is by using a hollow object as a kind of buoyant plug inside a housing. When the water level is high, the buoyant object rises up and presses a strip of silicone against an outlet, preventing water from flowing. If the water level is low, the buoyant plug drops and water is free to flow. With a reservoir of fresh nutrient-rich water placed above the grow tank, gravity takes care of pushing a fresh supply down a tube, so no active pump is needed. Combined with a passive float valve, the system pretty much runs itself.

Watch [Billy] give a tour of his system and valve design in the video embedded below. He’s got a lot of experience when it comes to working with projects involving liquids. Only someone as comfortable as he is would make his own DIY dishwasher.

Continue reading “DIY Float Valve For Passive Hydroponics Leverages 3D Printing”

RC Snowmobile Makes Tracks On Ice

With all the futuristic technology currently at our disposal, it seems a little bizarre that most passenger vehicles are essentially the same thing that they were a century ago. Four wheels, a motor, and some seats would appear to be a difficult formula to beat. But in the 3D printing world where rapid prototyping is the name of the game, some unique vehicle designs have been pushed out especially in the RC world. One of the latest comes to us from [RCLifeOn] in the form of a single-wheeled RC snowmobile.

While not a traditional snowmobile with tracks, this one does share some similarities. It has one drive wheel in the back printed with TPR for flexibility and it also includes studs all along its entire circumference to give it better traction on ice. There are runners in the front made from old ice skates which the vehicle uses for steering, and it’s all tied together with an RC controller and some lithium batteries to handle steering and driving the electric motor.

There were some design flaws in the first iteration of this vehicle, including a very large turning radius, a gearing setup with an unnecessarily high torque, and a frame that was too flexible for the chain drive. [RCLifeOn] was also testing this on a lake which looked like it was just about to revert to a liquid state which made for some interesting video segments of him retrieving the stuck vehicle with a tree branch and string. All in all, we are hopeful for a second revision in the future when some of these issues are hammered out and this one-of-a-kind vehicle can really rip across the frozen wastes not unlike this other interesting snowmobile from a decade ago.

Continue reading “RC Snowmobile Makes Tracks On Ice”