Companies now are looking to secure revenue streams by sneakily locking customers into as many recurring services as possible. Subscription software, OS ecosystems, music streaming, and even food delivery companies all want to lock consumers in to these types of services. Battery-operated power tools are no different as there’s often a cycle of buying tools that fit one’s existing batteries, then buying replacement batteries, ad infinitum. As consumers we might prefer a more open standard but since this is not likely to happen any time soon, at least we can build our own tools that work with our power tool brand of choice like this battery-powered soldering station. Continue reading “Soldering Station Designed Around Batteries”→
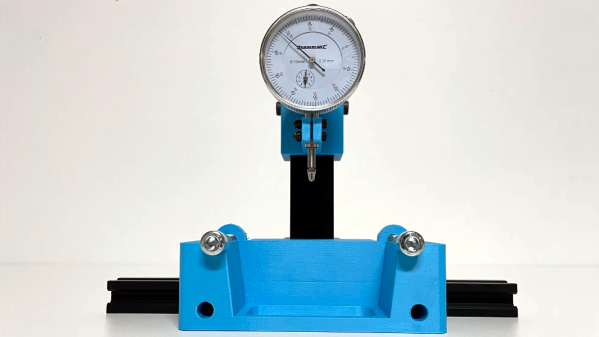
If one is serious about testing the stiffness of materials or parts, there’s nothing quite like doing your own tests. And thanks to [JanTec]’s 3-Point Bending Test rig, there’s no need to reinvent the wheel should one wish to do so.
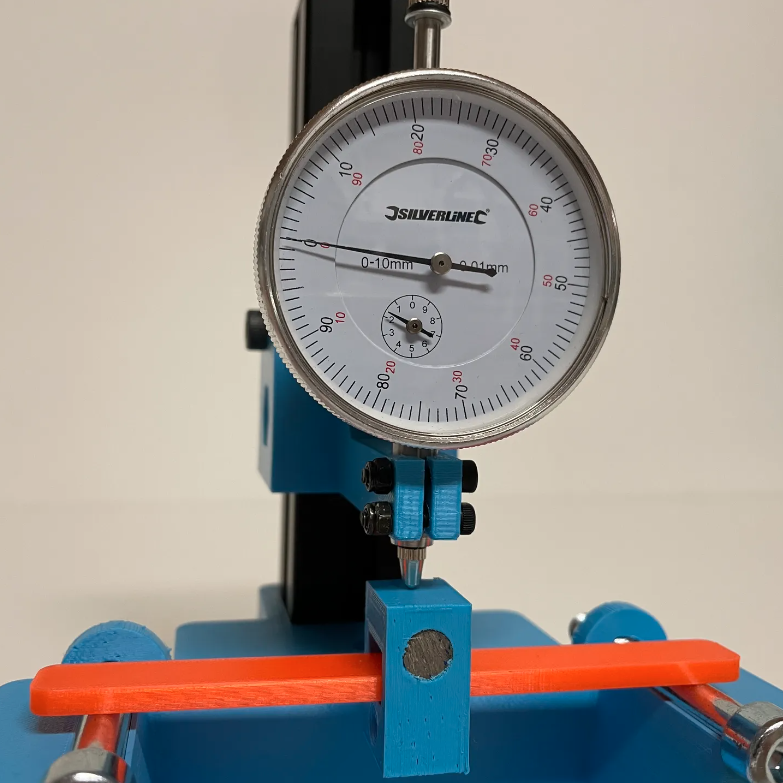
The dial caliper can be mounted to a fixed height, thanks to a section of 3030 T-slot extrusion.
Some simple hardware, a couple spare pieces of 3030 T-slot extrusion, a few 3D-printed parts, and a dial indicator all come together to create a handy rig that will let one get straight to measuring.
Here is how it works: stiffness of a material is measured by placing a sample between two points and applying a known force to the middle of the sample. This will cause the material to bend, and measuring how far a standardized sample deforms under a known amount of force (normally accomplished by a dial indicator) is how one can quantify a material’s stiffness.
When a material talks about its Young’s modulus (E) value, it’s talking about stiffness. A low Young’s modulus means a material is more elastic, a high value means the material is more stiff. (This shouldn’t be confused with strength or toughness, which are more about resistance to non-recoverable deformation, and resistance to fracture, respectively.)
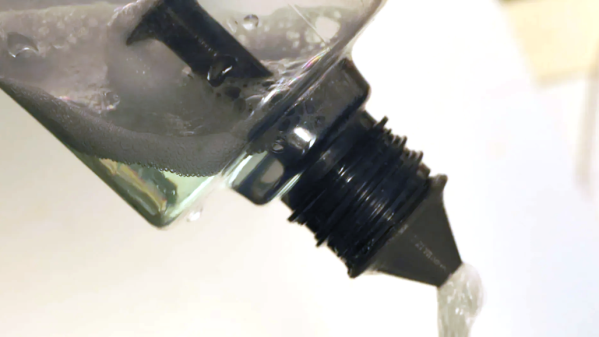
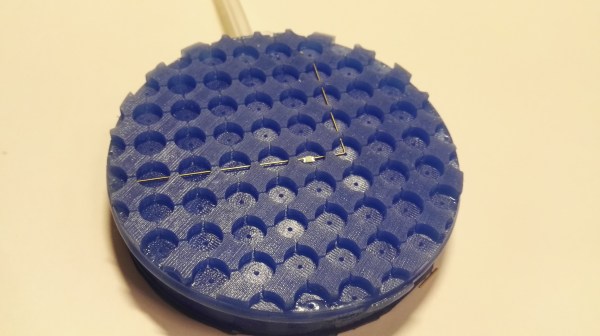
[Jack]’s design for a 3D-printable foaming nozzle works by mixing air with a fluid like liquid soap or hand sanitizer. This mixture gets forced through what looks like layers of fine-mesh sieve and eventually out the end by squeezing the bottle. The nozzle has no moving parts but does have an interesting structure to make this possible.
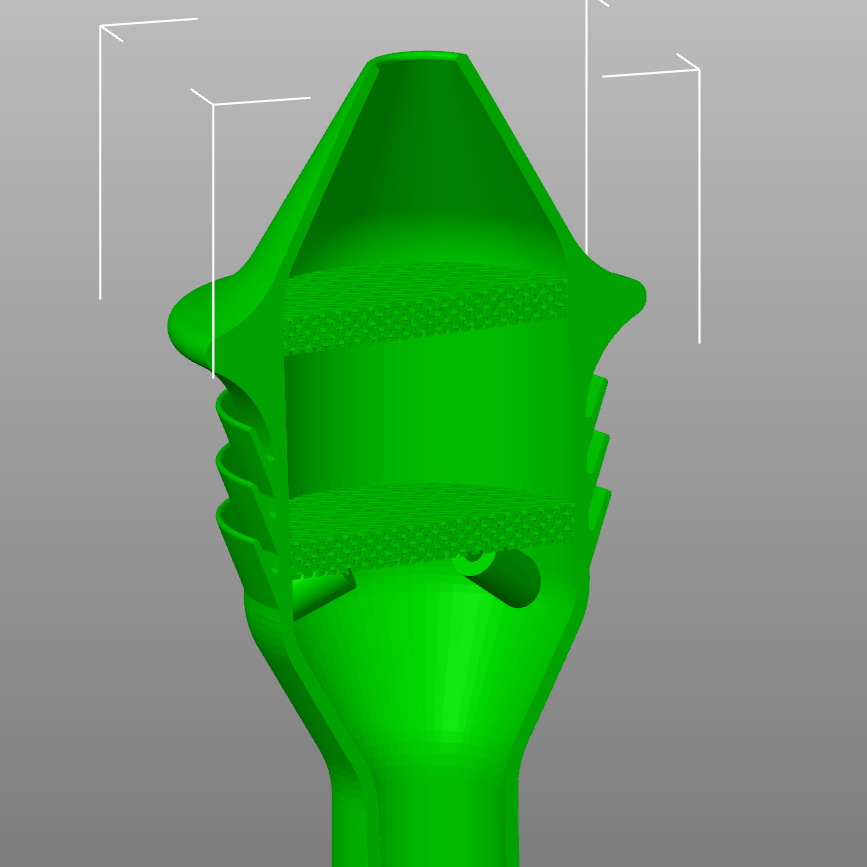
The fine meshes are formed by multiple layers of bridged filament.
Creating a foam with liquid soap requires roughly one part soap to nine parts air. The idea is that the resulting foam makes more efficient use of the liquid soap compared to dispensing an un-lathered goop directly onto one’s hands.
The really neat part is that the fine mesh structure inside the nozzle is created by having the printer stretch multiple layers of filament across the open span on the inside of the model. This is a technique similar to that used for creating bristles on 3D-printed brushes.
While this sort of thing may require a bit of expert tweaking to get the best results, it really showcases the way the fundamentals of how filament printers work. Once one knows the process, it can be exploited to get results that would be impossible elsewhere. Here are a few more examples of that: printing only a wall’s infill to allow airflow, manipulating “vase mode” to create volumes with structural ribs, and embedding a fine fabric mesh (like tulle) as either a fan filter or wearable and flexible armor. Everything’s got edge cases, and clever people can do some pretty neat things with them (when access isn’t restricted, that is.)
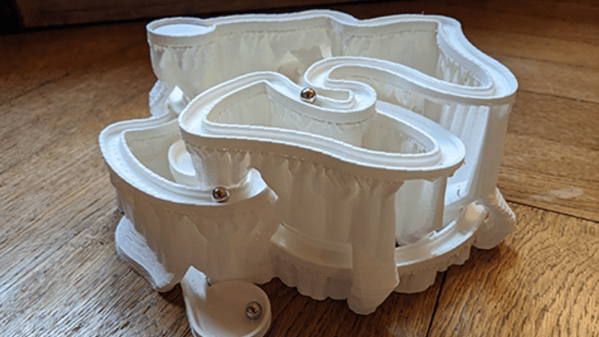
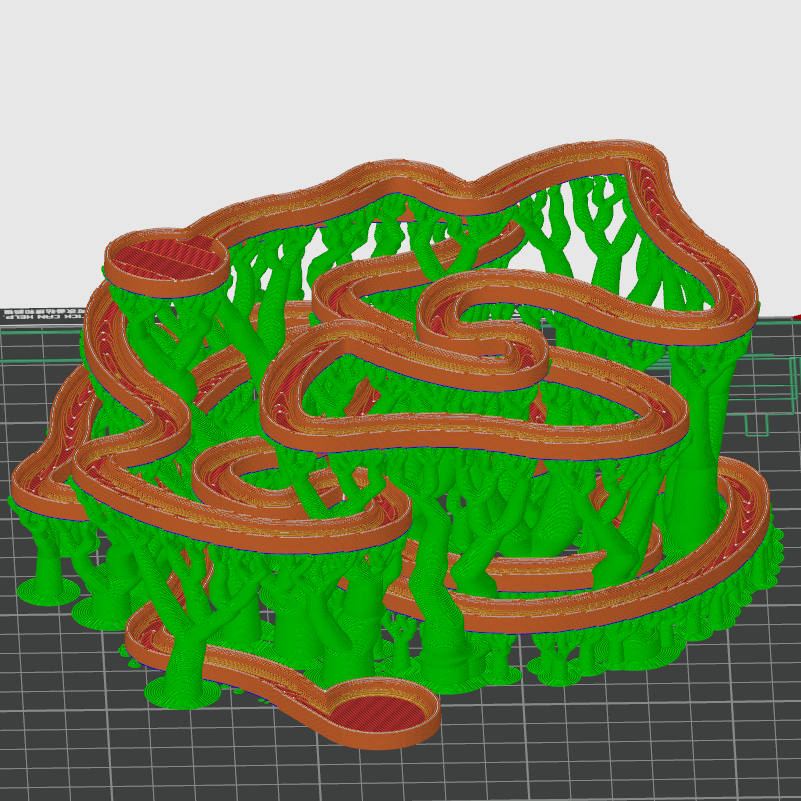
Here’s an idea that [Nephlonor] shared a couple years ago, but is worth keeping in mind because one never knows when it might come in handy. He 3D printed a marble run track and kept the generated tree supports. As you can see in the image above, the track resembles a roller-coaster and the tree supports function as an automatically-generated scaffolding for the whole thing. Clever!
As mentioned, these results are from a couple of years ago; so this idea should work even better nowadays. Tree supports have come a long way since then, and are available in more slicers than just Cura.
Tree supports without an interface layer is easy mode for “generate me some weird-looking scaffolding”
If you’re going to do this, we suggest reducing or eliminating the support interface and distance, which is the spacing between the supports and the rest of the model. The interface makes supports easier to remove, but if one is intending to leave it attached, it makes more sense to have a solid connection.
And while we’re on the topic of misusing supports, we’d like to leave you with one more trick to keep in mind. [Angus] of Maker’s Muse tucked a great idea into one of his videos: print just the support structure, and use it as a stand for oddly-shaped objects. Just set the object itself to zero walls and zero infill, and the printer will generate (and print) only the support structure. Choose an attractive angle, and presto! A display stand that fits the object like a glove.
You can watch a brief video of the marble run embedded below. Again, tree supports both look better and are available in more slicers nowadays. Have you tried this? If so we’d love to hear about it, so let us know in the comments!
We’ve seen some absolutely gorgeous freeform circuit sculptures. There’s a mystic quality to taking what has normally been hidden away for safety and reliability reasons and putting it on display for everyone to see. Of course, creating these unique circuit sculptures takes considerable time and effort. [Inne] created several silicone soldering jigs to help with these tricky joints.
While a vice or helping hands is crucial for many joints, when dealing with tiny SMD components and exacting angles, you need something a little more specialized. Double-sided tape is often recommended, but heat ruins the adhesive and SMD components like to stick to soldering iron tips. Since silicone tends to be heat resistant, it makes a decent material for soldering on. [Inne] uses a city analogy with the cups for soldering called plazas, each with a hole (called a manhole) leading to a foot-switch vacuum pump to keep parts in place. The OpenSCAD code is available on GitHub under a GPLv3 license. It generates a two-part mold that you can cast in A-8/A-15 silicone.
It’s a clever project that makes it far easier to assemble gorgeous circuit sculptures. We love the design and thought that went into it, particularly the naming scheme as we often find appropriately naming variables in OpenSCAD quickly becomes difficult.
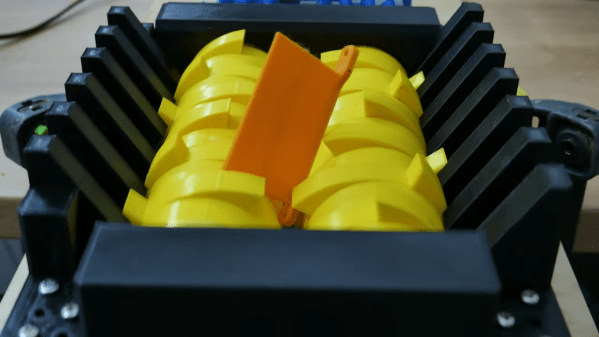
Shredding things isn’t just good for efficiently and securely disposing of them. It’s also very fun, as well. [Joonas] of [Let’s Print] didn’t have a shredder, so set about 3D printing one of their very own.
The design apes that of the big metal trash shredders you’ve probably seen in videos all over the internet. They use a pair of counter-rotating drums with big teeth. As the drums turn, the teeth grab and pull objects into the gap between the drums, where they are duly torn apart into smaller pieces.
In this design, plastic drums are pressed into service as [Joonas] does not have a metal 3D printer. A brushed DC motor is used to drive the shredder. A large multi-stage gearbox is used to step down the motor’s output and provide plenty of torque to do the job.
The shredder gets tested with plenty of amusing garbage. Everything from old vegetables, to paper, and rock-hard old cheeseburgers are put through the machine. It does an able job in all cases, though obviously the plastic drums can’t handle the same kind of jobs as a proper metal shredder. Harder plastics and aluminium cans stall out the shredder, though. The gearbox also tends to strip gears on the tougher stuff. The basic theory is sound, but some upgrades could really make this thing shine.
Is it a device that will see a lot of practical use? Perhaps not. Is it a fun device that would be the star of your next hackerspace Show and Tell? Absolutely. Plus it might be a great way to get rid of lots of those unfinished projects that always clog up your storage areas, too! Video after the break.
Thanks to its high orbital inclination, the International Space Station (ISS) eventually passes over most inhabited parts of the Earth. Like other artificial satellites, though, it’s typically only visible overhead during passes at sunrise and sunset. If you’d like to have an idea of where it is beyond the times that it’s directly visible, take a look at this tabletop ISS tracking system created by [dpelgrift].
The tracker uses an Adafruit Feather inside its enclosure along with a Featherwing ESP32 WiFi co-processor. Together they direct a 3D printed rocket-shaped pointing device up and down by way of a SG90 micro-servo, while a 28BYJ-48 stepper motor provides rotation.
This setup allows it to take in all of the information required to calculate the Station’s current position. The device uses the current latitude and longitude, as well as its compass heading, and combines that with data pulled off the net to calculate which direction it should be pointing.
While it might seem like a novelty or programming challenge, this project could be useful for plenty of people who just want to keep track so they know when to run outside and see the Station pass by, or even by those who use the radio repeater aboard the ISS. The repeater on the ISS and plenty of other satellites are available to amateur radio operators for long-distance VHF and UHF communication like we’ve seen in projects like these.