When you can buy a 3D printer at Aldi, you pretty much know that 3D printing has been reduced to practice. At least for the plastic version of 3D printing; metal printing is another thing entirely. It’s easy to squeeze out a little molten plastic in a controlled fashion, but things get a little more — energetic — when you try to do the same with metal.
At least that’s what [Lucas] has been experiencing with his attempts to build a metal 3D printer over on his Cranktown City YouTube channel. Granted, he set himself up for a challenge from the get-go by seeking to stick a MIG welder onto an Ender 3, a platform that in no way was ready for the abuse it was about to endure. Part 1 of the video series below shows the first attempt, which ended badly for both the printer and for the prints.
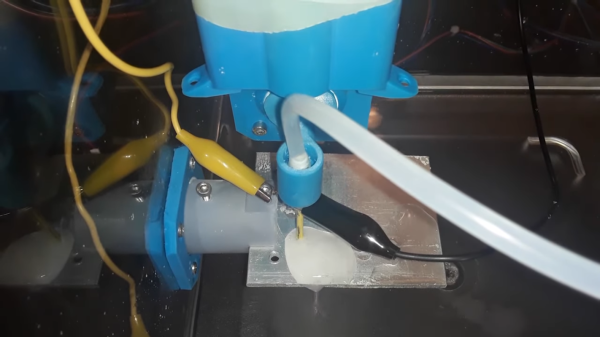
But that first prototype, melted parts notwithstanding, gave [Lucas] enough to go on for the improvements of version 2, including a better build plate, heat shielding for the printer’s tender bits, and a legit MIG welder wire feeder. [Lucas] also built current control in, with a clever non-destructive interface to the welder controls. These improvements were enough to attempt a Benchy print, which started out pretty decent but got a bit droopy toward the end.
As imperfect as it is, the Benchy is a vast improvement over the formless blobs from version 1, and the printer holds quite a bit of promise for the future. One thing you can’t accuse [Lucas] of is giving up on a project too easily; after all, he built a laser cutter from scratch, including the laser tube.
Continue reading “Ender 3 Meets MIG Welder To Make A Metal Benchy — Kind Of”
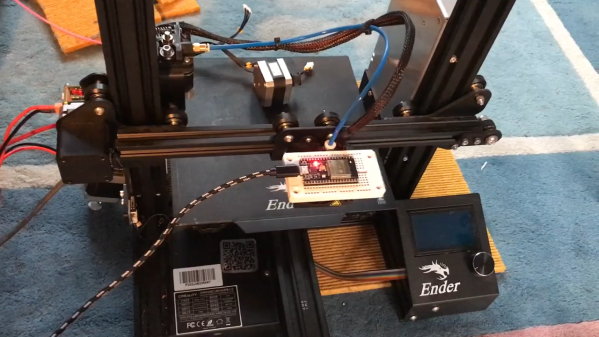
 Granted, based as it is on the gantry of an old 3D printer, [Neumi]’s WiFi scanner has a somewhat limited work envelope. A NodeMCU ESP32 module rides where the printer’s extruder normally resides, and scans through a series of points one centimeter apart. A received signal strength indicator (RSSI) reading is taken from the NodeMCU’s WiFi at each point, and the position and RSSI data for each point are saved to a CSV file. A couple of Python programs then digest the raw data to produce both 2D and 3D scans. The 3D scans are the most revealing — you can actually see a 12.5-cm spacing of signal strength, which corresponds to the wavelength of 2.4-GHz WiFi. The video below shows the data capture process and some of the visualizations.