Ask Hackaday: How Do You Keep The 3D Printer From Becoming EWaste

One thing we sometimes forget in our community is that many of the tecniques and machines that we take for granted are still something close to black magic for many outsiders. Here’s a tip: leave a 3D printer running next time you take a group of visitors round a hackerspace, and watch their reaction as a Benchy slowly emerges from the moving extruder. To us it’s part of the scenery, but to them it’s impossibly futuristic and their minds are blown.

Just because something says it's a Prusa i3, doesn't mean it is a Prusa i3.
Just because something says it’s a Prusa i3, doesn’t mean it is a Prusa i3.

Nearly 15 years after the dawn of the RepRap project we have seen a huge advancement in the capabilities of affordable 3D printers, and now a relatively low three-figure sum will secure a machine from China that will churn out prints whose quality would amaze those early builders. We’ve reached the point in our community at which many people are on their third or fourth printer, and this has brought with it an unexpected side-effect. Where once a hackerspace might have had a single highly prized 3D printer, now it’s not unusual to find a pile of surplus older printers on a shelf. My hackerspaces both have several, and it’s a sight I’ve frequently seen on my travels around others. Perhaps it’s a sign of a technology maturing when it becomes ewaste, and thus it seems affordable 3D printing has matured. Continue reading “Ask Hackaday: How Do You Keep The 3D Printer From Becoming EWaste”

Giant 3D Printer For Giant Projects

Established FDM 3D printers designs generally lead themselves well to being scaled up, as long as you keep frame stiffness, alignment and movement in mind. [Ivan Miranda] needed a big printer for his big projects (videos below), so he built his own i3 style printer with a 800 mm × 500 mm usable print bed and about 500 mm vertical print height.

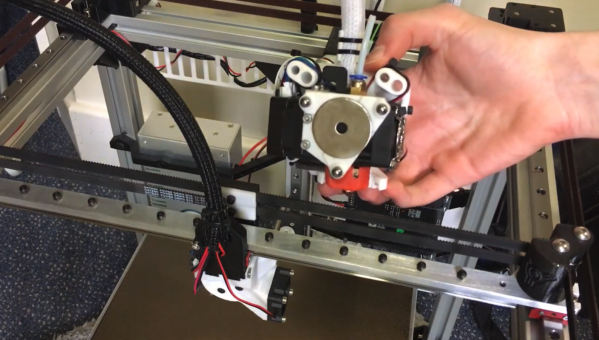
The frame of the new machine is built using 20×20 and 20×40 aluminium V-slot extrusions with some square tubing for reinforcement. To move all the weight, all 3 axes are driven by double NEMA17 steppers, via a DUET3D board with an expansion board for the extra motors. The extruder is the new E3D Hemera with a 0.8 mm nozzle. The print bed is a mirror, on top of the aluminium plate, headed by a large silicone heat pad. The first bed version used a smaller heat pad directly on the back of the mirror, but it heated up unevenly and the mirror ended up cracking. Look out for the ingeniously lightweight and simple cable management to the extruder. When all was said and done he printed a 800 mm long size 66 wrench as a test piece with zero warp, which is pretty good even for PLA. This project is also a perfect example of the power of 3D printing for rapid iterative development, as lot of the printed fittings went through multiple versions.

Although [Ivan] received most of the components for free, a printer like this is still within reach of the rest of us. We look forward to a lot of big prints by [Ivan] in his signature red, like a massive nerf gun and the ridable tank he is currently working on. Continue reading “Giant 3D Printer For Giant Projects”

Humongous 3D Printer Produces Boat And Challenges

We’ve seen some pretty big polymer 3D printers, but nothing quite as big as the University of Maine’s 3D printer with a 22,000 ft³  (623 m³) build volume. It holds the Guinness World Record for the largest polymer 3D printer, and with that size comes some interesting challenges and advantages.

You might have already seen the video of it printing an entire patrol boat hull in a single piece, and would have noticed how it printed at a 45° angle. Due to the sheer weight and thermal mass of the print bead, it cannot bridge more than an inch, since it’ll just sag. A 45° overhang angle is about all it can manage, but since the layers can be tilted at that angle, it ends up being able to print horizontal roofs with no support. A 10 mm nozzle is used and the extruded line ends up being 12.5 mm in diameter with a 5 mm layer height. The boat mentioned above was printed with carbon ABS, but it can reportedly use almost any thermoplastic. It looks like the extruder is a screw extruder from an injection moulding machine, and is likely fed with pellets, which is a lot more practical than filament at this scale. Check out the video below by [Paul Bussiere] who works in the Advanced Structures & Composites Center at the University. He also does a very interesting interview with his boss, [James M. Anderson].

The 45° layer angle is very similar to how some infinite build volume 3D printers work. For something more within the reach of the average hacker, check out the tool changing Jubilee.
Continue reading “Humongous 3D Printer Produces Boat And Challenges”

Multi Material 3D Printing Makes Soft Robot

When you zoom in on a fractal you find it is made of more fractals. Perhaps that helped inspire the Harvard 3D printers that have various arrays of mixing nozzles. In the video below you can see some of the interesting things you can do with an array of mixing nozzles. The coolest, we think, is a little multi-legged robot that uses vacuum to ambulate across the bench. The paper, however, is behind a paywall.

There are really two ideas here. Mixing nozzles are nothing new. Usually, you use them to mimic a printer with two hot ends. That is, you print one material at a time and purge the old filament out when switching to the new filament. This is often simpler than using two heads because with a two head arrangement, both the heads have to be at the same height, you must know the precise offset between the heads, and you generally lose some print space since the right head can’t cross the left head and vice versa. Add more heads, and you multiply those problems. We’ve also seen mixing nozzles provide different colors.

Continue reading “Multi Material 3D Printing Makes Soft Robot”

Robot Vs. Superbug

Working in a university or research laboratory on interesting, complicated problems in the sciences has a romanticized, glorified position in our culture. While the end results are certainly worth celebrating, often the process of new scientific discovery is underwhelming, if not outright tedious. That’s especially true in biology and chemistry, where scaling up sample sizes isn’t easy without a lot of human labor. A research group from Reading University was able to modify a 3D printer to take some of that labor out of the equation, though.

This 3D printer was used essentially as a base, with the printing head removed and replaced with a Raspberry Pi camera. The printer X/Y axes move the camera around to all of the different sample stored in the print bed, which allows the computer attached to the printer to do most of the work that a normal human would have had to do. This allows them to scale up massively and cheaply, presumably with less tedious inputs from a large number of graduate students.

While the group hopes that this method will have wide applicability for any research group handling large samples, their specific area of interest involves researching “superbugs” or microbes which have developed antibiotic resistance. Their recently-published paper states that any field which involves bacterial motility, colony growth, microtitre plates or microfluidic devices could benefit from this 3D printer modification.

A 3D Printer Scratch Built For Your Viewing Pleasure

Today it’s almost always cheaper to buy an imported 3D printer kit than it is to source your own parts and build one yourself. But that doesn’t stop people from doing it anyway. Whether they’re looking for something a bit more solid, or just want to do things their own way, there are still valid reasons to design and build your own machine. Luckily for us in the audience, [Rob Mech] decided to document the build of his custom “LayerFused C201” printer on his YouTube Channel.

If you’ve ever dreamed of taking the plunge and building a 3D printer exactly the way you want, but were never able to manage the time, this seven video series might be the next best thing. Each video takes you through a different step of the construction, from building the frame out of aluminum extrusion all the way to wiring up the endstop switches and the 32-bit SKR v1.3 controller. There’s even a video that introduces the viewer to the concept of a “Frankenstein” printer that uses cobbled together parts just long enough to produce its own final components.

All told, [Rob] says the Bill of Materials for the LayerFused C201 comes to at least $200, but that’s going to take shopping around for the lowest possible prices and potentially even salvaging some components from other machines and projects. Like we said, building a cheap printer is absolutely not the goal here; it’s all about building a printer you want to use. Continue reading “A 3D Printer Scratch Built For Your Viewing Pleasure”

Building A 3D Scanner With A 3D Printer

Using a 3D printer to make high quality parts is a great way to improve the look and appeal of any project. If you want to replicate something exactly, though, you’ll need either a very good set of calipers and a lot of time or a 3D scanner. Using the 3D scanner and the 3D printer go along very well together, especially if you use your 3D printer to build your 3D scanner too.

This project comes to us from [Vojislav] who spent the past two years perfecting this 3D scanner. Using a vast array of 3D printed parts, this build looks professional on every level. It also boasts a Raspberry Pi Zero and a fleet of camera modules, not to mention its own LED lighting. [Vojislav] has provided the printer files and the software needed to run it on the project page. It all runs through command line and python code, but that shouldn’t be a big hurdle.

While there is no video of it in action, it seems like all the parts are there for a solid 3D scanner, provided you have access to a 3D printer that can churn out the parts you’ll need. If you need something larger, there are some other options available as well that really take your photogrammetry skills to the next level.