An Arduino Nano connected to a portable tape recorder

Audio Tape Interface Revives Microcassettes As Storage Medium

In the early 1980s cassette tapes were the standard storage medium for home computer users; readers of a certain age will remember fiddling with audio jacks, tape counters and signal levels, then waiting for several minutes while a program (hopefully) loaded correctly. While most people happily upgraded to much more reliable floppy disks, [Zack Nelson] decided to go back in time and add a suitably classic storage medium to a retrocomputing project, in the form of a cassette interface. The cassette player he had available was a Pearlcorder L400, which uses the smaller microcassette instead of the familiar audio tapes used in your Walkman or boombox.

A microcassette and a computer interface for a tape recorder[Zack] designed the entire thing from the ground up: first he decided to use differential Manchester encoding,  which provides immunity against common disturbances like speed variations (which cause wow and flutter). The data is encoded in the frequency range from 1 kHz to 2 kHz, which suits the bandwidth of the cassette player. Next, he designed the interface between the computer and the tape recorder; built from an op-amp and a comparator with a handful of discrete components, it filters the incoming signal and clips it to provide a clean digital signal to be read out directly by the computer.

The system is demonstrated by hooking it up to an Arduino Nano, which reads out the data stream at about 3000 baud. The noise it makes should bring back memories to anyone brought up with the “PRESS PLAY ON TAPE” message; if it inspires you to make your own, we’re happy to report that full schematics and source code are available. [Zack] is not the first one to make his own cassette interface; we’ve seen a somewhat more complicated analog design before, as well as one based on an FPGA.

A stepper-powered flip clock

Steppers And ESP32 Make This Retro-Modern Flip-Clock Tick

Before LEDs became cheap enough to be ubiquitous, flip-card displays were about the only way to get a digital clock. These entirely electromechanical devices had their own charm, and they have a certain retro cachet these days. Apart from yard sales and thrift stores, though, they’re a bit hard to source — unless you roll your own, of course.

Granted, [David Huang]’s ESP32-based flip clock is worlds apart from the flip cards of the “I Got You, Babe” era. Unfortunately, the video below is all we have to go on to get the story behind this clock, but it’s pretty self-explanatory. [David] started the build by making the flip cards themselves, a process that takes some topological tricks as well as a laser cutter. 3D-printed spools are loaded with the cards, which are then attached to frames that hold a stepper motor and a Hall-effect sensor. The ESP32 drives the steppers via L298N H-bridge drivers, but it’s hard to say if there’s an RTC chip or if the microcontroller is just getting time via an NTP server.

[David] might not be the only one trying to recapture that retro look, but we’ve got to hand it to him — it’s a great look, and it takes a clever maker to not only build a clock like this, but to make a video that explains it all so clearly without a single word of narration.

Continue reading “Steppers And ESP32 Make This Retro-Modern Flip-Clock Tick”

MicroSynth, the business card-sized synthesizer

MicroSynth Mixes All-Analog Fun With A Little Business

While [MicroKits]’ MicroSynth is an all-analog synthesizer that fits on a business card-sized PCB, and he actually does use it to break the ice in business meetings, that’s not really the idea behind this project. Rather, [MicroKits] is keen to get people playing with synths, and what better way than a synth you can build yourself?

There was an ulterior motive behind this project, too: prototyping circuits for a more complete synthesizer. Thus, the design is purposely very simple — no microcontrollers, no logic chips, and not even a 555 to be found. It doesn’t even have buttons; instead, the one-octave keyboard just has interdigitated traces that are bridged by the player’s fingers, forming resistive touchpads. The keyboard interface circuit is clever, too — [MicroKits] uses a pair of op-amps to convert the linear change in resistance across the keyboard to a nearly exponential voltage to drive the synth’s voltage-controlled oscillator (VCO). The video below shows what it can do.

We love projects like these because they show what can be accomplished strictly using analog circuits. We don’t have any problem with other synth designs, mind you — this 555-based dub siren we featured recently was great, too. Continue reading “MicroSynth Mixes All-Analog Fun With A Little Business”

Detect Lightning Strikes With An Arduino

Lightning is a powerful and seemingly mysterious force of nature, capable of releasing huge amounts of energy over relatively short times and striking almost at random. Lightning obeys the laws of physics just like anything else, though, and with a little bit of technology some of its mysteries can be unraveled. For one, it only takes a small radio receiver to detect lightning strikes, and [mircemk] shows us exactly how to do that.

When lightning flashes, it also lights up an incredibly wide spectrum of radio spectrum as well. This build uses an AM radio built into a small integrated circuit to detect some of those radio waves. An Arduino Nano receives the signal from the TA7642 IC and lights up a series of LEDs as it detects strikes in closer and closer proximity to the detector. A white LED flashes when a strike is detected, and some analog circuitry supports an analog galvanometer which moves during lightning strikes as well.

While this project isn’t the first lightning detector we’ve ever seen, it does have significantly more sensitivity than most other homemade offerings. Something like this would be a helpful tool to have for lifeguards at a pool or for a work crew that is often outside, but we also think it’s pretty cool just to have around for its own sake, and three of them networked together would make triangulation of strikes possible too.

Continue reading “Detect Lightning Strikes With An Arduino”

Modern Tape Echo Made Easy

Modern popular music increasingly relies on more and more complicated and intricate equipment and algorithms to generate catchy tunes, but even decades ago this was still the case. The only difference between then and now was that most of the equipment in the past was analog instead of digital. For example, the humble tape echo was originally made by running a loop of magnetic tape over a recording head and then immediately playing it back. Old analog machines from that era are getting harder and harder to find, so [Adam Paul] decided to make his own.

At first, [Adam] planned to use standard cassette tapes in various configurations in order to achieve the desired effect, but this proved to be too cumbersome and he eventually switched his design to using the cassette internals in a custom tape deck. The final design includes a small loop of tape inside of the enclosure with a motor driving a spindle. The tape is passed over a record head, then a read head, and then an erase head in order to achieve the echo sound. All of this is done from inside of the device itself, with 1/4″ jacks provided so that the musician can plug in their instrument of choice just like a standard effects pedal would be configured.

The entire build is designed to be buildable and repairable using readily-available parts as well, which solves the problem of maintaining (or even finding) parts from dedicated tape echo machines from decades ago. We like the sound from the analog device, as well as the fact that it’s still an analog device in a world of otherwise digital substitutes. Much like this magnetic tape-based synthesizer we featured about a year ago.

Continue reading “Modern Tape Echo Made Easy”

Parts Shortage Forces Creativity For This Recursive Clock Of Clocks

We’ve been seeing a lot of metaclocks lately — a digital clock whose display is formed by the sweeping hands of an array of individual analog clocks. They can look fantastic, and we’ve certainly seen some great examples.

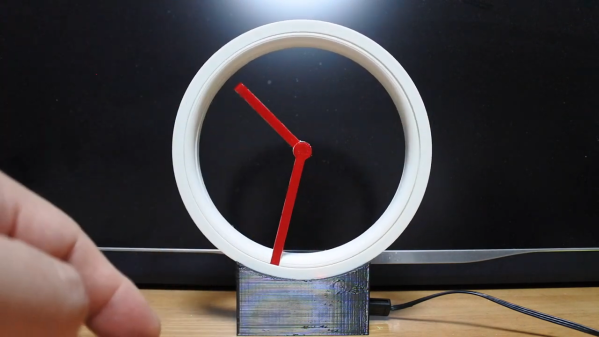
But in this time of supply pinches, it’s not always possible to gather the parts one needs for a full-scale build. Happily, that didn’t stop [Erich Styger] from executing this circular multi-metaclock with only thirteen of his custom dual-shaft stepper analog movements. Normally, his clocks use double that number of movements, which he arranges in a matrix so that the hands can be positioned to form virtual seven-segment displays. By arranging the movements in a circle, the light-pipe hands can mimic an analog clock face, or perform any of [Erich]’s signature “intermezzo” animations, each of which is graceful and engaging to watch. Check out a little of what this charmingly recursive clock has to offer in the video below.

[Erich] could easily have gotten stuck on the original design — he’s been at this metaclock game for a while, after all. The fact that the reduced part count forced him to get creative on the display is the best part of this build, at least to us.

Continue reading “Parts Shortage Forces Creativity For This Recursive Clock Of Clocks”

Analog Camera Goes Digital

The digital camera revolution swept through the world in the early 2000s, and aside from some unique situations and a handful of artists still using film, almost everyone has switched over to digital since then. Unfortunately that means that there’s a lot of high quality film cameras in the world that are gathering dust, but with a few pieces of equipment it’s possible to convert them to digital and get some more use out of them.

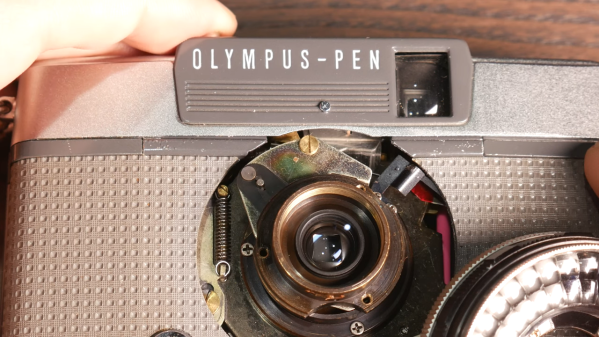
[befinitiv]’s latest project handles this conversion by swapping in a Raspberry Pi Zero where the film cartridge would otherwise be inserted into the camera. The Pi is attached to a 3D-printed case which mimics the shape of the film, and also houses a Pi camera right in front of the location where the film would be exposed. By removing the Pi camera’s lens, this new setup is able to take advantage of the analog camera’s optics instead and is able to capture images of relatively decent quality.

There are some perks of using this setup as well, namely that video can be broadcast to this phone over a wireless connection to a computer via the Raspberry Pi. It’s a pretty interesting build with excellent results for a remarkably low price tag, and it would be pretty straightforward to interface the camera’s shutter and other control dials into the Raspberry Pi to further replicate the action of an old film camera. And, if you enjoy [befinitiv]’s projects of bringing old tech into the modern world, be sure to check out his 80s-era DOS laptop which is able to run a modern Linux installation.

Continue reading “Analog Camera Goes Digital”