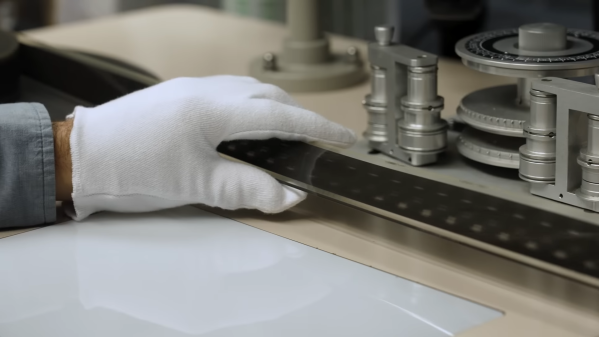
Closeup of a film restorer's hand holding a 35mm film print to check for defects as it goes into a film scanner

35mm Film Restoration Process Explained

For a large part of the 20th century, motion pictures were distributed on nitrate film. Although cheaper for the studios, this film was highly flammable and prone to decay. On top of that, most film prints were simply discarded once they had been through their run at the cinema, so a lot of film history has been lost.

Sometimes, the rolls of projected film would be kept by the projectionist and eventually found by a collector. If the film was too badly damaged to project again, it might still get tossed. Pushing against this tide of decay and destruction are small groups of experts who scan and restore these films for the digital age.

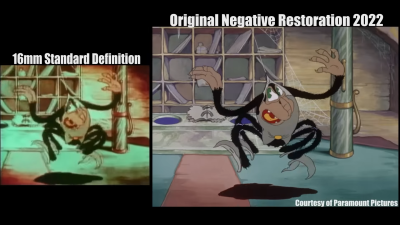
still showing the difference in quality between a 16mm print of a 35mm animated movie and a new scan of the 35mm original
The quality difference between a smaller-format print and the original restored negative can be startling

The process is quite involved – starting with checking every single frame of film by hand and repairing any damaged perforations or splices that could come apart in the scanner. Each frame is then automatically scanned at up to 10K resolution to future-proof the process before being painstakingly digitally cleaned.

The real expertise is in knowing what is damage or dirt, and what is the character of the original film. Especially in stop-motion movies, the subtle changes between frames are really part of the original, so the automatic clean-up tools need to be selectively reined in so as not to lose the charm and art of the film-makers.

The results are quite astonishing and we all have teams like this to thank for protecting our cultural heritage.

If you’re interested in watching the process, then check out the video after the break. If you fancy a go at automatic film digitising yourself (preferably not on unique historical prints!) then we’ve shown projects to do just that in the past.

Thanks to [Cliff Claven] for the tip.

Continue reading “35mm Film Restoration Process Explained”

Taking Pokémon On A Walk

Emulating old computers or video game systems isn’t always about recreating childhood nostalgia or playing classics on hardware that doesn’t exist anymore. A lot of the time it can be an excellent way to learn about the mechanics of programming a video game. Plenty of older titles have available source code that anyone can pour over and modify, and one of those is Pokémon Emerald. This was the first Pokémon game that [Inkbox] played, and he added a few modern features to it with this custom ROM file.

The first thing to add to this game was the ability to have one’s Pokémon follow their character around in the overworld map. This is common in later games, but wasn’t yet a feature when Emerald and Ruby first came out. [Inkbox] needed to import sprites from later games into the Emerald game file, convert their color palettes to match the game’s palette, and then get to work on the mechanics. After everything was finished, the Pokémon not only follow the player around the map but are animated, enter and exit their Pokéballs, and even jump off ledges in a believable, 32-bit way.

One of the great things about older games like these is that they’ve been around long enough to have source code or decompiled code available, they often have plenty of documentation, and the platforms they operate on are well-known by now as well. Pokémon Emerald is not alone in this regard; in fact, there is a huge Game Boy Advance homebrew scene that is not too difficult to get involved in.

Continue reading “Taking Pokémon On A Walk”

A Math Based Personality For Games

We make no apologies for being hardware focused here at Hackaday, but that doesn’t mean we aren’t occasionally impressed by a particularly inspired feat of bit wrangling. For example, [t3ssel8r] has taken a break from his game to discuss his procedural animation system and the beautiful math behind it.

Sometimes, rather than having specific keyframes, games will instead use procedural animation. This means that the position is determined on the fly rather than a predetermined set of positions. Developers can use the combination of IK or FK (inverse or forward kinematics) to solve for rotation and positions of the joints that will place the end at a specific position. Particularly with crawling multi-limb things, it’s pretty easy to put a limb on the ground and keep it there until it’s too far away, pick a new spot, and move it there. It’s simple code to write and looks convincing. It can handle complex terrain and situations with different limb positions.

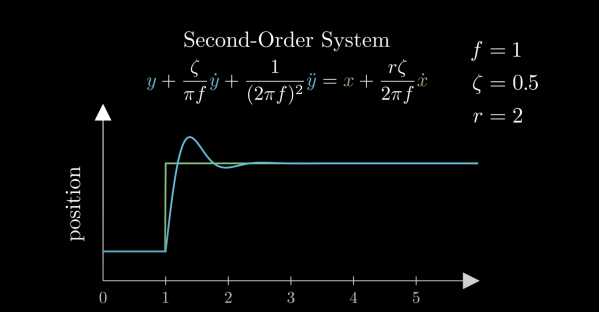
However, it doesn’t offer the chance to inject some life or personality into the movement as keyframes do. [t3ssel8r] goes through the equations and reasoning behind his semi-implicit Euler solver-based system. There are some fantastic explanations in the video, but the short version is that he has three parameters to control the system’s frequency, dampening, and initial response. This allows him to tweak the behavior in a somewhat intuitive manner. One problem is stability; if the timesteps get too large, the position quickly explodes outwards. Using eigenvalues (who ever thought you’d use those) to determine the minimum timestep allows the system to remain stable and take multiple smaller steps when needed or just bound the change temporarily.

If you’re looking for more animation, this blender plugin renders your PCB traces in a new light.

Continue reading “A Math Based Personality For Games”

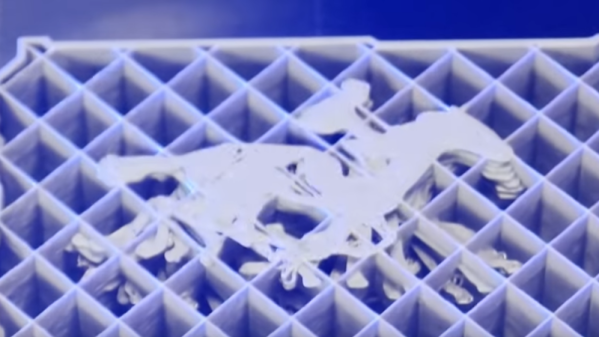
partially finished print, with the embedded animation

Flip Book Animations On The Inside Of 3D Prints

We’ve all seen 3D printed zoetropes, and drawn flip book animations in the corner of notebooks. The shifting, fluid shape of the layers forming on a 3D printer is satisfying. And we all know the joy of hidden, nested objects.

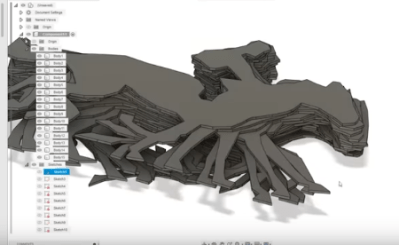
Hackaday alumnus [Caleb Kraft] has a few art pieces that all reflect all these. He’s been making animations by recording a 3D printer. The interesting bit is that his print is made of two objects. An outer one with normal infill that gives a solid form, and a layer cake like inner one with solid infill. It’s documented in this video on YouTube.

CAD model of the stack of frames

There are lots of things to get right.  The outer object needs to print without supports. The thickness of the “layer cake” layers determines the frame rate. I had to wonder how he triggered the shutter  when the head wasn’t in the way.

His first, experimental, piece is the classic ‘bouncing ball’ animation, inside a ball, and his mature piece is Eadward Muybridge’s “The Horse, In Motion” inside a movie camera.

We’ve covered [Caleb Kraft] before, of course. His Moon On A Budget piece is wonderful.  And we’ve covered a number of 3D printer animations. and 3D zoetropes.  We particularly were drawn to this one.

Thanks [jmc] for the tip!

Continue reading “Flip Book Animations On The Inside Of 3D Prints”

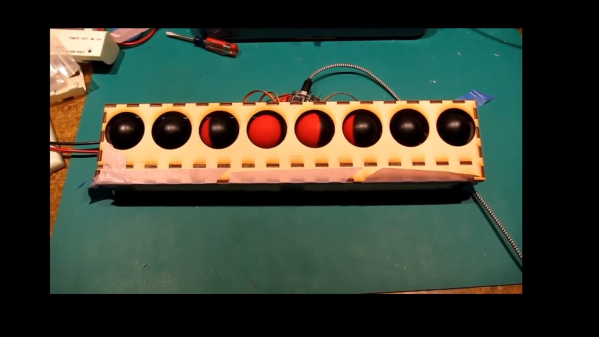
Servo Larson scanner

No LEDs Required For This Servo-Controlled Larson Scanner

All things considered, it’s pretty easy to get one LED is a strip to light up sequentially, and have it bounce back and forth. Turning that simple animation into a real Larson scanner, with smooth transitions and controlled fade-out, is another thing entirely. And forgetting the LEDs altogether and making a servo-operated Larson scanner is — well, let’s just call it an interesting lesson in hardware abstraction.

The Larson scanner, named after famed TV producer Glen A. Larson for his penchant for incorporating it into shows like Battlestar Galactica and Knight Rider, is actually hard to execute in hardware thanks to the fading tail that follows the lead pixel as it dances back and forth across the display. [Eric Gunnerson] decided to make this and other animation effects easier to achieve with Fade, a custom framework for LED animations that runs on an ESP32.

LED animations are fine, but what about servos? Could Fade be modified to support them? This turned out to be a fairly easy mod thanks to Fade’s architecture and [Eric]’s existing support for non-addressable LEDs via PWM signals. And it was even possible to support more than the 16 PWM channels on an ESP32by adding a UDP connection that puts multiple ESP32s under the control of a central microcontroller.

The video below shows [Eric]’s demo of servo support, with an eight-channel electromechanical Larson scanner. Each “pixel” is a painted ping pong ball swinging back and forth on a hobby servo, and the whole thing sounds just about as awful as you’d expect it to. If you squint just right, the effect looks pretty convincing, but that’s hardly the point. The real story here is [Eric]’s thoughtful architecture, which made the mods easier than starting from scratch.

Continue reading “No LEDs Required For This Servo-Controlled Larson Scanner”

Watch Blender Plugin Make Animated PCB Traces (and More)

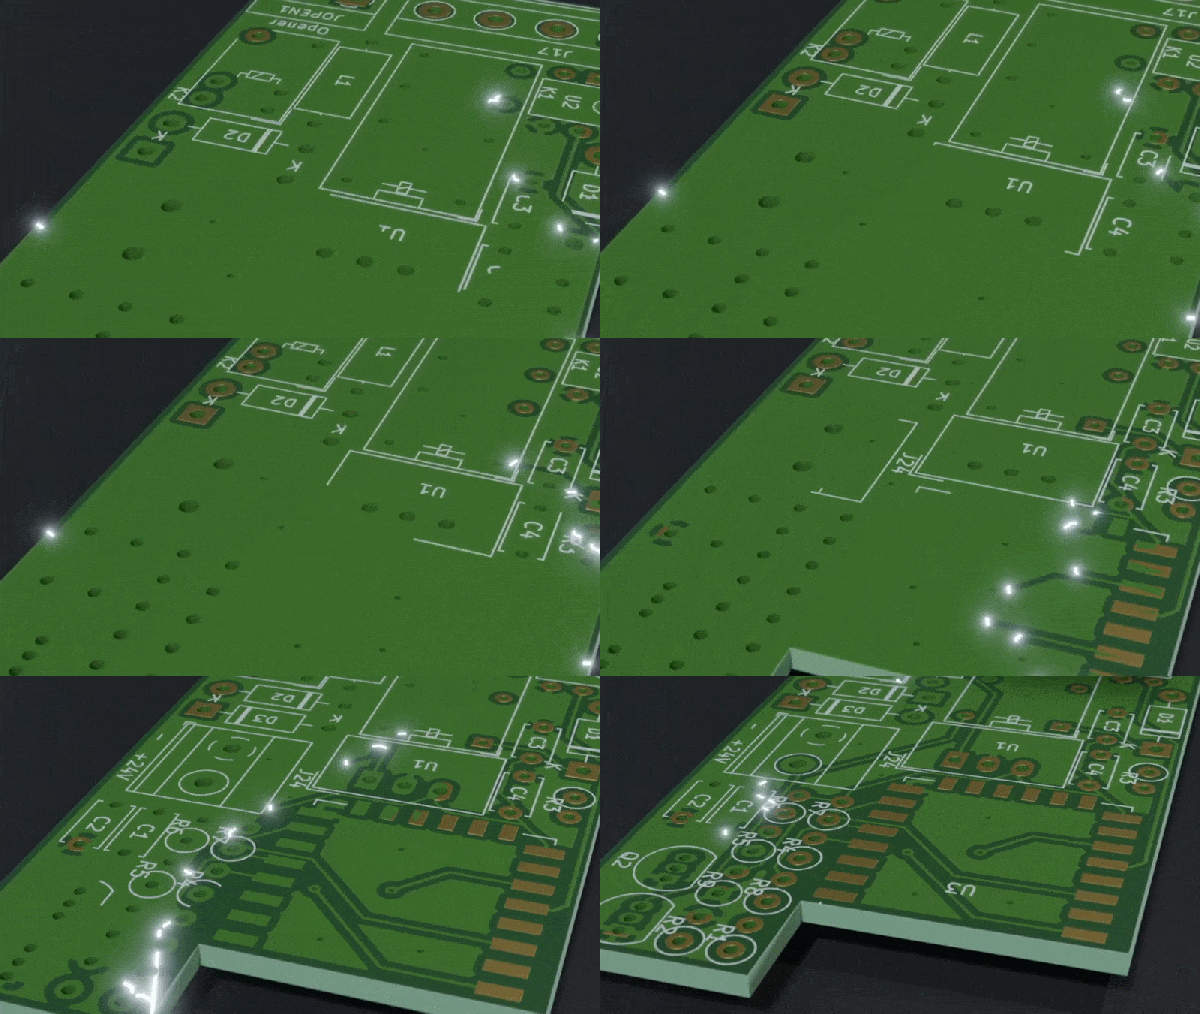
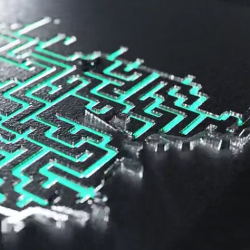
[Staacks]’s Blender plugin to animate growth is behind the sweet animation seen above. It’s an add-on that cleverly makes creating slick growth animations easier when using Blender. It isn’t limited to PCB images either, although they do happen to make an excellent example of the process.

The add-on isn’t limited to animating PCB traces.

The idea is that one begins with an image texture with a structure showing a bunch of paths (like a maze, or traces on a PCB), and that gets used as an input. The plugin then uses a path finding algorithm to determine how these paths could grow from an origin point, and stores the relevant data in the color channels of an output image. That output is further used within Blender as the parameters with which to generate the actual animation, resulting in the neat self-creating PCB seen above. That PCB isn’t just for show, by the way. It’s the PCB for [Staacks]’s smart doorbell project.

Blender is an amazingly comprehensive tool for modeling and animation, and while we’ve covered using it to create high-quality KiCad renders, this kind of animation is really something else.

Here is the GitHub repository for the Blender growth tool if you’re interested in giving it a spin. If you’d like to see more first, watch the video embedded below for a showcase of what it’s capable of, and how it works.

Continue reading “Watch Blender Plugin Make Animated PCB Traces (and More)”

Mastering Stop Motion Through Machine Learning

Stop motion animation is notoriously difficult to pull off well, in large part because it’s a mind-numbingly slow process. Each frame in the final video is a separate photograph, and for each one of those, the characters and props need to be moved the appropriate amount so that the final result looks smooth. You don’t even want to know how long Ben Wyatt spent working on Requiem for a Tuesday, though to be fair, it might still get done before the next Avatar.

But [Nick Bild] thinks his latest project might be able to improve on the classic technique with a dash of artificial intelligence provided by a Jetson Xavier NX. Basically, the Jetson watches the live feed from the camera, and using a hand pose detection model, waits until there’s no human hand in the frame. Once the coast is clear, it takes a shot and then goes back to waiting for the next hands-free opportunity. With the photographs being taken automatically, you’re free to focus on getting your characters moving around in a convincing way.

If it’s still not clicking for you, check out the video below. [Nick] first shows the raw unedited video, which primarily consists of him moving three LEGO figures around, and then the final product produced by his system. All the images of him fiddling with the scene have been automatically trimmed, leaving behind a short animated clip of the characters moving on their own.

Now don’t be fooled, it’s still going to take awhile. By our count, it took two solid minutes of moving around Minifigs to produce just a few seconds of animation. So while we can say its a quicker pace than with traditional stop motion production, it certainly isn’t fast.

Machine learning isn’t the only modern technology that can simplify stop motion production. We’ve seen a few examples of using 3D printed objects instead of manually-adjusted figures. It still takes a long time to print, and of course it eats up a ton of filament, but the mechanical precision of the printed scenes makes for a very clean final result.

Continue reading “Mastering Stop Motion Through Machine Learning”