Tidy POV Display Using The ESP32

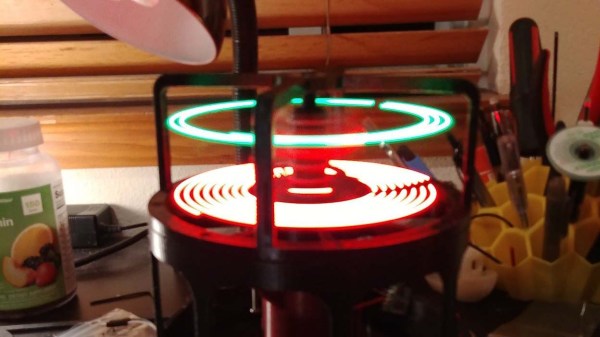
Chinese Youtuber [corebb] presents the second version of his POV display. The earlier version used 5050-sized SMT addressable LEDs, which didn’t give great resolution, so he rev’d the design to use a much higher number (160 to be exact) of APA102 LEDs. These are 2mm on the side, making them a little more difficult to handle, so after some initial solder paste wobbles, he decided to use a contract assembly house to do the tricky bit for him. This failed as they didn’t ‘understand’ the part and placed them the wrong way around! Not to be deterred, he had another go with a modified solder stencil, and eventually got the full strip to light up correctly.

Based on an ESP32 (using the Arduino stack) and SDCard for control, and a LiPo cell charged wirelessly, the build is rather tidy. A couple of hall effect switches are mounted at the start of each of the two arms, presumably lining

Real-time video streaming? Check!

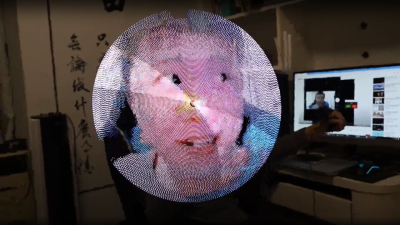
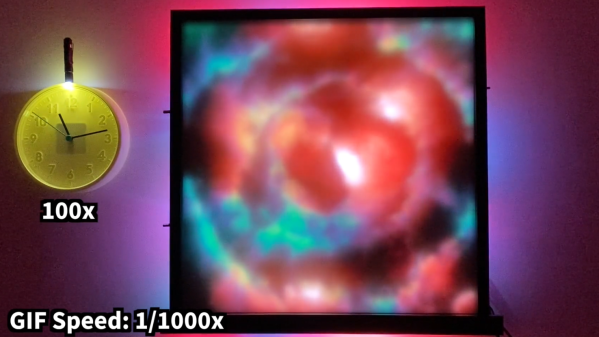
up with a magnet on the case somewhere, although this isn’t clear. The schematic and PCB appear to have been designed with JLCEDA, which is a repackaging of EasyEDA. We can see the attraction with the heavy integration of this with the JLC and LCSC services. It appears that he even managed to get streamed video working — showing a live video from a webcam — which is quite an undertaking to pull off when you think how much processing needs to happen in real-time. As he alludes to in the video, trying to increase the resolution beyond this point is not viable with the processing capability of the ESP32.

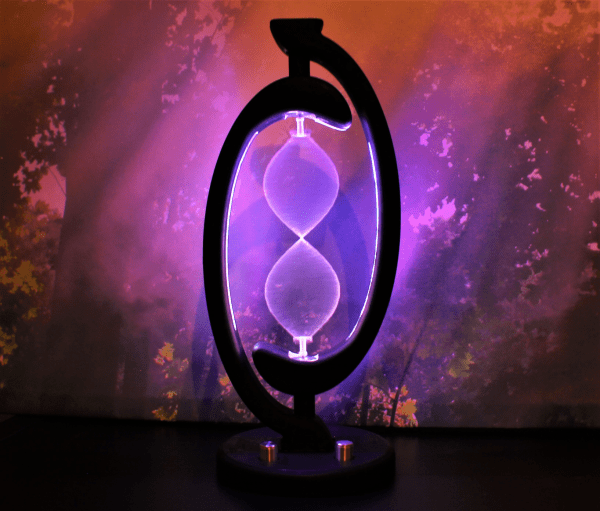
A resin-printed case finishes off the build, with a screw-thread mount added to the rear, to allow typical camera mounts to be used to hold the thing down. A smart move we think.

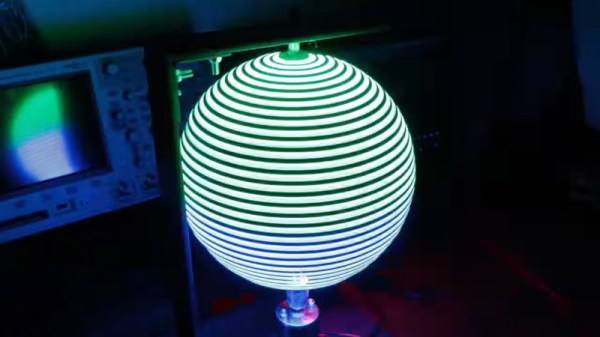
We love POV displays around here, this spherical POV display is especially fabulous, but you don’t need fancy hardware if you have a handy ceiling fan and a bit of protoboard spare.

Continue reading “Tidy POV Display Using The ESP32”

Image showing differences between WS2815 and WS2813 LED strips - the WS2815 strip lighting is more uniform throughout the strip's length.

Teaching You Everything You Might Have Missed About Addressable LEDs

Often, financial motivation results in people writing great educational material for hackers. Such is absolutely the case with this extensive documentation blog post on addressable LEDs by [DeRun]. This article could very be named “Addressable LEDs 101”, and it’s a must-scroll-through for anyone, whether you’re a seasoned hacker, or an artist with hardly any technical background and a desire to put LEDs in your creations.

This blog post is easy to read, painting a complete picture of what you can expect from different addressable LED types, and with apt illustrations to boot. Ever wonder which one of the addressable strips you should get from your retailer of choice, and what are the limitations of any specific type? Or, perhaps, you’d like to know – why is it that a strip with a certain LED controller is suspiciously cheap or expensive? You’re more than welcome to, at least, scroll through and fill into any of your addressable LED knowledge gaps, whether it’s voltage drops, color accuracy differences, data transfer protocol basics or dead LED failsafes.

Addressable LEDs have a special place in our hearts, it’s as if the sun started shining brighter after we’ve discovered them… or, perhaps, it’s all the LEDs we are now able to use. WS2812 is a staple of the addressable LED world, which is why we see them even be targets of both clone manufacturers and patent trolls. However, just like the blog post we highlight today mentions, there’s plenty of other options. Either way do keep coming cover a new addressable LED-related hack, like rewriting their drivers to optimize them, or adding 3.3V compatibility with just a diode.

We thank [Helge] for sharing this with us!

LED Art Reveals Itself In Very Slow Motion

Every bit of film or video you’ve ever seen is a mind trick, an optical illusion of continuous movement based on flashing 24 to 30 slightly different images into your eyes every second. The wetware between your ears can’t deal with all that information individually, so it convinces itself that you’re seeing smooth motion.

But what if you slow down time: dial things back to one frame every 100 seconds, or every 1,000? That’s the idea behind this slow-motion LED art display called, appropriately enough, “Continuum.” It’s the work of [Louis Beaudoin] and it was inspired by the original very-slow-motion movie player and the recent update we featured. But while those players featured e-paper displays for photorealistic images, “Continuum” takes a lower-resolution approach. The display is comprised of four nine HUB75 32×32 RGB LED displays, each with a 5-mm pitch. The resulting 96×96 pixel display fits nicely within an Ikea RIBBA picture frame.

The display is driven by a Teensy 4 and [Louis]’ custom-designed SmartLED Shield that plugs directly into the HUB75s. The rear of the frame is rimmed with APA102 LED strips for an Ambilight-style effect, and the front of the display has a frosted acrylic diffuser. It’s configured to show animated GIFs at anything from 1 frame per second its original framerate to 1,000 seconds per frame times slower, the latter resulting in an image that looks static unless you revisit it sometime later. [Louis] takes full advantage of the Teensy’s processing power to smoothly transition between each pair of frames, and the whole effect is quite wonderful. The video below captures it as best it can, but we imagine this is something best seen in person.

Continue reading “LED Art Reveals Itself In Very Slow Motion”

A Simple POV Globe Via APA102

POV builds come in all shapes and sizes, and typically rely on LEDs for their high light output and fast response time. With this in mind, [Great Scott] grabbed some LED strip off the shelf and set about whipping up a POV LED globe.

Being a spinning POV build, it’s necessary to consider how to get power to the rotating elements. [Great Scott] decided to go with a simple solution of putting a LiPo battery on the rotating assembly, which runs the LEDs and Arduino Nano at the heart of the operation. The LEDs in question are of the APA102 type, making them readily addressable and capable of a wide color gamut. It’s all spun by a simple brushed DC motor, running from a separate supply at the base of the platform.

It’s very much a hacker build, held together with duct tape and zipties. Despite this, it looks tidy when in operation, as all of the important hardware is hidden at the centre of the globe. There’s a bit of a vibration problem, but [Great Scott] reckons this can be fixed with some frame modifications.

We’d love to see the build run some more advanced operations, like a representation of the Earth, or some kind of sun clock. If you’re interested in learning more about POV displays, we’ve got the primer you need. Video after the break.

Continue reading “A Simple POV Globe Via APA102”

Kinetic Lamp Sheds Light On Scientific Principles

This thing right here might be the coolest desk toy since Newton’s Cradle. It’s [Stephen Co]’s latest installment in a line of mesmerizing, zodiac-themed art lamps that started with the water-dancing Aquarius.  All at once, it demonstrates standing waves, persistence of vision, and the stroboscopic effect. And the best part? You can stick your finger in it.

This intriguing lamp is designed to illustrate Pisces, that mythological pair of fish bound by string that represent Aphrodite and her son Eros’ escape from the clutches of Typhon. Here’s what is happening: two 5V DC motors, one running in reverse, are rotating a string at high speeds. The strobing LEDs turn the string into an array of optical illusions depending on the strobing rate, which is controlled with a potentiometer. A second pot sweeps through eleven preset patterns that vary the colors and visual effect. And of course, poking the string will cause interesting interruptions.

The stroboscopic effect hinges on the choice of LED. Those old standby 2812s don’t have a high enough max refresh rate, so [Stephen] sprung for APA102Cs, aka DotStars. Everything is controlled with an Arduino Nano clone. [Stephen] has an active Kickstarter campaign going for Pisces, and one of the rewards is the code and STL files. On the IO page for Pisces, [Stephen] walks us through the cost vs. consumer pricing breakdown.

We love all kinds of lamps around here, from the super-useful to the super-animated.

A Multi-Layered Spin On Persistence Of Vision

By taking advantage of persistence in human vision, we can use modest bits of hardware to create an illusion of a far larger display. We’ve featured many POV projects here, but they are almost always an exploration in two dimensions. [Jamal-Ra-Davis] extends that into the third dimension with his Volumetric POV Display.

Having already built a 6x6x6 LED cube, [Jamal] wanted to make it bigger, but was not a fan of the amount of work it would take to grow the size of a three-dimensional array. To sidestep the exponential increase in effort required, he switched to using persistence of vision by spinning the light source and thereby multiplying its effect.

The current version has six arms stacked vertically, each of which presents eight individually addressable APA102 LEDs. When spinning, those 48 LEDs create a 3D display with an effective resolution of 60x8x6.

We saw an earlier iteration of this project a little over a year ago at Bay Area Maker Faire 2018. (A demo video from that evening can be found below.) It was set aside for a while but has now returned to active development as an entry to Hackaday Prize 2019. [Jamal-Ra-Davis] would like to evolve his prototype into something that can be sold as a kit, and all information has been made public so others can build upon this work.

We’ve seen two-dimensional spinning POV LED display in a toy top, and we’ve also seen some POV projects taking steps into the third dimension. We like where this trend is going.

Continue reading “A Multi-Layered Spin On Persistence Of Vision”

Flashing LEDs With MIDI, Note By Note

Musical keyboards that light up the correct notes to play have long been touted as a quick and easy way to learn how to play. They’re also fun to look at. [Shootingmaker] has developed a similar concept, with a keyboard lookalike, covered in LEDs (Youtube video, embedded below).

The project consists of a PCB, in which the design of the mask imitates the white and black notes of a piano. This makes it look like a keyboard, but as far as we can tell, it doesn’t actually work as one. All the notes are fitted with APA102 addressable LEDs, under the control of a Teensy 3.2 board, operating in USB-MIDI mode. The Teensy receives MIDI data, and then directs the individual LEDs to flash in different colors based on which MIDI channel fired the note.

It’s a fun way to visualise MIDI data, and we think it would be even more fun combined with a basic synthesis engine to make some noise. We suspect it wouldn’t be too hard to integrate the project into an existing instrument, either. Software is available on Github for those interested in replicating the project. You can use MIDI to control neon lights, too.
Continue reading “Flashing LEDs With MIDI, Note By Note”