BornHack Tease Us With Their Badge

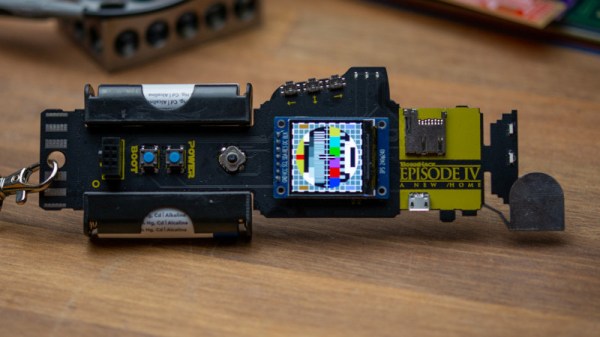
Every August for the past four years, there has been a summer hacker camp on the Danish island of Bornholm, that may be a relatively new kid on the block but is slowly evolving into one of the summer’s essential stop-offs. This year for the first time they are moving to a larger site in an easier-to-reach part of the country, and in the usual build-up to the event they have released a teaser image of their badge.

Of course, you will want to know a little more about it than the picture can convey, so the BornHack folks were kind enough to give us a few more details. At its heart is a Silicon Labs Happy Gecko EFM32HG322F64G microcontroller, the same 25 MHz ultra-low-power ARM Cortex M0+ part that has featured in the previous BornHack offerings. Power comes from a pair of AA cells, and it sports a 240 x 240 pixel colour IPS display and an SD card holder. Connectivity is via USB and an infra-red interface for badge-to-badge communication, and human interface is via a mini joystick switch. Finally, it has a six-way v1.69bis Shitty Addon connector.

By some standards this is a relatively modest offering, but by using an evolution of their hardware from previous years as well as the same proven Geckoboot bootloader they are far more likely to deliver a satisfactory user experience than had they opted for a more ambitious design. We’ll be attending the camp, so we’ll report on the finished article once we have it.

BornHack will run from the 8th to the 15th of August, on the Danish island of Funen. There are a range of tickets still available, from single day visits to the whole week for 1200 DKK (about €160, or $181). Compared to some other events on our community’s calendar, we think that represents a bargain.

Art Meets Science In The Cold Wastelands Of Iceland

Although Iceland is now a popular destination for the day-tripping selfie-seeking Instagrammer who rents a 4×4, drives it off road onto delicate ecosystems and then videos the ensuing rescue when the cops arrive, there are still some genuine photographers prepared to put a huge amount of time and effort into their art. [Dheera Venkatraman] is one of the latter and produces composite photos using a relatively low resolution thermal camera and DIY pan and tilt rig.

Whilst we don’t have the exact details, we think that, since the Seek Reveal Pro camera used has a resolution of 320 x 240, [Dheera] would have had to take at least 20 photos for each panoramic shot. In post processing, the shots were meticulously recombined into stunning landscape photos which are a real inspiration to anybody interested in photography.

If you do go to Iceland you might find the traditional food a little challenging to those not raised upon it, nor would you go there for a stag night as beer is eyewateringly expensive. But if you enjoy uninhabitable, desolate, dramatic landscapes there is a huge range of possibilities for the photographer from rugged, frozen lava flows to extra terrestrial ‘Martian’ crater-scapes, if you know where to find them.

[Dheera’s] blog contains some more information about his Iceland photography and there’s a Github repsoitory too. And if you cant afford a $699 Seek Reveal Pro, maybe try building one yourself.

High-Tech Alms Collection With The ESP32

In an ideal world, shop space, tools, and components would be free. But until we get to that Star Trek utopia, hackerspaces will have to rely on donations from the community to help stay afloat. While asking for money, at least you can have some fun with it if you design and build an Internet-connected donation box.

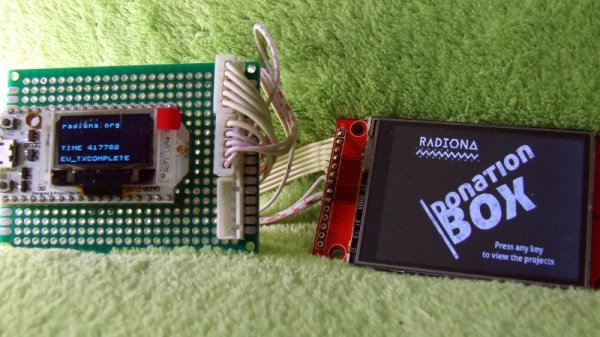
Or at least that’s how [Goran Mahovlic] handled it for the Radiona hackerspace in Zagreb, Croatia. Not content with just cutting a slit in the top of a shoe box, he came up with a physical donation system that’s not only more informative for those donating, but more organized for those collecting the funds.

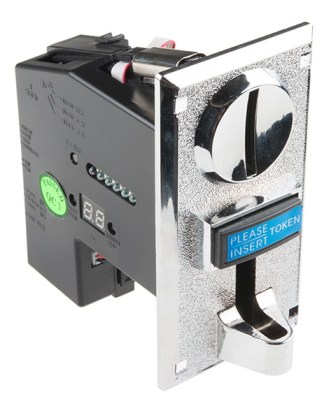
The key is a arcade-style programmable coin acceptor from SparkFun. When connected to a microcontroller, this allows the box to keep a running tally on how much money has been inserted. With the use of a RFM96 LoRa module, it can even report on the current haul while remaining mobile; perfect for when the hackerspace has events outside of their home base.

But counting quarters is hardly a task befitting a powerful microcontroller like the ESP32. So [Goran] gave the chip something to do in its spare time by adding a couple of buttons and an LCD. This allows the user to scroll through a list of various projects that are looking for donations, and decide which one they want to financially support. When the donation box counts how much money has been inserted, it records which project its been earmarked for.

Of course, if you’d rather the free market do its thing, we’ve seen this same coin acceptor used to build a locker-sized vending machine. Or if you’re feeling crafty, you could always try your hand at building one with cardboard.

Continue reading “High-Tech Alms Collection With The ESP32”

A Fruity Approach To CNC Design

[Frank Howarth] found himself in need of a lamp for his dining room. Being of the maker persuasion, store-bought simply wouldn’t do. With a serious wood shop at his disposal, [Frank] took a trip down to the supermarket for inspiration.

Having picked out a particularly well-formed starfruit for his project, [Frank] didn’t want to spend an inordinately long time attempting to recreate the organic lumps and bumps in modelling software, Instead, Meshroom was used to create a model through photogrammetry. After several failed attempts, success was achieved by using a textured rotating table as a background, with the starfruit painted in matte grey and a final dusting of black speckle. This gave the software enough visual cues to accurately model the fruit’s geometry.

With a 3D model to hand, Fusion Slicer was then used to generate a model that could be constructed out of flat lasercut pieces. The cutting outlines were then generated and passed to Rhino for final tweaking. With everything ready, parts were cut out of plywood and a small mockup of a potential lamp design was created. [Frank] is currently workshopping the design with the inhabitants of the dining room, prior to the final build.

Photogrammetry and modern CAD tools make working with natural forms quick and easy. We’ve also seen the technology used for other purposes too, with [Eric Strebel] providing a great example on how to use it for reverse engineering.

The starfruit tag on Hackaday is pretty sparse, so if you’ve got a project, let us know. Video after the break.

Continue reading “A Fruity Approach To CNC Design”

3D Printed Prosthesis Reads Your Mind, Sees With Its Hand

Hobbyist electronics and robotics are getting cheaper and easier to build as time moves on, and one advantage of that is the possibility of affordable prosthetics. A great example is this transhumeral prosthesis from [Duy], his entry for this year’s Hackaday Prize.

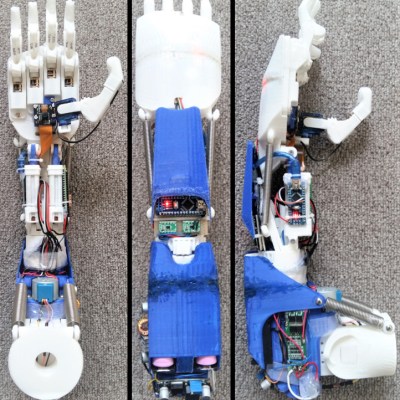
Side views of the 3D printed prosthesis arm.With ten degrees of freedom, including individual fingers, two axes for the thumb and enough wrist movement for the hand to wave with, this is already a pretty impressive robotics build in and of itself. The features don’t stop there however. The entire prosthesis is modular and can be used in different configurations, and it’s all 3D printed for ease of customization and manufacturing. Along with the myoelectric sensor which is how these prostheses are usually controlled, [Duy] also designed the hand to be controlled with computer vision and brain-controlled interfaces.

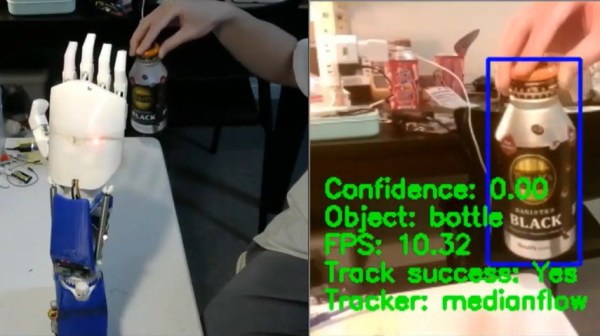
The palm of the hand has a camera embedded in it, and by passing that feed through CV software the hand can recognize and track objects the user moves it close to. This makes it easier to grab onto them, since the different gripping patterns required for each object can be programmed into the Raspberry Pi controlling the actuators. Because the alpha-wave BCI may not offer enough discernment for a full range of movement of each finger, this is where computer aid can help the prosthesis feel more natural to the user.

We’ve seen a fair amount of creative custom prostheses here, like this one which uses AI to allow the user to play music with it, and this one which gives its user a tattoo machine for an appendage.

Continue reading “3D Printed Prosthesis Reads Your Mind, Sees With Its Hand”

Tuning Into Atomic Radio: Quantum Technique Unlocks Laser-Based Radio Reception

The basic technology of radio hasn’t changed much since an Italian marquis first blasted telegraph messages across the Atlantic using a souped-up spark plug and a couple of coils of wire. Then as now, receiving radio waves relies on antennas of just the right shape and size to use the energy in the radio waves to induce a current that can be amplified, filtered, and demodulated, and changed into an audio waveform.

That basic equation may be set to change soon, though, as direct receivers made from an exotic phase of matter are developed and commercialized. Atomic radio, which does not rely on the trappings of traditional radio receivers, is poised to open a new window on the RF spectrum, one that is less subject to interference, takes up less space, and has much broader bandwidth than current receiver technologies. And surprisingly, it relies on just a small cloud of gas and a couple of lasers to work.

Continue reading “Tuning Into Atomic Radio: Quantum Technique Unlocks Laser-Based Radio Reception”

Flashing LEDs With MIDI, Note By Note

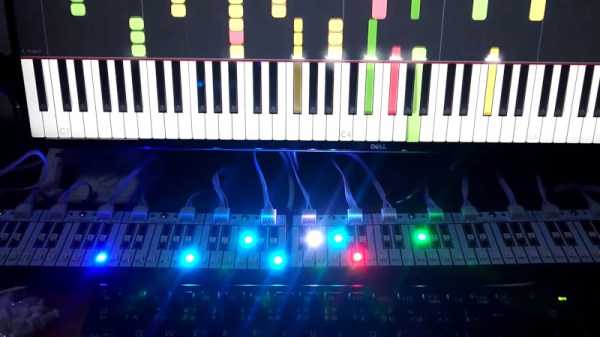
Musical keyboards that light up the correct notes to play have long been touted as a quick and easy way to learn how to play. They’re also fun to look at. [Shootingmaker] has developed a similar concept, with a keyboard lookalike, covered in LEDs (Youtube video, embedded below).

The project consists of a PCB, in which the design of the mask imitates the white and black notes of a piano. This makes it look like a keyboard, but as far as we can tell, it doesn’t actually work as one. All the notes are fitted with APA102 addressable LEDs, under the control of a Teensy 3.2 board, operating in USB-MIDI mode. The Teensy receives MIDI data, and then directs the individual LEDs to flash in different colors based on which MIDI channel fired the note.

It’s a fun way to visualise MIDI data, and we think it would be even more fun combined with a basic synthesis engine to make some noise. We suspect it wouldn’t be too hard to integrate the project into an existing instrument, either. Software is available on Github for those interested in replicating the project. You can use MIDI to control neon lights, too.
Continue reading “Flashing LEDs With MIDI, Note By Note”