Software Shortcut Keyboard Registers Many Macros

[FabroLabs Technologies] is an industrial designer who uses several creative-type software programs in a given day. Unfortunately, they all have slightly different shortcut schemes, and trying to remember all the different modifiers is a waste of time better spent elsewhere.

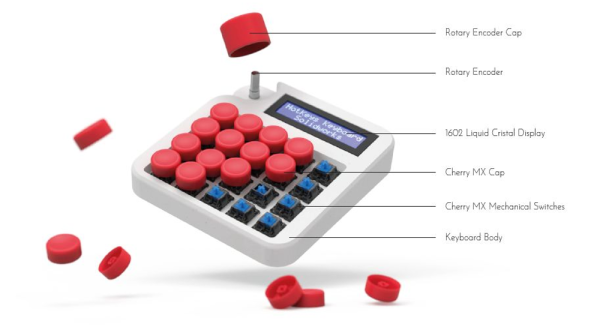
This lovely little macro keyboard is every bit as useful as it is cool looking. Spinning the rotary encoder cycles through a menu of programs on the 16×2 LCD, and the key map just updates automatically for the chosen program. At the heart of this build is an Arduino Pro Micro and 20 of the loudest key switches ever made — Cherry MX blues. We like that it manages to look like toy cash register and a serious peripheral all at once — it probably has something to do with those way-cool circular keycaps that were made on a resin printer.

We’re glad that [FabroLabs] laid down such a comprehensive and open build guide during the process of making this macro keyboard. The average hacker can learn a lot from industrial designers who show their work. Remember the time [Eric Strebel] showed us all how to improve our foam board design game?

Custom Reddit Keyboard Only Needs One Hand

Sometimes you might want to browse your favorite social media site while eating a sandwich, or throwing darts, or fending off an attacker with a sword. You know, normal things that might occupy only one of your hands. If you’ve ever found yourself in such a situation, then this custom Reddit keyboard could be for you.

Built by [jangxx], this little board is about as simple as it gets. Even if you aren’t looking for a way to browse /r/cooking while practicing your single-handed egg cracking technique, the same principles could be used to quickly throw together a macro keyboard for whatever your particular needs might be.

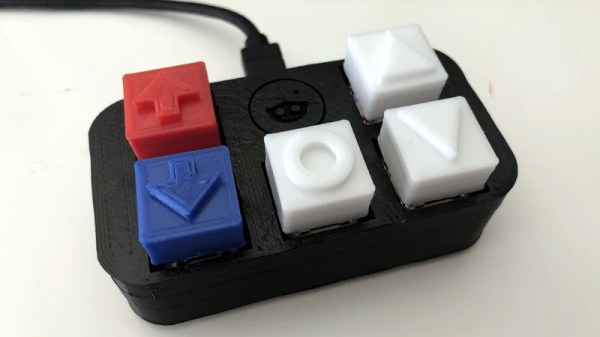
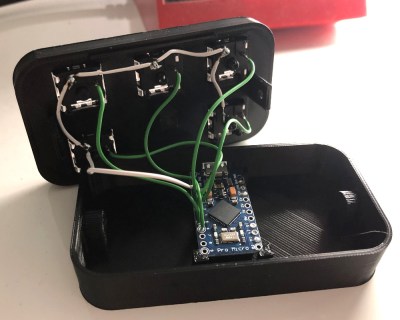
Inside the 3D printed enclosure is nothing more exotic than an Arduino Pro Micro and five Cherry MX Red switches. The switches have been wired directly to the GPIO pins on the Arduino, and a simple Sketch takes care of the rest. [jangxx] has written the code in such a way that you can easily define the mapping of USB HID keys to physical switches right at the top of the file, making it easy to reuse for your own purposes.

As simple as this project is, we really like the trouble that [jangxx] went through on the 3D printed key caps. The white up and down arrows allow you to navigate through the posts, and the center key selects the one you want to view. Since it’s for Reddit, naturally the red and blue buttons for rapid voting. When you want to go back to the list of posts, just hit the center button again.

Back in 2011 we saw a dedicated Reddit voting peripheral, but we think the addition of simple navigation keys makes this project a bit more compelling. Incidentally, if you can think of any other reason you might want a one-handed keyboard for browsing Reddit…we definitely don’t want to hear about it.

Custom Tibia Keyboard For A Leg Up In The Game

[Elite Worm] wrote in to tell us about a cool little keyboard designed to make playing a certain game a whole lot easier. One of the ways you can move your character is with the numpad in directional mode plus Control and Shift, but those are too far apart to drive blindly with one hand. This is all the motivation [Elite Worm] needed to build a custom keyboard with only the essentials.

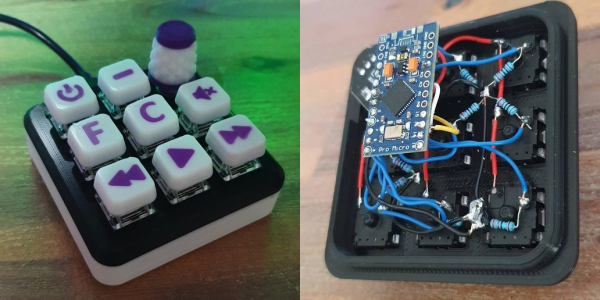
The keyboard is controlled by an Arduino Pro Micro, which is fairly standard for this type of build — it’s usually that or a Teensy. [Elite Worm] used Cherry MX browns for a nice tactile feel, and added LEDs for a purple-white under-glow. We love the way the printed keycaps turned out, and are impressed because tolerances are notoriously tight for those fruity switch stems.

Starting to think of a few uses for a small custom keypad? This thing is wide open, and [Elite Worm] will even send you the PCB files if you ask nicely. See if you can get past the break without your mouse, and check out the build video while you wait.

Want more flexibility? Just use more switches! Continue reading “Custom Tibia Keyboard For A Leg Up In The Game”

Micro Macro Keyboard Makes A Major Difference

Media keyboards are nice in theory. But in practice they never have all the keys you want, and they almost always have a few you don’t. Sure, you could maybe reassign the ones you don’t use, but then the caps are wrong, and it’s a whole thing. So really, the only winning move is to make a micro macro keyboard as [littleSilvr] did to make all your shortcuts one-button accessible.

This lovely input has an Arduino Pro Micro for a brain, and Gateron browns for brawn. That knob there is a rotary encoder, not a potentiometer, because endless volume knob twiddling is just so much nicer. In case you’re wondering, those shortcuts open Fusion 360 and Cura, but we’re still not sure what the hyphen does.

Can we talk about those keycaps, though? [littleSilvr] used [Make Anything]’s process of of printing in multi-color with a single extruder. The technique involves building a vector for each color, each of which gets its own STL file. Then you add retraction as you go up through the layers, slow the print speed, change filament colors while the nozzle and bed are still warm, and voila, a vibrant canvas of colors.

If you don’t have a printer and you don’t mind a bit of compromise on the number of inputs, try basing your build on an existing input, like an old rotary telephone dialer.

Via r/duino

An Arduino Pro Micro With USB-C

USB-C versus USB Micro connectors are turning into one of the holy wars of our time. Rather than be left on the wrong side of the divide [Stefan S] has come up with his own USB-C version of of an Arduino Pro Micro to avoid having to always find a different cable.

Home made Arduinos come in all shapes and sizes from the conventional to the adventurous, and from the pictures it seems that this one is firmly in the former camp. The USB-C is present in connector form alone as the device is only capable of talking at the much slower speed of the ATMEGA32U4 processor, but having the newer connector should at least make cabling more accessible.

This is one of the most practical Arduino clones we’ve ever seen, but one of our other favourites is also a bit impractical.

Force Sensitive Resistor Takes The Pain Out Of Bed Leveling

How do you know if your 3D printer bed is levelled? Oh, don’t worry – you’ll know. Without a level bed, filament won’t stick properly to the build surface and you’ll run into all sorts of other problems. Knowing how tricky it can be to get the bed just right, [Antzy] built a tool to help.

The device, which he calls the FS-Touch, is based around an Arduino Pro Micro fitted with a force sensitive resistor. This allows the distance between the bed and nozzle to be measured based on the force read by the resistor when placed in between the two.

Using the tool is simple. First, the bed is brought roughly into alignment using the typical paper method. Then, a reading is taken from one corner of the bed, and the measurement saved for reference. The other corners can then be set to the same level, with the aid of LEDs to guide the user in which direction to turn the adjustment knobs.

Measuring force in this way has the potential of being more repeatable than the somewhat difficult paper method. It promises to ease the task for users that may be struggling to get their bed in proper shape. Of course, automated bed levelling makes things even easier again. Video after the break.

Continue reading “Force Sensitive Resistor Takes The Pain Out Of Bed Leveling”

Arduino Provides Hands-Free Focus For Digital Inspection Scope

With surface-mount technology pushing the size of components ever smaller, even the most eagle-eyed among us needs some kind of optical assistance to do PCB work. Lots of microscopes have digital cameras too, which can be a big help – unless the camera fights you.

Faced with a camera whose idea of autofocus targets on didn’t quite coincide with his, [Scott M. Baker] took matters into his own hands – foot, actually – by replacing mouse inputs to the camera with an outboard controller. His particular camera’s autofocus can be turned off, but only via mouse clicks on the camera’s GUI. That’s disruptive while soldering, so [Scott] used an Arduino Pro Micro and a small keypad to mimic the mouse movements needed to control the camera.

At the press of a key, the Arduino forces the mouse cursor up to the top left corner of the screen, pulls down the camera menu, and steps down the proper distance to toggle autofocus. The controller can also run the manual focus in and out or to take a screenshot. There’s even a footswitch that forces the camera to refocus if the field of view changes. It looks really handy, and as usual [Scott] provides a great walkthrough in the video below.

Like it or not, if shrinking technology doesn’t force you into the microscope market, entropy will. If you’re looking for a buyer’s guide to microscopes, you could do worse than [Shahriar]’s roundup of digital USB scopes. Or perhaps you’d prefer to dumpster dive for yours.

Continue reading “Arduino Provides Hands-Free Focus For Digital Inspection Scope”