Kickstarter and its ilk seem like the Wild West when it comes to claims of being “The world’s most (Insert feature here) device!” It does add something special when you can truly say you have the world record for a device though, and [MellBell Electronics] are currently running a Kickstarter claiming the worlds smallest Arduino compatible board called Pico.
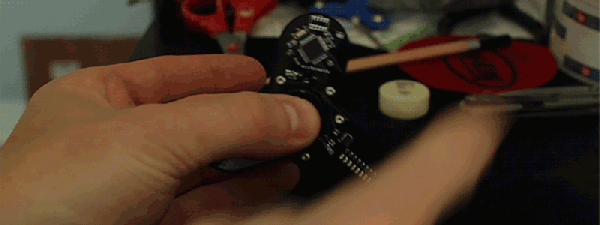
We don’t want to knock them too much, they seem like a legit Kickstarter campaign who have at time of writing doubled their goal, but after watching their promo video, checking out their Kickstarter, and around a couple of minutes research, their claim of being the world’s smallest Arduino-compatible board seems to have been debunked. The Pico measures in at an impressive 0.6 in. x 0.6 in. with a total area of 0.36 sq.in. which is nothing to be sniffed at, but the Nanite 85 which we wrote up back in 2014 measures up at around 0.4 in. x 0.7in. with a total area of around 0.28 sq.in.. In this post-fact, fake news world we live in, does it really matter? Are we splitting hairs? Or are the Pico team a little fast and loose with facts and the truth?
There may be smaller Arduino compatible boards out there, and this is just a case study between these two. We think when it comes to making bold claims like “worlds smallest” or something similar perhaps performing a simple Google search just to be sure may be an idea.