Arduino Shield Makes Driving Nixies Easy

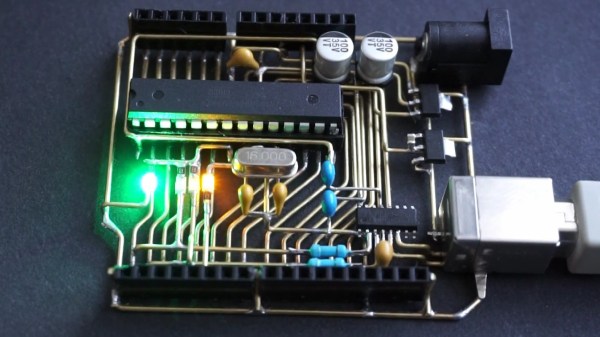
Nixie tubes are adored by hackers across the world for their warm glow that recalls an age of bitter nuclear standoffs and endless proxy wars. However, they’re not the easiest thing to drive, requiring high voltages that can scare microcontrollers senseless. Thankfully, it’s possible to score an Arduino shield that does the heavy lifting for you.

The HV supply is the heart of any Nixie driver.

The shield uses HV5812 drivers to handle the high-voltage side of things, a part more typically used to drive vacuum fluorescent displays. There’s also a DHT22 for temperature and humidity measurements, and a DS3231 real time clock. It’s designed to work with IN-12 and IN-15 tubes, with the part selection depending on whether you’re going for a clock build or a combined thermometer/hygrometer. There’s also an enclosure option available, consisting of two-tone laser etched parts that snap together to give a rather sleek finished look.

For those looking to spin up their own, code is available on Github and schematics are also available. You’ll have to create your own PCB of course, but there are guides that can help you along that path. If you’re looking to whip up a quick Nixie project to get your feet wet, this might just be what you need to get started. Of course, you can always go straight to hard mode, and attempt a functional Nixie watch. Video after the break.

Continue reading “Arduino Shield Makes Driving Nixies Easy”

Printed Perching Pals Proliferate

Anansi in African folktale is a trickster and god of stories, usually taking physical form of a spider. Anansi’s adventures through oral tradition have adapted to the situation of people telling those stories, everything ranging from unseasonable weather to living a life in slavery. How might Anansi adapt to the twenty-first century? [odd_jayy] imagined the form of a cyborg spider, and created Asi the robot companion to perch on his shoulder. Anyone who desire their own are invited to visit Asi’s project page.

Asi was inspired by [Alex Glow]’s Archimedes, who also has a project page for anyone to build their own. According to [Alex] at Superconference 2018, she knew of several who have done so, some with their own individual customization. [odd_jayy] loved the idea of a robot companion perched on his shoulder but decided to draw from a different pool of cultural folklore for Asi. Accompanying him to various events like Sparklecon 2019, Asi is always a crowd pleaser wherever they go.

Like every project ever undertaken, there is no shortage of ideas for Asi’s future and [odd_jayy] listed some of them in an interview with [Alex]. (Video after the break.) Adding sound localization components will let Asi face whoever’s speaking nearby. Mechanical articulation for legs would allow more dynamic behaviors while perched, but if the motors are powerful enough, Asi can walk on a surface when not perched. It’s always great to see open source projects inspire even more projects, and watch them as they all evolve in skill and capability. If they all become independently mobile, we’ll need clarification when discussing the average velocity of an unladen folklore robot companion: African or European folklore?

Continue reading “Printed Perching Pals Proliferate”

Library Makes ESP Over The Air Updates Easy

Potentially, one of the great things about having a device connected to the network is that you can update it remotely. However, how do you make that happen? If you use the Arduino setup for the ESP8266 or ESP32, you might try [scottchiefbaker’s] library which promises to make the process easy.

Adding it looks to be simple. You’ll need an include, of course. If you don’t mind using port 8080 and the path /webota, you only need to call handle_webota() from your main loop. If you want to change the defaults, you’ll need to add an extra call in your setup. You also need to set up a few global variables to specify your network parameters.

Continue reading “Library Makes ESP Over The Air Updates Easy”

Vintage Atari Becomes Modern Keyboard

The modern keyboard enthusiast is blessed with innumerable choices when it comes to typing hardware. There are keyboards designed specifically for gaming, fast typing, ergonomics, and all manner of other criteria. [iot4c] undertook their own build for no other reason than nostalgia – which sounds plenty fun to us.

An Arduino Leonardo is pressed into service for this hack. With its USB HID capabilities, it’s perfectly suited for custom keyboard builds. It’s built into a working Atari 65XE computer, and connected to the keyboard matrix. The Keypad and Keyboard libraries are pressed into service to turn keypresses on the 80s keyboard into easily digseted USB data.

There’s plenty of room inside the computer for the added hardware, with the USB cable neatly sneaked out the rear. [iot4c] notes that everything still works and the added hardware does not cause any problems, as long as it’s not used as a computer and a keyboard at the same time.

It’s possible to do a similar hack on the Commodore 64, too. If you’re doing tricky keyboard builds yourself, you know where to send ’em.

Alma The Talking Dog Might Win Some Bar Bets

Students at the University of Illinois at Urbana-Champaign have a brain-computer interface that can measure brainwaves. What did they do with it? They gave it to Alma, a golden labrador, as you can see in the video below. The code and enough info to duplicate the electronics are on GitHub.

Of course, the dog doesn’t directly generate speech. Instead, the circuit watches her brainwaves via an Arduino and feeds the raw data to a Raspberry Pi. A machine learning algorithm determines Alma’s brainwave state and plays prerecorded audio expressing Alma’s thoughts.

Continue reading “Alma The Talking Dog Might Win Some Bar Bets”

This Arduino Feeds The Dog

Part of the joy of owning a dog is feeding it. How often do you get to make another living being that happy? However, sometimes you can’t be there when your best friend is hungry. [El Taller De TD] built an auto dog feeder using an Arduino and stepper motor. The video and links are in Spanish, but if your Spanish is rusty, YouTube’s caption autotranslation isn’t bad and Google Translate can help you with the web site.

The electronics are reasonably simple: an Arduino, a Bluetooth module, and a stepper motor driver. Mechanically, the motor and some PVC pipe are all you need. There’s a small phone application to drive the Bluetooth using App Inventor.

Continue reading “This Arduino Feeds The Dog”

Driving A Controllerless LCD With The Humble Arduino Uno

These days, you could be forgiven for thinking driving an LCD from a microcontroller is easy. Cheap displays have proliferated, ready to go on breakout boards with controllers already baked in. Load up the right libraries and you’re up and running in a matter of minutes. However, turn your attention to trying to drive a random LCD you’ve yanked out of a piece of old equipment, and suddenly things get harder. [Ivan Kostoski] was in just such a position and decided to get down to work.

[Ivan]’s LCD was a 320×240 STN device salvaged from an old tape library. The display featured no onboard controller, and the original driver wasn’t easily repurposed. Instead, [Ivan] decided to drive it directly from an Arduino Uno.

This is easier said than done. There are stringent timing requirements that push the limits of the 8-bit platform, let alone the need for a negative voltage to drive the screen and further hardware to drive the backlight. These are all tackled in turn, with [Ivan] sharing his tips to get the most flexibility out of the display. Graphics and text modes are discussed, along with optimizations that could be possible through the varied use of available RAM and flash.

The code is available on Github. If you need inspiration for your own controllerless LCD driver. [Ben Heck] has done similar work too, using FPGA grunt to get the job done.