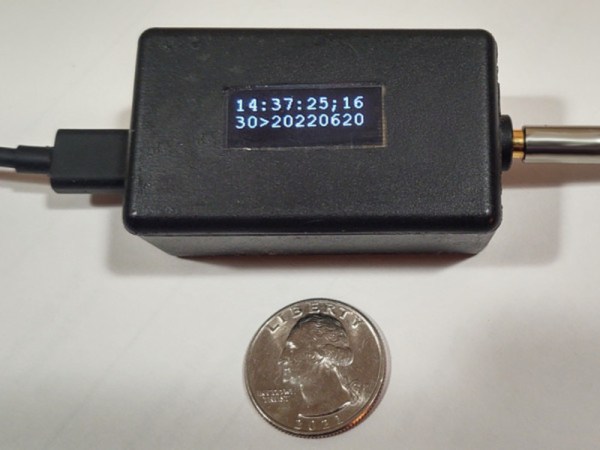
Diagram of the LTC protocol, showing the difference between 1 bits and 0 bits - both transmitted using one up and one down pulse, but with '1' bit pulses being half as short.

Animate Arcane Protocols With Interrupt-Backed Bitbanging

We often take our “SoftwareSerial” libraries for granted, and don’t investigate what goes on under the hood — until they fail us, at least. Would you like to learn how to harness the power of interrupt-driven bitbanging? [Jim Mack] teaches us how to make our protocol implementations fly using the LTC protocol as a springboard.

LTC (Linear/[Longitudinal] TimeCode) is a widely-used and beautifully-crafted protocol that tends to fly under our radar, and is one that hackers could learn plenty from. It’s used for synchronization of audio/video devices during media production and playback. LTC’s signal is almost digital but not quite: it doesn’t need a clock, and it has no polarity. Additionally, it mimics an audio signal really well, you can decode it at any playback speed, and many other benefits and quirks that [Jim] outlines. You do need to maintain the timings, though, and [Jim]’s article shows us how to keep them right while not inconveniencing your primary tasks.

Continue reading “Animate Arcane Protocols With Interrupt-Backed Bitbanging”

A graph visualising approximation errors - the specific principle pictured is described well by the linked article

Time And Accuracy In Las ATMegas

Do you ever have to ensure that an exact amount of time passes between two tasks in your microcontroller code? Do you know what’s the difference between precision and accuracy? Today, [Jim Mack] tells us about pushing timers and interrupts to their limits when it comes to managing time, while keeping it applicable to an ever-popular ATMega328P target! Every now and then, someone decides to push the frontiers of what’s possible on a given platform, and today’s rules is coding within constraints of an Arduino environment. However, you should check [Jim]’s post out even if you use Arduino as a swearword – purely for all of the theoretical insights laid out, accompanied by hardware-accurate examples!

This will be useful to any hacker looking to implement, say, motor encoder readings, signal frequency calculations, or build a gadget processing or modifying audio in real time. To give you a sample of this article, [Jim] starts by introducing us to distinctions between precision and accuracy, and then presents us with a seemingly simple task – creating exactly 2400 interrupts a second. As much as it might look straightforward, problems quickly arise when clock crystal frequency doesn’t cleanly divide by the sampling frequency that you have to pick for your application! This is just a taste of all the examples of hidden complexity presented, and they’re accompanied with solutions you can use when you eventually encounter one of these examples in your hacker pursuits. In the end, [Jim] concludes with links to other sources you can study if you ever need to dig deeper into this topic.

Keeping our projects true to the passage of time can be an issue, and we’ve been at it for ages – calibrating your RC oscillator is a rite of passage for any ATTiny project. If you ever decide to have an interrupt peripheral help you with timing issues, we’ve gone in-depth on that topic in the past, with a three-part series describing the benefits, the drawbacks and the edgecases of interrupts. Going for a more modern target? Our piece on using interrupts with STM32 is a great path for trying out tools of the modern age.

Arduino Compatible IR Blaster Keeps TVs At Bay

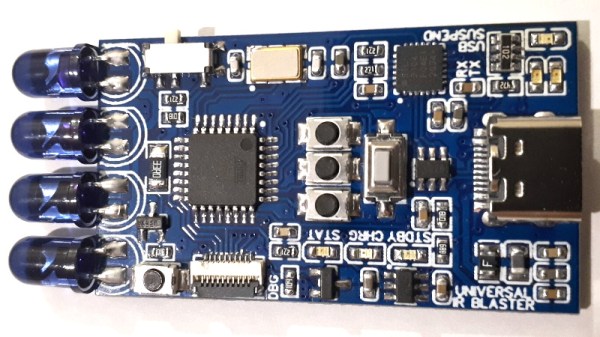
The TV-B-Gone is a well known piece of kit in hacker circles: just point it at a noisy TV in a public space, hit the button, and one of the hundreds of IR remote codes for “Power Off” that it blinks out in rapid succession is more than likely to get the intended response. Unfortunately, while a neat conversation starter, its practical use is limited to a single function. But not so with this programmable IR development board that creator [Djordje Mandic] describes as a “TV-B-Gone on steroids”.

Sure you can point it at a random TV and turn it off with a single button press, but you can also plug the board into your computer and control it directly through the serial connection provided by its CP2104 chip. Using a simple plain-text control protocol, the user can modify the behavior of the device and monitor its status. [Djordje] imagines this feature being used in conjunction with a smartphone application for covert applications. To that end, the device’s support for an onboard battery should keep it from draining the phone during extended operations.

Of course you could do something else entirely with it simply by firing up the Arduino IDE and writing some new code for the device’s ATmega328P microcontroller. As with the IR-enabled ESP8266 development board we looked at a few months ago, there are plenty of applications for an all-in-one board that allows you to communicate with the wide world of IR devices.

Continue reading “Arduino Compatible IR Blaster Keeps TVs At Bay”

Build-It-Yourself LC Meter

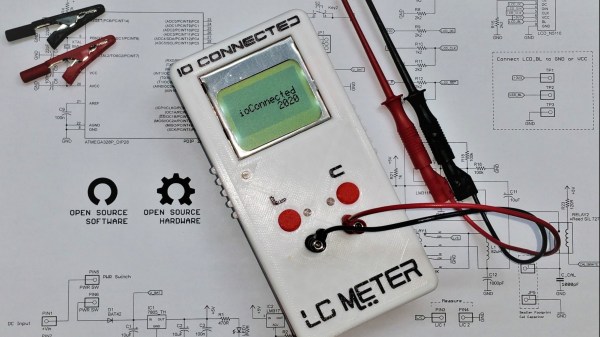
A basic digital multimeter (DMM) is usually the first measurement tool the aspiring electronics tinkerer buys. Even a bargain-bin DMM will happily measure voltage, current, and resistance; check continuity; and may even have a mode to measure transistor gain. Every toolbox needs at least one DMM, but most have an crucial limitation— they can’t measure two of the fundamental electrical quantities: inductance and capacitance. On Hackaday.io, [core weaver] has developed an open-source LC meter to allow you to build your own tool to measure inductance and capacitance.

[core weaver]’s design is all through-hole, so even just assembling one would be a great exercise for someone getting started in electronics. However, he didn’t just release a design, in a series of videos he goes through the theory of the device’s operation; explains the design of the circuit, firmware, and case; and shows you how to put it all together. For times when you need to measure a lot of parts (e.g. if you have to sort a bag of cheap capacitors looking for specific value), he’s even developed a desktop program to save you some trouble!

The finished meter looks incredible! If you want to build one for yourself, he’s put all of the files up on GitHub, and we highly recommend you check out his first video after the break. If you’d like to build yourself a 6.5-digit DMM to go with our LC Meter, consider this one which even has a home-built ADC.

Continue reading “Build-It-Yourself LC Meter”

Keep Cool With This Open Source AVR Fan Controller

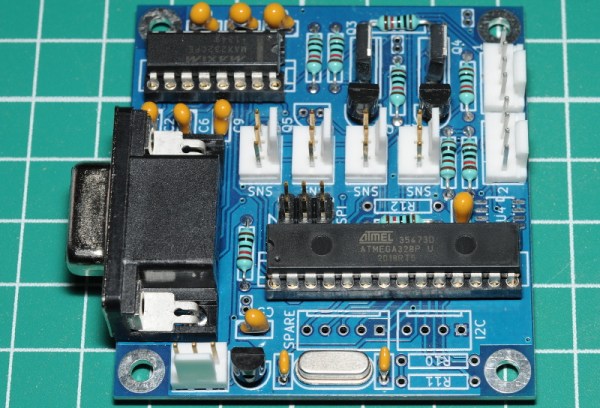
We’ve all got projects kicking around that we haven’t had time to document for our own purposes, let alone expose to the blinding light of the Internet. There are only so many hours in a day, and let’s face it, building the thing is a lot more fun than taking pictures of it. It took [Matthew Millman] the better part of a decade to combine everything he’s learned over the years to finally document the definitive version of his open source intelligent fan controller, but looking at the final result, we’re glad he did.

At the heart of this board is an ATmega328P, but don’t call it an Arduino. [Matthew] makes it very clear that if you want to hack around with the code for this project, you’re going to need to not only have a programmer for said chip, but know your way around AVR-GCC. He’s provided pre-built binaries for those content to run with the default settings, but you’ve still got to get it flashed onto the chip yourself. The project is designed to use the common DS18B20 temperature sensor, and as an added bonus, the firmware can even check if yours is a bootleg (spoilers: there’s an excellent chance it is).

Arguably the most interesting feature of this fan controller is its command line interface. Just plug into the serial port on the board, open your terminal emulator, and you’ll have access to a concise set of functions for querying the sensors as well as setting temperature thresholds and RPM ranges for the fans. There’s even a built-in “help” function should you forget a command or the appropriate syntax.

Originally [Matthew] developed this project as a way to control multiple fans inside of a PC case, but naturally, things have changed quite a bit since those early days. While today there’s no shortage of fancy controllers that can handle throttling an array of fans based on the internal temperature of your rig, there’s still something to be said for rolling your own solution. More importantly, there’s certainly other potential uses for a fully open source programmable fan controller.

Slick Web Oscilloscope Is Ready In A Flash (Literally)

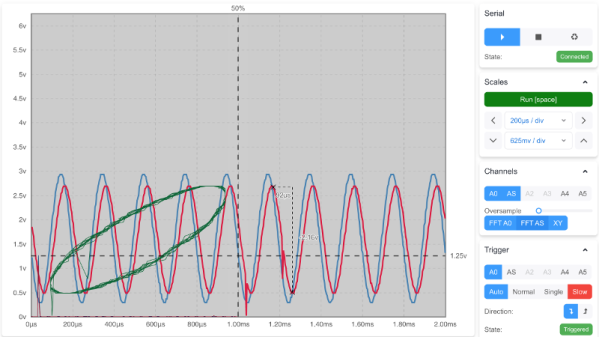
A bench oscilloscope is one of the most invaluable tools in the hardware hacker’s arsenal, but even the slimmest digital models are a bit large to be part of your everyday electronic carry. Sure you could throw one of those cheap pocket scopes in your bag, but what if there was an even easier way to take a peek at a few signals while you’re on the go?

For those who roam, the Arduino-web-oscilloscope project created by [David Buezas] is worth a close look. Using the Web Serial API built into recent versions of Google’s Chrome browser, this project allows you to pop open a software oscilloscope without installing anything locally. Whether it’s a public computer or that cheap Chromebook you keep around for emergencies, a valuable tool is just a few clicks away.

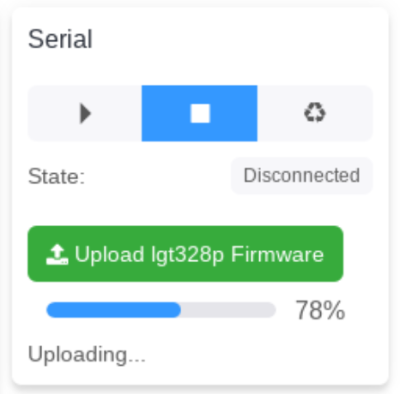
Flashing the MCU from the web interface.

Of course, there has to be some hardware involved. Despite what you might think given the name of the project, the code currently only supports the Logic Green LGT8F328P microcontroller. This cheap ATmega328P clone not only runs at 32 Mhz but according to [David], many operations can be done in fewer clock cycles than on the original 328P. In short it’s fast, and fast is good if you want more samples.

One of the best parts about this project is that a function to flash the firmware to the LGT8F328P is built right in the web interface. With the oscilloscope running in the browser, you just need to plug in a blank board, click the button to flash it, and start taking measurements. You could outfit a whole classroom or hackerspace with basic oscilloscopes in minutes, with a per-seat cost of just a few bucks.

Now as you might expect, there are some pretty hard limits on what you can realistically measure with this setup. For one thing, the board can’t handle anything higher than 5 volts. Even the cheapest oscilloscope kit is still going to be an upgrade, but the fact you can spin this up almost anywhere for the cost of a cheap MCU board makes it hard to complain about the results.

[Thanks to Bill for the tip.]

A DIY Electronic Load With A Twist

If you’re testing a power supply or battery pack, an electronic load is a nice tool to have. By watching the voltage as you crank up the resistance, you can verify the unit’s real-world capabilities quickly and easily. But [Xavier Bourlot] wanted a bit more information than is generally afforded by these devices, so he came up with his own scratch built load that can measure the voltage at multiple points in the circuit.

Now at first glance, it might not be obvious why you’d want such a capability. But [Xavier] is looking to do something very specific with this device: analyze the efficiency of DC-DC converters. The idea is that if the electronic load can measure the voltage on both sides of the converter, it can calculate what kind of losses are being incurred.

Could you do this with a multimeter and a traditional electronic load? Sure. But if it’s the kind of thing you’ll be doing a lot of, it’s not hard to see why this method would be preferable.

But even if you ignore the converter analysis capabilities, this looks to be a very useful device to have around the lab. [Xavier] says it can sink more than 5 amps, and handle an input voltage as high as 100 volts. Powered by an ATmega328P, the load is also fully programmable and even features an I2C expansion port that you can use to hang additional hardware or sensors on. The stock firmware is already quite capable, and the list of future enhancements has some very interesting entries such as the ability to log data over serial or to a SD card.

We’ve seen a number of programmable electronic load projects over the years, ranging from Arduino shields to VFD equipped units that would be the pride of any hacker’s bench.