The equipment used in professional radio and TV studios is both extremely high quality and very expensive indeed, and thus out of the reach of an experimenter. Happily as studios are refurbished there’s a steady supply of second-hand equipment which can be surprisingly cheap, but as [Nathan] found out with a Quartz audio router, comes with no control software. What’s to be done with what’s essentially a piece of junk? Remove its brain and replace it with one that can be controlled, of course!
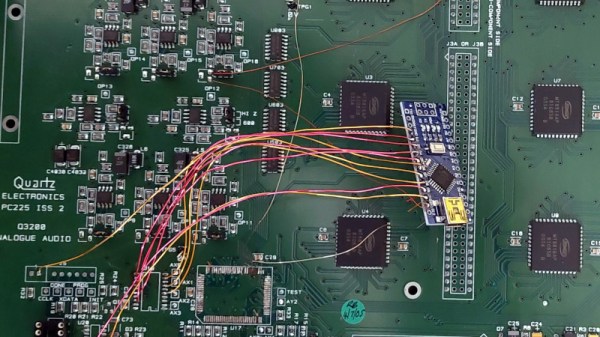
On the PCB alongside a bank of switch matrices is an FPGA which does the heavy lifting. That’s “heavy” in a limited sense, because all it does is handle the chip select lines for the matrices and write data to their registers. This is a task that can be handled by a microcontroller, so in goes an Arduino Nano, which along with a few other board modifications delivers a serial-controlled studio router.
The interesting part for us in this project comes from a look at the date codes on the board, they’re from the early 2000s. This is (roughly) contemporary with the ATmega chip on the Arduino, so we’re curious as to why the designers saw fit to use an FPGA when the microcontrollers of the day were clearly up to the task for much less outlay. We suspect a touch of millennium-era price inflation, but we can’t be sure.
Meanwhile, old broadcast kit has featured here before.