AVR334 Articles
Unlocking The Crippled Potential Of An Unmanaged Switch
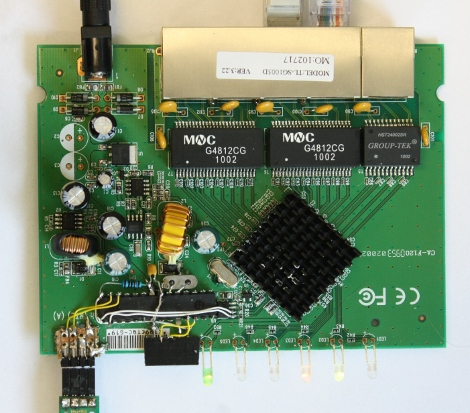
[Sprite_TM] outgrew the features of the cheap unmanaged TL-SG1005D switch he was using on his home network. Instead of buying a new and much more costly switch he cracked the cheap one open and found that the RTL8366SB chip inside possessed the ability to work harder but was crippled for sale as a low-end model. It wasn’t as easy as that oscilloscope firmware upgrade we saw a while back. He had to add an AVR ATmega88 to send I2C commands to the switch. Turns out that the I2C protocol wasn’t standard and after much head scratching he found some Linux drivers for the chipset that gave him enough info to send the configuration commands he needed. Now he’s go the managed switch he needed for his VLAN for the cost of a microcontroller and some wire.
Magically Repair AVR Chips
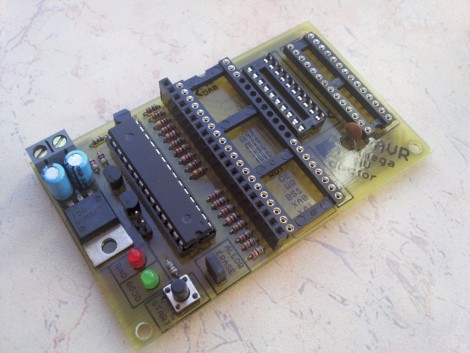
If you’ve ever spent time working with AVR microcontrollers you’ve probably set the fuse bits incorrectly at least once. The ATmega fusebit doctor will automatically repair the fuse bits and get you back in business until your next mishap. The ATmega8 that powers the device has the chip signatures for the ATmega family stored inside so it will automatically detect which chip you’re trying to ‘unbrick’. From there it looks up the correct fuse bits and resurrects the sick microcontroller. This is useful in recovering a chip that has serial programming disabled, used the reset pin as I/O, or just enabled an external clock without the necessary hardware to deliver on that feature.
This magic is taken care of by using High Voltage Parallel Programming. We’ve seen HVPP used in the Arduino rescue shield and it is a valuable feature of the AVR Dragon, our favorite AVR programmer, as well as others. Still, you can hardly beat the ease of plugging a dead chip into this board and pressing one button. Oh, did you brick a member of the ATtiny family? There’s a rescue board for those too.
[Thanks Stewe]
Human Tetris: Object Tracking On An 8-bit Microcontroller
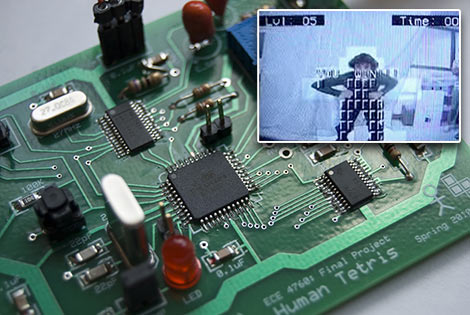
Elaborating on an item previously mentioned among last weekend’s Cornell final projects list, this time with video:
For their ECE final project, [Adam Papamarcos] and [Kerran Flanagan] implemented a real-time video object tracking system centered around an ATmega644 8-bit microcontroller. Their board ingests an NTSC video camera feed, samples frames at a coarse 39×60 pixel resolution (sufficient for simple games), processes the input to recognize objects and then drives a TV output using the OSD display chip from a video camera (this chip also recognizes the horizontal and vertical sync pulses from the input video signal, which the CPU uses to synchronize the digitizing step). Pretty amazing work all around.
Sometimes clever projects online are scant on information…but as this is their final grade, they’ve left no detail to speculation. Along with a great explanation of the system and its specific challenges, there’s complete source code, schematics, a parts list, the whole nine yards. Come on, guys! You’re making the rest of us look bad… Videos after the break…
[G’day Bruce]
Continue reading “Human Tetris: Object Tracking On An 8-bit Microcontroller”
Minimalist AVR Programmer Is Just Fab!
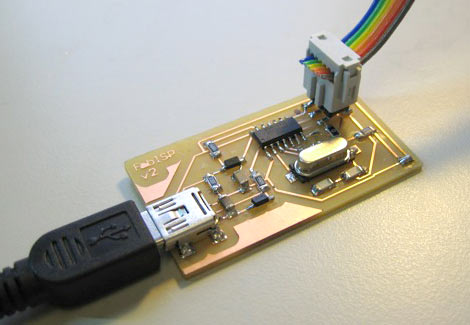
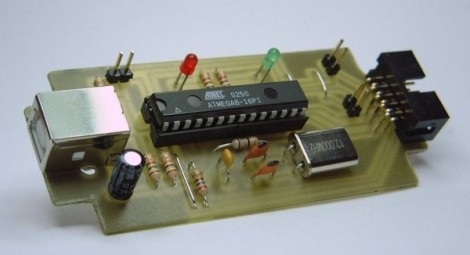
Whether you’re burning a new bootloader to an Arduino board, or doing away with a bootloader to flash Atmel chips directly, an in-system programmer (ISP) is an indispensable tool for working with AVR microcontrollers. If cost has held you back, it’s no longer an excuse: FabISP is a barebones USB-based AVR programmer that can be pieced together for about ten bucks.
FabISP was created by [David Mellis] as a product of MIT’s Fab Lab program, which provides schools with access to design and manufacturing tools based around a core set of fabrication capabilities, so labs around the world can share results. But the FabISP design is simple enough that you don’t need a whole fab lab. It’s a small, single-sided board with no drilling required; the parts are all surface-mounted, but not so fine-pitched as to require reflow soldering. Easy!
There’s still the bootstrap problem, of course: you need an AVR programmer to get the firmware onto the FabISP. This would be an excellent group project for a hackerspace, club or school: if one person can provide the initial programmer to flash several boards, each member could etch and assemble their own, have it programmed, then take these out into the world to help create more. We must repeat!
[Thanks Juan]
Vehicle Information Display Hacks
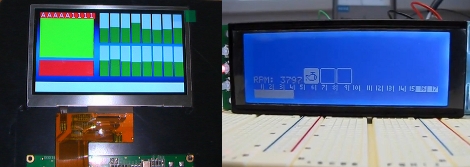
We’ve had a few folks send us info about their vehicle display hacks after seeing [Will O’Brien’s] motorcycle computer a few days ago.
On the left we have a display for an electric vehicle. [S1axter] is using a 4.3″ TFT screen to display charge information for each battery cell in the car. An ATmega88 collects the data and sends it to a breakout board with an LCD controller on it.
To the right is a display from a Formula Student project. a Matrix Orbital GLK19264-7T-1U LCD display provides a lot of real estate for displaying data. Right now [Alan] is still in the early prototyping stages, but the video after the break demonstrates the RPM readout using a function generator. It’s not shown in the video, but he tells us that he’s since tried it out with the engine and has a PIC 16f877 reading temperate data from the electronic control transmission sensors in addition to the RPM data.
Correction: Thanks to [j] for correcting our mistake. This is a Formula Student car.
Phasor A/V PAL Demo Uses ATmega88
[youtube=http://www.youtube.com/watch?v=sCN1bqRG-7o]
Above is a new demo video called Phasor developed by [Lft]. It is run from an AVR ATmega88 and a few passive components, and the result is pretty amazing. [Lft] goes into detail about the tricks he used to get this up and running. The chip is clocked at 17.73447 MHz which is exactly four times the frequency of the PAL color carrier wave which allows him to fake a smooth signal. He also uses a timer trick to get the voltages that he needs. The work done here is beyond hardcore and quite frankly we can’t believe he managed to fit all of this into 8.5 KB of program space with just 1 KB or RAM. We wonder if there’s enough room there to add sound and color to the AVR Tetris project.
[Thanks Sprite_tm]

