Do You Have Any Idea How Fast Your Blender Was Going?

blenderSpeed Some people really love their smoothies. We mean really, really, love smoothies and everything about making them, especially the blenders. [Adam] is a big fan of blenders, and wanted to verify that his Vitamix blenders ran as fast as the manufacturer claimed. So he built not one, but two speed measuring setups. Scientific blender measurement method requires one to cross check their results to be sure, right?

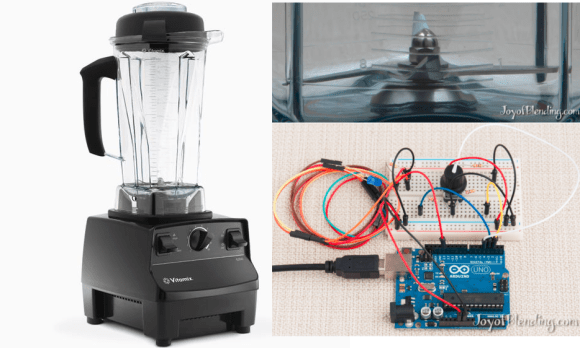
Measuring the speed of a blender is all about the RPM. Appropriately, [Adam’s] first measurement tool was an LED based stroboscope. Stroboscopes have been around for hundreds of years, and are a great way to measure how fast an object is rotating. Just adjust the speed of a flashing light until the rotating object appears frozen. The number of blinks per second is then equal to the Rotations Per Second (RPS) of the object being measured.Multiply by 60 seconds, and you’ve got RPM. [Adam] used an Arduino as the brains behind his stroboscope. He wired a dial up on his breadboard, and used it to adjust the flash rate of an LED. Since this was a quick hack, [Adam] skipped the display and just used the Arduino’s USB output to display speed measurements on his laptop.

There are possibilities for error with stroboscopes. [Adam] discovered that if the stroboscope was flashing at a multiple of the blade’s rotation speed, the blades would appear frozen, and he’d get an erroneous RPM value. Thankfully, [Adam’s] Vitamix had asymmetric blades, which made the test a bit easier. He calculated his blades to be spinning at 380 RPS, or 23,000 RPM. Not satisfied with his results, [Adam] brought out Audacity, and ran a spectral analysis of the blender in operation. He found a peak at 378Hz, which was pretty darn close to his previous measurement. Since the blender has a 4 inch blade this all works out to a blade tip speed right around the claimed value of 270 MPH. We’re glad [Adam] found an answer to his blender questions, but our personal favorite blender hack still has to be the V8 blender created by the Top Gear crew.   [via HackerNews]

3D Printering: Making A Thing With Blender, Part II

printering

So you have a 3D printer and need to print something of your own design. That’s a problem if you don’t know how to create and edit 3D objects.  In this post, we’re continuing our previous misadventures with Blender by making a ‘thing’ torn from a very old book on drafting.

Previously, we’ve made the same part in other 3D design packages. Here’s some links to those other ‘Making a Thing’ posts:

We’ve already done half the work to make a ‘thing’ in Blender, so now it’s time to finish the job. Check out the rest of the tutorial below.

Continue reading “3D Printering: Making A Thing With Blender, Part II”

3D Printering: Making A Thing In Blender, Part I

printering

In case you weren’t aware, having a 3D printer is nothing like owning a real-life Star Trek replicator. For one, replicators are usually found on Federation starships and not hype trains. Secondly, the details of how replicated objects are designed in the 24th century is an issue completely left unexplored by TNG, and DS9, and only a minor plot point in a few Voyager episodes. Of the most likely possibilities, though, it appears replicated objects are either initially created by ‘scanning’ them with a teleporter, or commanding the ship’s computer to conjure something out of the hologrid.

No, with your own 3D printer, if you want a unique object you actually have to design it yourself. Without a holodeck. Using your hands to move a mouse and keyboard. Savages.

This series of ‘Making a Thing’ tutorials aims to fix that. With this post, we’re taking a look at Blender, an amazing 3D modeling and animation package.

Because we still haven’t figured out the best way to combine multiple blog posts together as a single resource − we’re working on that, though − here’s the links to the previous “Making a Thing” posts:

This list is sure to grow thanks to your suggestions on what 3D modeling software to feature, but for now let’s make a thing in Blender.

Continue reading “3D Printering: Making A Thing In Blender, Part I”

Blender CAM – Open Source CAM Software

[Vilem] sent in a tip about a plugin he’s been working on for Blender, called Blender CAM. It allows for exporting directly from Blender to a G-code file. He has been working on it for several months, and releasing regular updates with various tweaks and improvements. While the project isn’t complete, [Vilem] has made some very impressive progress. It currently supports 2D and 3D strategies, various cutter types, simulation of 3D operations, and even automatic bridges.

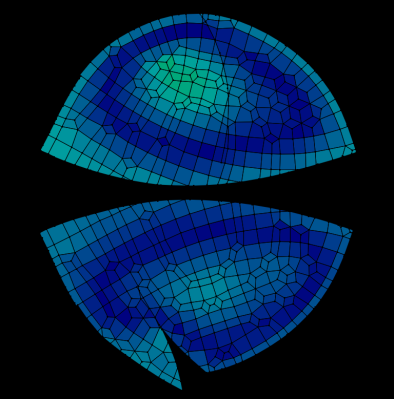
The image above was made using the plugin, and it shows the level of detail possible. We can’t wait to see the 4 and 5-axis support that he is planning on adding.

A basic tutorial video is embedded after the break. As with anything Blender-related, it isn’t incredibly automatic, but another free tool is definitely a good thing. It looks like [Vilem] is looking for some other developers who could help out. If you have the knowledge, you might consider contributing.

Continue reading “Blender CAM – Open Source CAM Software”

BlenderDefender: Automating Pavlovian Conditioning

blenderDefender

This isn’t your typical home automation project; who turns a blender on remotely? [Brian Gaut] did, when he rigged his blender and a strobe light to scare his cat off the kitchen counter. To be fair, we’ve linked to this project before on Hackaday—twice actually—but neither the article about relays or the related cat waterwall article actually talk about the BlenderDefender, and that’s a shame, because it’s pretty clever.

[Brian] began by installing a DCS-900 network camera on the wall near his kitchen sink. The camera monitors any motion on the counter, and once it detects something, a networked computer starts recording individual frames. This security camera setup isn’t looking for criminals: [Brian] needed to keep his cat away from a particularly tasty plant. The motion detection signals an X10 Firecracker module to turn on both a nearby blender and a strobe light, provoking some hilarious reactions from the cat, all of which are captured by the camera.

Check out some other ways to work with the X10 firecracker, and feel free to jump into the home automation discussion from last week.

[Thanks Joy]

Complex Camera Rig Controlled With Blender 3D

blender-3d-camera-control

This is a pretty intricate camera mount. Not only does it provide pan and tilt as the subtitles state, but it moves along a track and offers zoom and focus controls. Its great, but you’ll need an equally complex set of controls to do anything meaningful with it. That’s where the real hack comes into play. The entire system is controlled by its virtual model in Blender 3D.

You probably already know that Blender 3D is an open source 3-dimensional modeling suite. It’s got a mountain of features, which include a framework for animating virtual objects. The camera rig was replicated inside of the software, and includes a skeleton that moves just like the real thing. You can make an animation of how the camera should move, then export and play back those motions on the physical hardware.

Now if you need help making 3D models of your hardware perhaps you should try scanning them.

Continue reading “Complex Camera Rig Controlled With Blender 3D”

Delta-type 3D Printer Built Using Extruded Rails

delta-3d-printer-extruded-rail

From concept to completion this delta-style 3D printer (translated) is a sweet build. The quality of the work comes as no surprise. We’re familiar with [Arkadiusz Spiewak’s] craftsmanship from that H-bot type 3D printer we saw from him back in April.

Planning started off with a render of the design using Blender 3D. Not only did this give him a 3D model to use as his building reference, but the animation framework allowed him to test the kinematics of the design. After ordering an extruded rail system and assembling the frame he found the pillars had too much flex to them due to the rails used on the top and bottom. The fix was to mill a top and bottom plate to stiffen things up. After testing out the motors and the extruder head mount he made one final design change. He exported his Blender design as dxf files to cut and weld an aluminum replacement for the extruder mounting platform. As you can see in this video, the preliminary results are looking good!

Continue reading “Delta-type 3D Printer Built Using Extruded Rails”