A Menorah For The 21st Century

For those new and experienced, this time of year is a great chance for enterprising makers to apply their skills to create unique gifts and decorations for family and friends. [Mike Diamond] of What I Made Today built a phone controlled, light-up menorah. It’s a charming way to display some home automation know-how during the holidays.

Expanding on his previous project — a pocket-sized menorah — a Raspberry Pi Zero with a WiFi dongle, some LEDs, wire, and tea lights suffice for the materials, while setting-up Blynk on the Raspberry Pi and a phone to control the lights ties it together after mounting it in an old monitor housing.

Continue reading “A Menorah For The 21st Century”

Blynk With Joy

Last time, I talked about how my storage situation and my cheap nature led me to build an RC joystick controller with a cell phone app and an ESP8266. The key to making this easy was to use the GUI builder called Blynk to make a user interface for an Android or Apple phone. Blynk can communicate with the ESP8266 and makes the project relatively simple.

ESP8266 and Arduino IDE

The ESP8266 Blynk code is straightforward. You do need to set up the Arduino IDE to build for the ESP8266. That can vary by board, but here’s the instructions for the board I was using (from Adafruit; see below).

adaesp

Depending on the type of ESP8266 device you are using, you may need a 3.3 V serial cable or some other means of getting the firmware into the device. For the Adafruit device I had, it has a 5 V-tolerant serial connection so a standard USB to serial dongle plugs right in. There’s also two switches on my device. To get into bootload mode, you have to push the one button down, hold it, and then press the reset button. Once you release the reset button you can release the other button. The red LED half-glows and the device is then waiting for a download.
Continue reading “Blynk With Joy”

The Joy Of The ESP8266 And Blynk

I’ll admit it. I can be a little cheap. I also find it hard to pass up a bargain. So when I saw a robot kit at the local store that had been originally $125 marked down to $20, I had to bite. There was only one problem. After I got the thing home, I found they expected you to supply your own radio control transmitter and receiver.

Normally, that wouldn’t be a problem but lately… let’s just say a lot of my stuff is in storage and I didn’t have anything handy. I certainly didn’t want to go buy something that would double the cost of this robot that I really didn’t need to begin with.

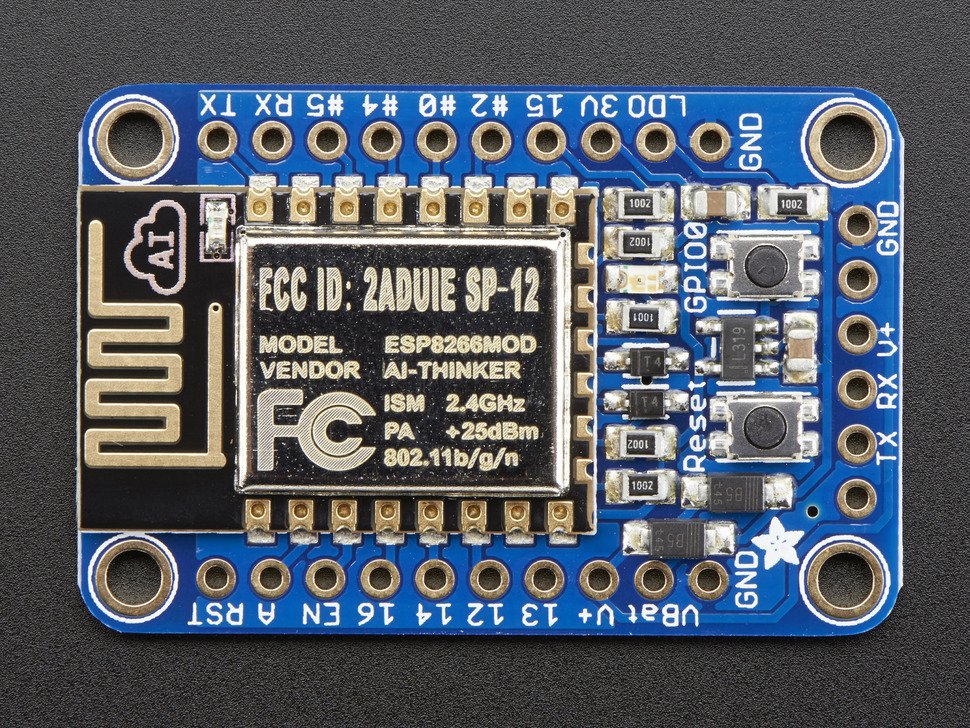
However, I did have a few ESP8266 modules handy. Good ones, too, from Adafruit with selected 5 V I/O compatibility and an onboard regulator. I started thinking about writing something for the ESP8266 to pick up data from, say, a UDP packet and converting it into RC servo commands.

joymain
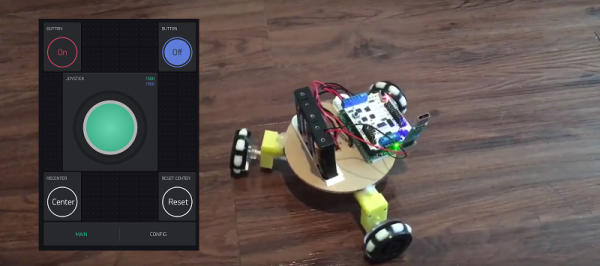
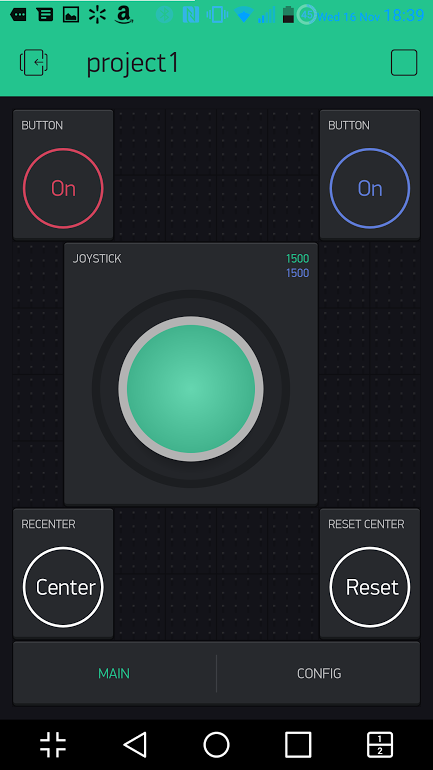
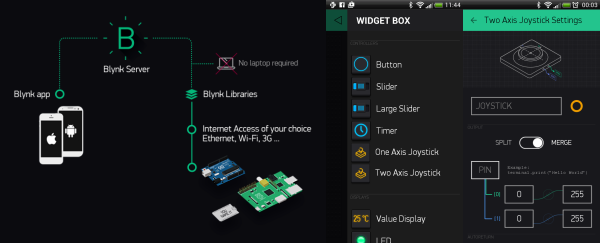
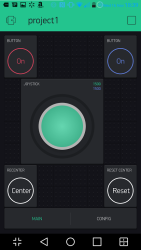
Seemed like a fair amount of work and then I remembered that I wanted to try Blynk. If you haven’t heard of Blynk, it is a user interface for Android and Apple phones that can send commands to an embedded system over the Internet. You usually think of using Blynk with an Arduino, but you can also program the embedded part directly on an ESP8266. I quickly threw together a little prototype joystick.
Continue reading “The Joy Of The ESP8266 And Blynk”

Avoiding Exercise With An ESP8266 And Blynk

[Mike Diamond] was tired of climbing down (and back up) 40 stairs to check his mailbox. He decided to create a mailbox alert using the ESP8266 to connect to his WiFi. The idea was simple: have the ESP8266 monitor when the mailbox flap opened using a magnet and a reed switch. As always, though, the devil is in the details. [Mike] got things working with a little help and shares not only the finished design but how he got there.

To handle the sending of e-mail, [Mike] used the Blynk app. You often think of Blynk as a way to build user interfaces on an Android or iOS device that can control an Arduino. In this case, though, [Mike] used the library with the ESP8266 and had it send e-mail on his behalf.

Continue reading “Avoiding Exercise With An ESP8266 And Blynk”

Fingerprint Garage Door Won’t Open Every Time A Neighbor Microwaves A Burrito

With three kids, including himself, [Dave] faced the very real likelihood of someone absent-mindedly leaving the garage door open and being robbed blind. Rather than installing some plebeian solution, he compiled a feature list. And what a feature list it is!

The garage door needed to notify him of its status with strategically placed LEDs around the house, and give him full control on his devices. He wanted to open and close it using his existing key-code entry system. Lastly, it would be extra-cool if he could add some biometrics to it; in this case, a fingerprint sensor.

The core hardware is the staple Arduino augmented with a fingerprint module, a touch screen, some vitamins, and a WiFi break-out. He also worked up some casings in tinkercad: one for the indoor hardware, another with a flip cover for the outdoor fingerprint scanner.

We think [Dave] has accomplished what he set out to. We can just picture the would-be-thief staring at the finger print scanner and moving their operation one house over where the world is simpler. Video after the break.

Continue reading “Fingerprint Garage Door Won’t Open Every Time A Neighbor Microwaves A Burrito”

App Control With Ease Using Blynk

App development is not fun for everyone, and sometimes you just want to control a device from your phone with minimal work. Blynk appears to be a fairly put-together library for not only hooking up any Arduino or esp8266 to a phone through WiFi, but also through the net if desired.

Install the app onto your iPhone or Android device. Install the libraries on your computer. Next, modify your Arduino source to either pass direct control of a pin to Blynk, or connect Blynk to a virtual pin inside your code for more advanced control. If you want to go the easy route, create an account, log into the app, and drag and drop the interface you’d like. If the idea of letting some corporation host your Arduino project sends shivers down your spine, there is also an option to host your own server. (Editorial snark: Yes, it requires a server. That’s the cost of “simplicity”.)

There have been a few times where we’ve wished we could add app control to our projects, but installing all the libraries and learning a new language just to see a button on a screen didn’t seem worth it. This is a great solution. Have any of you had experience using it?