A door’s hinges are arguably its most important pieces. After all, a door without hinges is just, well, a wall. Or a bulkhead, if we’re talking about a hingeless hatch on a spacecraft.
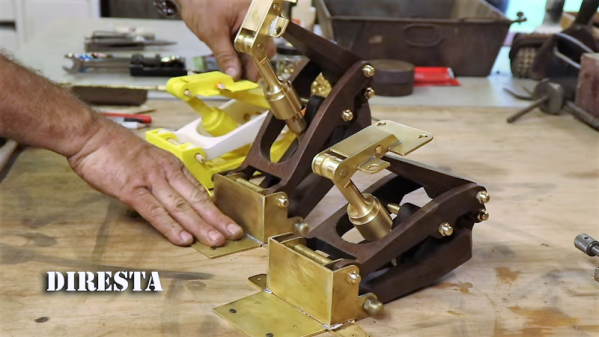
And so the assignment for creating hinges for Progress Egress, the celebration of the 50th anniversary of the Apollo 11 landing by creating a replica of the command module hatch, went to [Jimmy DiResta]. The hinges were complex linkages that were designed to not only handle the 225 pound (102 kg) hatch on the launch pad, but to allow extended extravehicular activity (EVA) while en route to the Moon. [Jimmy], a multimedia maker, is just as likely to turn metal as he is to work in wood, and his hinges are a study of 1960s aerospace engineering rendered in ipe, and extremely hard and dense tropical hardwood, and brass.
[Jimmy]’s build started with a full-size 3D-printed model of the hinge, a move that paid off as the prints acted both as templates for machining the wood components and as test jigs to make sure everything would articulate properly. Sheet brass was bent and soldered into the hinge brackets, while brass rod stock was turned on the lathe to simulate the hydraulic cylinder hinge stays of the original. The dark ipe and the brass work really well together, and should go nicely with [Fran Blanche]’s walnut and brass latch on the assembled hatch.
With [Adam Savage]’s final assembly of all the parts scheduled for Thursday the 18th, we’re down to the wire on this celebration of both Apollo and the maker movement that was at least in part born from it.
Note: the assembly started at 11:00 Eastern time, and there’s a live stream at https://airandspace.si.edu/events/project-egress-build.
Continue reading “Project Egress: The Hinges” →