Robot Clock Writes Time Over And Over And Over

We’ve seen quite a few clocks that write the time out with a pen or marker. If you think about it, this really isn’t a great solution; every whiteboard marker will dry out in a day or two, and even if you’re using a pen, that’s still eventually going to run out of ink.

[ekaggrat] wanted a drawing clock that didn’t have these problems, and after taking a look at a magnetic drawing board, was struck with inspiration. The result is a clock that will perpetually write the time. It’s a revision of one of his earlier builds and looks to be much more reliable and mechanically precise.

A clock that writes time needs some sort of surface that won’t degrade, but can be written to over and over again. Whiteboards and glass won’t work, and neither will anything with ink. The solution to this problem was found in a ‘magnetic writing board’ or a Magna Doodle. These magnetic writing boards have a series of cells encapsulating iron filings. Pass a magnet over one side of the board, and a dot of filings appear. Pass a magnet over the opposite side of the board, and the filings disappear.

[ekaggrat]’s time-writing robot consists of a small Magna Doodle display, a robotic arm controlled by two stepper motors, and two solenoids on the end of the arm. The kinematics come from a helpful chap on the RepRap forums, and with the ATmega644 and two stepper drivers, this clock can write the time by altering the current flowing through two solenoids.

A video is the best way to experience this project, and you can check that out below.

Continue reading “Robot Clock Writes Time Over And Over And Over”

KIM-1 Clock

Over on hackaday.io, [Arduino Enigma] posted the code for his clock that runs on a KIM Uno (the KIM-1 clone we mentioned late last year). Although the KIM Uno has a few demos preloaded (including Microchess and a scientific calculator), all of them take some interaction. The clock makes the KIM Uno a more dynamic desk display since it does something useful without any user interaction (once you set the clock, of course).

The project shows the code stored in ROM, but you can’t directly enter the program into ROM (which is really EEPROM on the host Arduino). The trick is to enter the address (that is press AD and then 0, 4, 0, 0) and then mash down the reset button for about a second. Then you can press DA and enter the hex codes provided (pressing + after each byte). Since the code is in nonvolatile storage, you can start it at any time by setting the time in RAM and executing the code at address 400.

Continue reading “KIM-1 Clock”

If You Could Build A Clock In World Of Goo…

[Orson Scott Card] once wrote “…time flows through all lives equally.” You have to wonder what he would think if he saw Rhei, a fluid clock that is part prototype, part dynamic installation, and part moving sculpture. The developers [Damjan Stanković], and [Marko Pavlović] say that time flows, and thanks to the fluid-based numerals on the clock face, that seems to be an appropriate tag line (if you can’t visualize it, check out the video below).

Continue reading “If You Could Build A Clock In World Of Goo…”

Porsche-themed Mancave Clock: There Is No Substitute

With an extra Porsche brake rotor lying about and a persistent friend to be silenced, [GordsGarage] decided to fabricate a one-of-a-kind man cave wall clock.

This was not to be a boring old hang-it-flat-on-the-wall design, though. The Porsche rotor is a composite design, with a steel hub and a ceramic disc weighing only a third of what an all-steel rotor weighs. That inspired [GordsGarage] to fabricate a wall bracket to hold the rotor and allow it to spin, showing off both sides. The business side has a brushed aluminum clock face with decals cut with a s vinyl-plotter and designed to look like a Porsche tachometer, while the reverse side has a nice custom badge for his friend’s shop. The build log shares some of the nice touches that went into the clock, like powder coated parts to mimic stock Porsche red brake calipers, and the secret [GordsGarage] logo.

It may not have been a clock for social good, but it’s a great design and a nice build that’s sure to brighten up his friend’s shop. And mancave warming presents are apparently a thing now, so we’ll be sure to keep our finger on the pulse of this social trend.

Nixie Tube Clock Isn’t Just A Clock

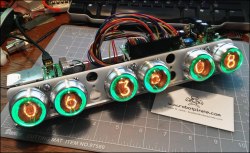
With everything that’s been happening in the news lately, [Jarek] decided it was finally time to finish up his latest project. The Internet of Things has been exploding with projects lately, and this clock that also alerts him of the weather is the latest addition. Plus it has the added bonus of using everybody’s favorite display: nixie tubes!

Of course, using high voltage for the nixies can be terror-inducing, but [Jarek] found a power supply on eBay that was able to power the tubes for not too much money. The controller is an HV5622 which can control up to 32 nixies while only using up three pins on a microcontroller which is pretty handy if you have a limited number of output pins.

The clock also has another device hidden behind all of the wires for the tubes: an ESP8266 to give it network connectivity. The clock connects to the Internet and searches for the nine-hour weather forecast. There are a few nixie lights behind the display which illuminate cutouts in the case to indicate a few different weather statuses. It’s a very polished project, and since it’s enclosed in a nice case it’s not likely to be mistaken for any movie props. Of course, other nixie projects don’t have the same comforting look.

Continue reading “Nixie Tube Clock Isn’t Just A Clock”

Homebrew Mini-Chumby Blends 3D Printing, ESP8266 And A Touchscreen

We were all despondent when our Chumby’s went dead. And plans to hack at least one of them died when the device quit powering on. [Spiros Papadimitriou] must have missed his too because he’s made a good start at making his own wireless, touchscreen, smart clock.

In all honesty, it isn’t much of a Chumby replacement yet. It has a clock and can control some devices. There’s some hooks to add a weather display that isn’t finished yet. Still, it is a working first step. Of course, anyone can take a Raspberry Pi (or similar), a Wifi dongle, and a touchscreen and do the same thing, right? Maybe, but it is a lot harder to make one you (or your significant other) wants on your nightstand. [Spiros] took a lot of time to design a beautiful 3D printed case.

Continue reading “Homebrew Mini-Chumby Blends 3D Printing, ESP8266 And A Touchscreen”

clock

Ferrofluid Clock Is A Work Of Art

It is not usually too difficult to separate functionality from art. Consider a clock. It’s a machine that has a clear and distinct function. It provides information. Nothing could be more different from a clock on a wall than a piece of artwork.  A painting, for instance has no clear function and provides no information. It’s just…art. It’s nice to look at. If we were to ask you to build a functioning, information providing clock that is also a piece of artwork, you would surely have your hands full. Where would you even start? If your name was [Zelf Koelma], you’d grab a bottle of ferrofluid and build us a beautiful, almost mesmerizing clock.

clock_01There’s little to no information on the details of how the clock works other than the use of ferrofluid. But it’s not hard to guess that it uses dozens of electromagnets and an Arduino. You can even pick one up for a cool $8,300 if you’re lucky enough to get a spot on the list, as he’s only making 24 of them.

Want to make one of your own? Pick up some ferrofluid and keep us updated. We’d love to hear from you in the comments on how you’d implement a build like this one. We had a fun time hearing your ideas when we covered the clock made of clocks.

Continue reading “Ferrofluid Clock Is A Work Of Art”