Homemade EDM Machine Moves From Prototype To Production

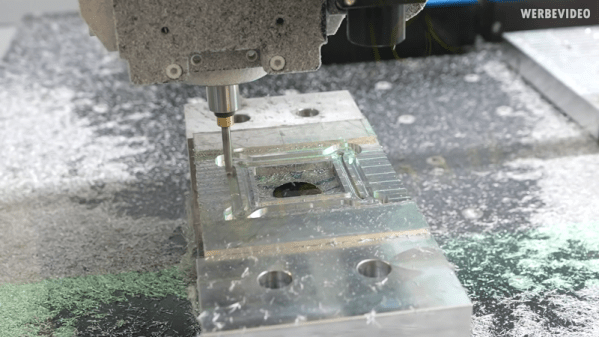
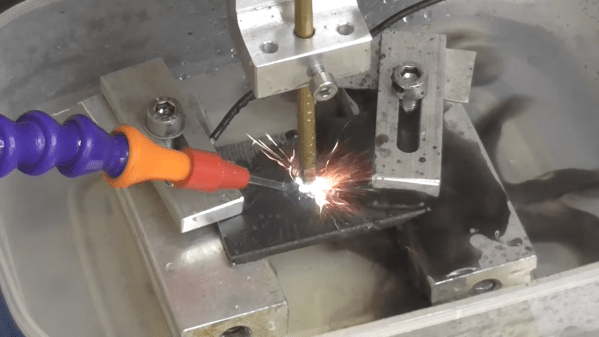
Of all the methods of making big pieces of metal into smaller pieces of metal, perhaps none is more interesting than electrical discharge machining. EDM is also notoriously fussy, what with having to control an arc discharge while precisely positioning the tool relative to the workpiece. Still, some home gamers give it a whirl, and we love to share their successes, like this work-in-progress EDM machine. (Video, embedded below.)

We’ve linked [Andy]’s first videos below the break, and we’d expect there will be a few more before all is said and done. But really, for being fairly early in the project, [Andy] has made a lot of progress. EDM is basically using an electric arc to remove material from a workpiece, but as anyone who has unintentionally performed EDM on, say, a screwdriver by shorting it across the terminals in a live outlet box, the process needs to be controlled to be useful.

Part 1 shows the start of the build using an old tap burning machine, a 60-volt power supply, and a simple pulse generator. This was enough to experiment with the basics of both the mechanical control of electrode positioning, and the electrical aspects of getting a sustained, useful discharge. Part 2 continues with refinements that led very quickly to the first useful parts, machined quickly and cleanly from thin stock using a custom tool. We’ll admit to being impressed — many EDM builds either never get to the point of making simple holes, or stop when progressing beyond that initial success proves daunting. Of course, when [Andy] drops the fact that he made the buttons for the control panel on his homemade injection molding machine, one gets the feeling that anything is possible.

We’re looking forward to more on this build. We’ve seen a few EDM builds before, but none with this much potential.

Continue reading “Homemade EDM Machine Moves From Prototype To Production”

A $50 CNC

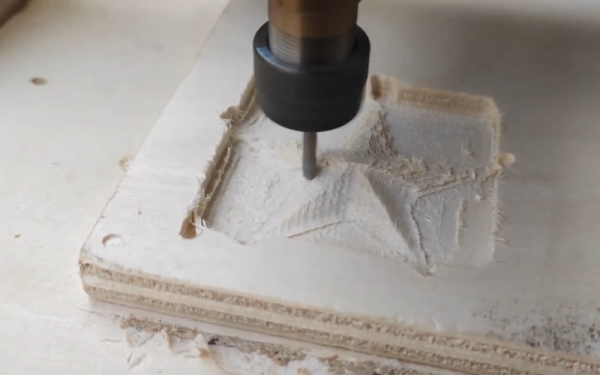
In theory, there’s isn’t much to building a CNC machine. Hook a bit to a motor and move the motor around with some lead screws and stepper motors. Easy. But, of course, the devil is in the details. [DAZ] made a nice-looking and inexpensive rig that probably isn’t the most precise CNC in the world, but it looks like it does a good enough job and he claims he spent about $50 on it. The video below shows some of the work it has done, and it doesn’t look bad.

This isn’t a rainy afternoon project. You’ll need to cut some wood and 3D print many parts. The drives use M8 threaded rod. Electronics is just an Arduino running standard software.

The steppers looked pretty light duty, and we wondered if it would have been worthwhile to trade them out for beefier ones instead of modifying the ones used for bipolar operation. Still, the results did look good for $50. The 775 spindle is another place you could probably spend a little more and get something better. Non-printed linear rails, and a better screw? The point is that you’ve got a basis to build from.

Continue reading “A $50 CNC”

CNC Chainsaw

You can spend a lot of time trying to think of a clever title for a post about a CNC chainsaw. But you’ll finally realize, what else can you say but “CNC Chainsaw?” [Stuff Made Here] actually built such a beast, and you can watch it go in the video embedded below. A custom chainsaw on a Tormach robotic arm. So it is more like a robot using a chainsaw than a conventional CNC machine.

Instead of an XY motion, the machine uses what the video calls an “apple peeler” method and uses the Minkowski algorithm to adjust for the size of the chainsaw. The video is an odd juxtaposition of advanced topics like the Minkowski and basic things like G code.

Continue reading “CNC Chainsaw”

Scratch-Built CO2 Laser Tube Kicks Off A Laser Cutter Build

When we see a CO2 laser cutter build around these parts, chances are pretty good that the focus will be on the mechatronics end, and that the actual laser will be purchased. So when we see a laser cutter project that starts with scratch-building the laser tube, we take notice.

[Cranktown City]’s build style is refreshingly informal, but there’s a lot going on with this build that’s worth looking at — although it’s perhaps best to ignore the sourcing of glass tubing by cutting the ends off of an old fluorescent tube; there’s no mention of what became of the mercury vapor or liquid therein, but we’ll just assume it was disposed of safely. We’ll further assume that stealing nitrogen for the lasing gas mix from car tires was just prank, but we did like the rough-and-ready volumetric method for estimating the gas mix.

The video below shows the whole process of building and testing the tube. Initial tests were disappointing, but with a lot of tweaking and the addition of a much bigger neon sign transformer to power the tube, the familiar bluish-purple plasma made an appearance. Further fiddling with the mirrors revealed the least little bit of laser output — nowhere near enough to start cutting, but certainly on the path to the ultimate goal of building a laser cutter.

We appreciate [Cranktown City]’s unique approach to his builds; you may recall his abuse-powered drill bit index that we recently covered. We’re interested to see where this laser build goes, and we’ll be sure to keep you posted.

Continue reading “Scratch-Built CO2 Laser Tube Kicks Off A Laser Cutter Build”

Balanced Design And How To Know When To Quit Optimizing

I got a relatively inexpensive 6040 CNC machine, and have been spending most weekends making the thing work, and then cutting stuff, learning the toolchain, and making subsequent improvements. Probably 90% of my machine time has been on making improvements. It’s not that the machine was bad — I got the version with ballscrews and a decently solid frame — but it’s that it somehow didn’t work together as a whole. It’s just an incredibly unbalanced design.

Let’s start with the spindle motor. It’s a 2.2 kW water-cooled beast that is capable of putting tons of work into a piece and spinning at very high speed. Yet to keep up with the high speed spindle, the motors that move it around would have to be capable of high speeds as well — it’s a feeds and speeds thing if you’re not a CNC geek. And they can’t. Instead, the stepper motors that came with the kit are designed for maximum force at low speeds. Which can make sense for some machines, but for one with a slightly flexible X-axis like this one, that’s wasted as well. The frame just can’t handle the low-end grunt that the motors are capable of, so it can’t take advantage of the spindle’s power either. The design is all over the place.

Over the last two months’ of weekends, I’ve been going through this iterative procedure of asking “what is my limiting factor right now?”, working on fixing that thing up, running it some, and then asking the question again. And it’s a good general procedure, and I believe that it’s getting me to the machine I want at the minimum cost of time, money, and effort.

At first, it was the driver hardware/software with its emulated USB parallel port, so I swapped out the controller for an Arduino running GRBL, soldered directly to the DB-25 that comes out of the back. At least it can put out pulses fast enough to order the motors around, but they would still stall out at high speeds. Swapping the stepper motors out for a high-speed pair only cost me €40, which makes you wonder why they didn’t just put the right motors on in the first place. The machine now travels fast enough to make use of the high-speed spindle, and I’m flying through plywood and plastics without leaving burn marks. It’s a huge win for not much money.

The final frontier is taking big bites out of aluminum. The spindle can do it, but I fear I’m up against the frame’s rigidity on the X-axis. For whatever reason, they went with unsupported rods on the X, which are significantly more flexible than an axis that’s backed up by more metal. And this is where the limiting factor may actually be my time and patience, rather than money. I just can’t bear to disassemble and reassemble the thing again. So for now, it’s going to be small nibbles, taking advantage of the machine’s speed, if not yet the spindle’s full horsepower.

But it’s odd, because this machine is a bundle of good parts. It’s just that they haven’t been chosen to work together optimally; the frame doesn’t work with the stepper motors, which don’t work with the spindle. If they went through my procedure of saying “what’s the limiting factor?” they could have saved themselves €100 by just shipping it with a wimpier spindle, which would have been a balanced, if anemic, machine. Or they could have built it with the right motors for more speed. Or supported rails for more grunt. Or both!

I’ll never know why they quit optimizing their design when they did. Maybe they never got past the slow USB/parallel port speed? But I’m near the end of my path, and I can tell because the limiting ingredient isn’t a simple upgrade, or even mere money anymore, but my own willpower.

How can you tell when you’re at the top of a mountain in a dense fog? A step you take in any direction would lead you downhill. How can you tell when you’re satisfied with a project’s state? When you don’t have the need, or desire, to undertake the next most obvious improvement.

Waterjet-Cut Precision Pastry

We need more high-end, geometric pastry in our lives. This insight is courtesy of a fairly old video, embedded below, demonstrating an extremely clever 2D CNC mechanism that cuts out shapes on a cake pan, opening up a universe of arbitrary cake topologies.

The coolest thing about this machine for us is the drive mechanism. A huge circular gear is trapped between two toothed belts. When the two belts move together the entire thing translates, but when they move in opposite directions, it turns. It seems to be floating on a plastic platform, and because the design allows the water-jet cutting head to remain entirely fixed, only a small hole underneath is necessary, which doubtless simplifies high-pressure water delivery and collection. Rounding the machine out are cake pans make up of vertical slats, like on a laser- or plasma-cutter table, that slip into registration pins and let the water pass through.

The kinematics of this machine are a dream, or perhaps a nightmare. To cut a straight line, it does a cycloid-shaped dance of translation and turning that you simply have to see in motion. Because of this intricate path, the cake-feed speed varies along the way, so this machine won’t be perfect for all applications and relies on a thin kerf. And we can’t help thinking how dizzy the cake must get in the process.

Indeed, the same company put out a relatively pedestrian two-arm motion cutter (another video!) that poses different kinematic problems. It’s essentially a two-arm plotter with a moving table underneath that helps increase the working area. Details are scarce, but it looks like they’re minimizing motion of the moving table, doing the high frequency small stuff with the stiff arms. Presumably someone turned the speed on the previous machine up to 11 and spun a cake off into the room, causing them to rethink the whole move-the-cake-around design.

Of course, watercut pastry isn’t limited to exotic CNC mechanisms. This (third!) video demonstrates that a simple Cartesian XY bot can do the job as well.

If you think about it, using high-pressure pure water to cut foodstuffs is a win on many levels. We’d just miss out on licking the knife. Thanks [Adam G DeMuri] for the awesome comment that lead us to a new world of watercut edibles.

Continue reading “Waterjet-Cut Precision Pastry”

3D Print A PCB The Hard Way

There’s an old joke about the physics student tasked with finding the height of a building using a barometer. She dropped the barometer from the roof and timed how long it took to hit the ground. Maybe that was a similar inspiration to [Moe_fpv_team’s] response to the challenge: use a 3D printer to create a PC board. The answer in that case? Print a CNC mill.

[Moe] had some leftover 3D printer parts. A $40 ER11 spindle gets control from the 3D printer software as a fan. The X, Y, and Z axis is pretty standard. The machine can’t mill metal, but it does handy on plywood and fiber board and should be sufficient to mill out a PCB from some copper clad board.

Continue reading “3D Print A PCB The Hard Way”