Some projects are simple, some focus on precision and craftsmanship, and some are more of the quick-and-dirty variety. This home-built CNC plasma cutter table seems to follow a “go big or go home” philosophy, and we have to say we’re mighty impressed by the finished product.
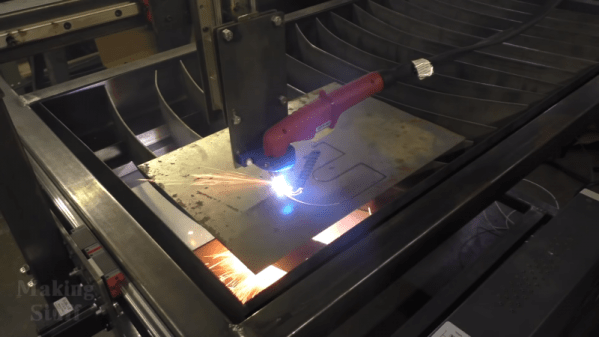
For those who follow [Bob]’s “Making Stuff” YouTube channel, this build has been a long time coming. The playlist below has eight videos that cover the entire process from cutting the first tubes of the welded frame to the initial test cuts with the finished machine. [Bob] took great pains to make the frame as square and flat as possible, to the extent of shimming a cross member to correct a 0.030″ misalignment before welding. He used good-quality linear rails for each axis, and hefty NEMA 23 steppers. There were a few false starts, like the water pan that was going to be welded out of five separate pieces of steel until the metal shop guys saved the day with their press brake. In the end, the machine turned out great; with a build cost of $2000 including the plasma cutter it’s not exactly cheap, but it’s quite a bargain compared to similar sized commercial machines.
We think the video series is a great guide for anyone looking to make a CNC plasma table. We’ve seen builds like this before, including [This Old Tony]’s CNC router. Watching these builds gives us the itch to get into the shop and start cutting metal. Continue reading “A CNC Plasma Cutter Table, From The Shop Floor Up”