Converting Power Supplies For Antique Computers

Just because something is “never used” doesn’t mean it’s good. [Inkoo Vintage Computing] learned that lesson while trying to repair an Amiga 500 and finding parts online that were claimed to be “new” in that they were old stock that had never been used. The problem was that in the last 30 years the capacitors had dried out, rendering these parts essentially worthless. The solution, though, was to adapt a modern PSU for use on the old equipment.

The first hurdle to getting this machine running again was finding the connector for the power supply. The parts seemed to have vanished, with some people making their own from scratch. But after considering the problem for a minute longer they realized that another Commodore machine used the same parts, and were able to source a proper cable.

Many more parts had to be sourced to get the power supply operational, but these were not as hard to come across. After some dedicated work with the soldering iron, the power supply was put to use running the old Amiga. Asture readers will know that [Inkoo Vintage Computing] aren’t strangers to the Amiga. They recently were featured with a nondestructive memory module hack that suffered from the same parts sourcing issues that this modification had, but also came out wonderfully in the end.

JST Is Not A Connector

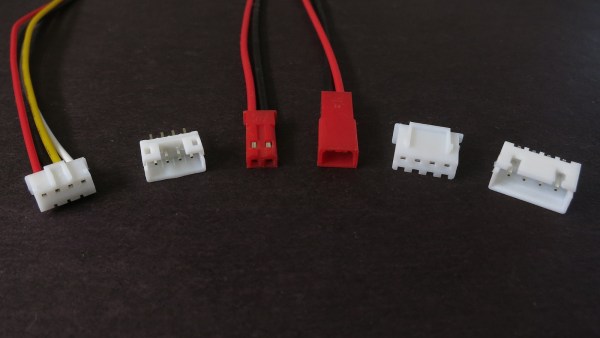
When reading about cool projects and products, it’s common to see wiring plugs labelled “JST connector.” This looks fine until we start getting hands-on and begin hacking things together. Inevitably we find the JST connector from one part fails to fit in the JST connector of another. This is the moment we learn “JST” is not a connector specification. It is short for Japan Solderless Terminals Manufacturing Company, Ltd. A company whose history goes back to 1957 and their website (styled in 1999) lists hundreds of different types.

We can simplify to “JST connector” when chit-chatting about projects. But when it comes to actual hardware specification, that’s not good enough. Which JST connector?

Continue reading “JST Is Not A Connector”

Magsafe 1 To Magsafe 2 The Cheap Way

[Klakinoumi] wanted to use their Magsafe 1 charger from 2007 with their newer Macbook Pro Retina from 2012 — but it had a Magsafe 2 port. There were a few options on the table (buy an adapter, buy a new charger, cry) but those wouldn’t do. [Klakinoumi] went with the brute force option of grinding a Magsafe 1 charger to fit Magsafe 2.

Based on the existence of passive adapters that allow Magsafe 1 chargers to work with newer laptops, we’d assume that the older chargers are probably electrically similar to the newer models. That said, it’s not our gear and we’d definitely be checking first.

With that out of the way, it’s a simple enough modification — grind away the Magsafe 1’s magnet until it fits into a Magsafe 2 port. It really is that easy. The spring-loaded pins all seem to line up with the newer port’s pads. [Klakinoumi] reports it worked successfully in their tests with 2012, 2014 and 2015 Macbooks but that it should be attempted at your own risk — good advice, as laptops ain’t cheap.

When doing this mod, consider taking care not to overheat the connector during grinding. You could both melt plastic parts of the connector, or ruin the magnet by heating it past its Curie point.

Interested in the protocol Magsafe speaks over those little golden pins? Find out here.

Good In A Pinch: The Physics Of Crimped Connections

I had a friend who was an electronics assembly tech for a big defense contractor. He was a production floor guy who had a chip on his shoulder for the engineers with their fancy book-learnin’ who couldn’t figure out the simplest problems. He claimed that one assembly wasn’t passing QC and a bunch of the guys in ties couldn’t figure it out. He sidled up to assess the situation and delivered his two-word diagnosis: “Bad crimp.” The dodgy connector was re-worked and the assembly passed, much to the chagrin of the guys in the short-sleeved shirts.

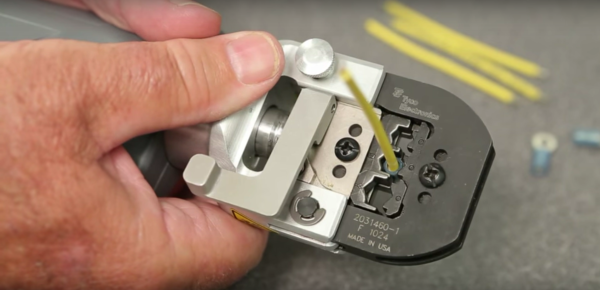
Aside from the object lesson in experience sometimes trumping education, I always wondered about that “bad crimp” proclamation. What could go wrong with a crimp to so subtly futz with a circuit that engineers were baffled? How is it that we can rely on such a simple technology to wire up so much of the modern world? What exactly is going on inside a crimped connection anyway?

Continue reading “Good In A Pinch: The Physics Of Crimped Connections”

The World’s Supply Of DB-19 Connectors

[Steve] over at Big Mess O’ Wires has a very, very niche product. It’s the Floppy Emu, a hard disk emulator for the Apple II, Lisa, and very old Macs. The Floppy Emu takes data stored on an SD card and presents it to these classic computers through a contemporary connector, the venerable DB-19. This connector is in the same family as the familiar DB-25 parallel port, DE-9 serial port and the old DA-15 joystick port, but there’s something very special about the DB-19 connector – nobody makes it anymore, and no surplus electronics store has any in stock. They’re unobtanium, and when you’re making a product built around this connector, you’re going to have a few problems.

Those problems have come to a head over the past year, but getting a few thousand DB-19 connectors manufactured has always seemed just out of reach. It would be a five-figure investment for a very niche product, and [Steve] would have to find someone to make the connectors.

The world’s shortage of DB-19 connectors is no more. After chatting up a few people in the NeXT and Atari communities, [Steve] set up a group buy and manufactured the first batch of DB-19 connectors in recent memory. The world’s supply of DB-19 connectors, all 10,000 of them, is now in [Steve]’s living room.

The process of manufacturing ten thousand DB-19 connectors actually wasn’t that hard for [Steve]. Over the past year, he’s reached out to manufacturers to get a quote, and he still had those numbers in his rolodex. The only problem was finding an engineering drawing of a DB-19 connector and transferring a large amount of money to Hong Kong. The drawing was easy enough, as datasheets sometimes last longer than the parts they describe. Transferring the money over to the manufacturer meant convincing a bank manager there is not a Nigerian prince in Hong Kong and thirty minutes of paperwork.

After a few months, a round of prototyping, and a trip through customs, the world’s supply of DB-19 connectors finally landed on [Steve]’s porch. He still needs to ship them out to the NeXT and Atari folk who participated in the group buy, but the great shortage of DB-19 connectors is over for now.

Local Hacker Discovers Card Edge Connectors

When [turingbirds] was looking around for the absolute minimum connector for a JTAG adapter, he wanted something small, that didn’t require expensive adapters, and that could easily and reliably connect a few JTAG pins to a programmer. This, unsurprisingly, is a problem that’s been solved many times over, but that doesn’t mean there isn’t room for improvement. [turingbirds] found his better solution by looking at some old card edge connectors.

Instead of 0.1″ pitch pin headers, weirder and more expensive connectors, the Tag Connect, or even pogo pins, [turingbirds] came up with a JTAG adapter that required no additional parts, had a small footprint, and could be constructed out of trash usually found behind any busy hackerspace or garage. The connector is based on the venerable PCI connector, chopped up with a Dremel and soldered to a JTAG or ISP programmer.

This is simply a card edge connector, something the younglings seem to have forgotten. Back in the day, card edge connectors were a great way to connect peripherals, ports, and anything else to the outside world. They were keyed, and you could only put them in one way. They were relatively cheap, and with a big coil of ribbon cable, you could make custom adapters easily. For low-speed connections that will only be used a few times, it’s very hard to beat a card edge connector.

Of course the connector itself is only half of the actual build. To turn a chopped up PCI connector into a JTAG adapter, [turingbirds] made footprint and part files for his favorite PCB design tool. In this case it’s Eagle, and the libraries that will plop one of these connectors down are available on GitHub.

Is this the latest and greatest way to plug a programmer into a board? No, because this has been around for 30 or 40 years. It does, however, put a programming port on a PCB with zero dollars in components, a minimum of board footprint, and uses parts that can be salvaged from any pile of old computers.

Tag Connect Programming Headers

A Small Replacement For Large Programming Headers

No matter how small you make your embedded projects, you still need a way to program the MCU. Standard programming headers can be annoyingly large for those very small projects. [Danny] wrote in to tell us how we can save room on our PCB designs using special spring loaded connectors, rather than large headers.

There are so many small embedded development systems, such as the Trinket that still rely on standard headers. Reducing the size of the programming headers and interface headers is an issue that deserves more attention than it currently receives. Based on Tag-Connect, a proprietary connector built around pogo-style pins, your PCB does not actually require any on-board mating connector. The PCB footprint simply has test-pads that connect with the pogo-pins and holes that allow for a rock solid connection. While the Tag-Connect header is a bit expensive (it costs about $34), you only need to buy it once.

It would be great to see even smaller Tag-Connect cables. Do you have a similar solution? What about something even smaller and more compact? Write in to tell us about any ultra-compact connector solutions you have been using!