Beating Life-Force Amulet

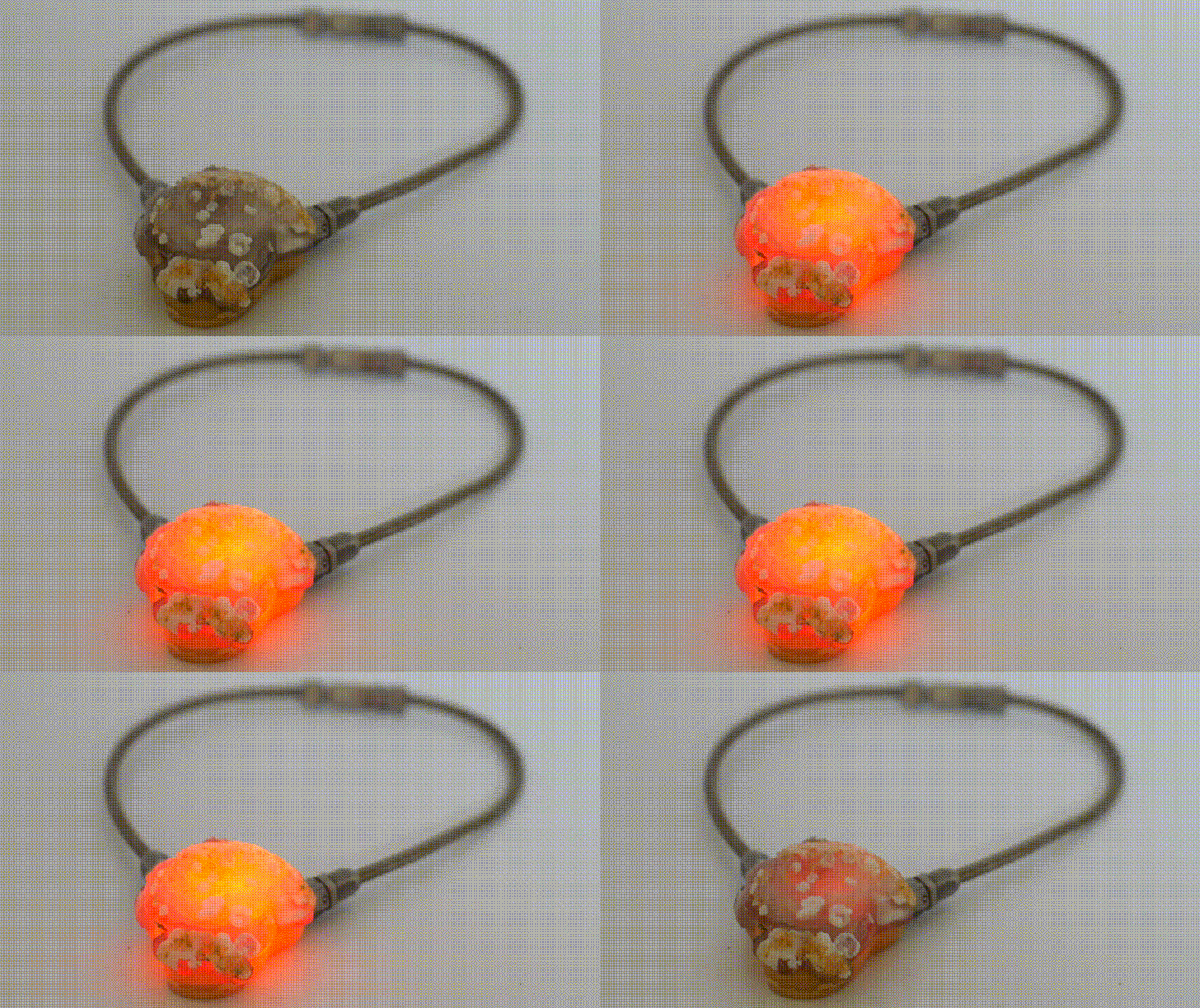
It’s one thing to see science-fiction slowly become reality, but quite another to take that process into your own hands. Inspired by a movie prop, [Eric Strebel] decided to build himself a 21st science-fiction artifact: a pulsing, life-force amulet.

At the — aheam — heart of this amulet is a blinking LED circuit which [Strebel] modified into a slow pulse with the help of his friends. To add to the surreal quality of the amulet, he sourced a stone from a local gem show, bringing his circuit along to get an idea of what the final product would look like. Once [Strebel] had shaped the stone to a more manageable size, he took a polyester filler mold of its rear face to use as a base from which to cast a durable resin housing for the circuit.

[Strebel] is using a pair of coin cell batteries which fit snugly behind the glowing LED, and in case he ever needs to get inside the amulet, he’s attached the stone to the rear with sew-on straps — super-gluing them to each piece. He went for a bit of an industrial look for the necklace — a braided oil line with a modified quick-release clasp that works like a charm.

How does this amulet stack up to one from the 23rd century? You be the judge!

Servo-Controlled Eyeball Makes A Muggle Moody

Even when you bear a passing resemblance to the paranoid Auror of the Harry Potter universe, you still really need that wonky and wandering prosthetic eye to really sell that Mad-Eye Moody cosplay, and this one is pretty impressive.

Of course, there’s more to the [daronjay]’s prosthetic peeper than an eBay doll’s eye. There’s the micro-servo that swivels the orb, as well as a Trinket to send the PWM signal and a pocket full of batteries. The fit and finish really tie it together, though, especially considering that it’s made from, well, garbage — a metal food jar lid, a yogurt cup, and the tube of a roll-on antiperspirant. Some brass screws and a leather strap evoke the necessary Potter-verse look, and coupled with what we assume are prosthetic scars, [daronjay] really brings the character to life. We think it would be cool to have the servo eye somehow slaved to the movements of the real eye, with a little randomness thrown in to make it look good.

Marauder’s maps, wand duels, Weasley clocks — the wizarding world is ripe for creative hacking and prop making. What’s next — a Nimbus 2000 quadcopter? Please?

Continue reading “Servo-Controlled Eyeball Makes A Muggle Moody”

Visual 3D Print Finishing Guide

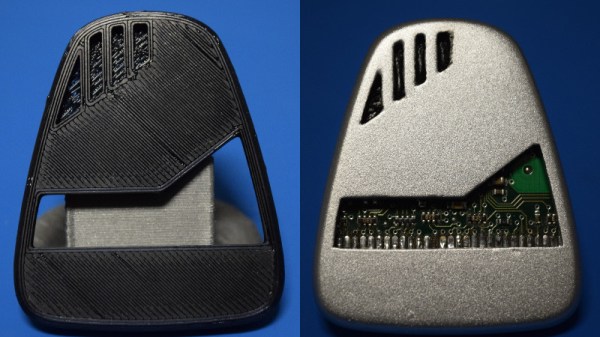
With 3D printers now dropping to record low prices, more and more people are getting on the additive manufacturing bandwagon. As a long time believer in consumer-level desktop 3D printing, this is a very exciting time for me; the creativity coming out of places like Thingiverse or the 3D printing communities on Reddit is absolutely incredible. But the realist in me knows that despite what slick promotional material from the manufacturers may lead you to believe, these aren’t Star Trek-level replicators. What comes out of these machines is often riddled with imperfections (from small to soul crushing), and can require considerable cleanup work before they start to look like finished pieces.

If all you hope to get out of your 3D printer are some decent toy boats and some low-poly Pokemon, then have no fear. Even the most finicky of cheap printers can pump those out all day. But if you’re looking to build display pieces, cosplay props, or even prototypes that are worth showing to investors, you’ve got some work cut out for you.

With time, patience, and a few commercial products, you can accomplish the ultimate goal: turning a 3D printed object into something that doesn’t look like it was 3D printed. For the purposes of this demonstration I’ll be creating a replica of the mobile emitter used by the “Emergency Medical Hologram” in Star Trek: Voyager. I can neither confirm nor deny I selected this example due to the fact that I’m currently re-watching Voyager on Netflix. Let’s make it look good.

Continue reading “Visual 3D Print Finishing Guide”

Beautiful Rocketeer Jetpack Replica Boasts Impressive Metalwork

Fans of the Rocketeer comic book and movie franchise will be familiar with its hero’s 1930s-styled rocket backpack.  It’s an intricate construction of complex streamlined curves, that has inspired many recreations over the years.

Most Rocketeer jetpacks are made from plastic, foam, and other lightweight materials that will be familiar to cosplayers and costumers. But [David Guyton]’s one is different, he’s made it from sheet steel.

The attraction in his video is not so much the finished pack, though that is an impressive build. Instead it’s the workmanship, nay, the craftsmanship, as he documents every stage of the metalwork involved. The panel beating tools of a sheet metalworker’s trade are surprisingly simple, and it’s tempting to think as you watch: “I could do that!”. But behind the short video clips and apparent speed of the build lies many hours of painstaking work and a huge amount of skill. Some of us will have tried this kind of sheet work, few of us will have taken it to this level.

The video is below the break, it takes us through the constituent parts of the build, including at the end some of the engine details which are cast in resin. Watch it with a sense of awe!

Continue reading “Beautiful Rocketeer Jetpack Replica Boasts Impressive Metalwork”

Gesture Controlled Sword Of Omens Gives Sight Beyond Sight

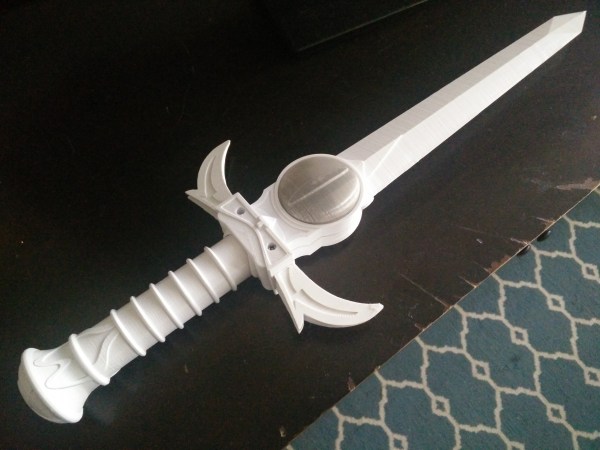
The 80’s were a golden age of Sci-Fi cartoons. We had Transformers, Voltron, and of course, Thundercats. The story of feline humanoids on third earth has stuck with a few hackers, including [Juan Garcia]. Juan has tunneled his fandom into something amazing – he’s built his own version of Lion-O’s iconic Sword of omens. The modeling and 3D print work are top-notch. While this sword doesn’t have the Eye of Thundera as a power source, it does have some pretty clever electronics. It’s also one of the amazing entries in this year’s Sci-Fi Contest.

[Juan] wanted to create the “sight beyond sight” effect from the TV show. He started with an MPU6050 six axis gyro + accelerometer. These chips are most often found at the heart of quadcopter controllers. An Arduino Pro Mini reads the sensor data. When the sword is lifted vertically, it turns on a row of WS2812 LEDs. The LEDs replicate the pulsing eye effect from the cartoon version of the sword.

[Juan] really made this a neat build. The whole sword is powered by an 18650 Li-Ion battery. Power control and charging circuitry are all concealed inside the 3D print. When it’s time to charge up the eye, the hilt can be unscrewed to reveal a USB charging port. Click past the break to see this hack in action!

Click past the break to see this hack in action, and don’t forget – there’s still time to enter the Sci-Fi Contest!

Continue reading “Gesture Controlled Sword Of Omens Gives Sight Beyond Sight”

Animatronic Cosplay Wings

In recent years, Cosplay as a hobby has seen improvement in the props department by leaps and bounds. Thanks in part due to the rise of the Maker culture and the easy availability of design and manufacturing tools and processes. Case in point is this awesome set of Animatronic Wings that programmer [Nelson Stoldt] built for his daughter who wanted to be Nightmare Moon.

[Nelson] had no idea what he’d gotten himself in to when he answered “Sure, I can do that”. Making motorized cosplay wings that open up to 8 feet wide and close again at the flick of a switch without weighing a ton is not a trivial project. The final rig did end up tipping the scales at just over 9 kgs, but we guess that’s a load that Cosplayers are used to hauling around.

Using a nifty program called Linkage, he played around with a few different design approaches until he found a mechanism that worked well. If you ever want to build one of [Theo Jansen]’s Strandbeest, give this program a spin. Armed with this information, and a spreadsheet to help determine the exact length of each linkage element, he modelled the project in Sketchup. The wings are operated by a scissor mechanism that is driven by a motorized screw operated sliding carriage. Wing position is measured by a potentiometer coupled to one of the wing elements. Basically, he just built a huge, powerful servo.

Continue reading “Animatronic Cosplay Wings”

Monstrous Suit Of Power Armor 3D Printed Over 140 Days

fallout-armour-3d-printed-no-helmet[hirocreations] printed an entire suit of enormous Fallout power armor on his Monoprice Maker Select 3D printer, which took some 140 days and over 120 pounds of IC3D PLA filament. Happily, [hirocreations] was able to arrange a sponsorship with IC3D for the build – who would be crazy enough to use so much filament over so long for an entire 7+ foot tall suit, right? Over those 140 days, the belts on the printer needed to be replaced twice but it otherwise chugged right along.

Most of the parts were printed at 0.46 mm layer height. Individual parts were welded (melted) together using what is essentially a soldering iron with a flat tip; many parts were too thin for any kind of joints or fixtures to be practical. Parts were smoothed with drywall spackle, lots of filler primer, and painted. Some of the parts – like the chest armor – are mounted on a frame made from PVC tubing. [hirocreations] may have gone through 120 pounds of filament, but the end result doesn’t weigh that much; the suit itself weighs in at 85-90 lbs, the rest of it went to support material, skirts, and print failures.

It was known from the start that weight could become a serious issue, so [hirocreations] went for a very light infill (10%) and 3-4 perimeter layers; he also extruded at a high temperature (~230C) which he said seemed to provide a very strong layer bond with the settings and filament he was using. So far, he says it’s taken some very hard knocks and nothing has broken or cracked. He has a short video series documenting the assembly, and you can see some of the raw armor parts before any finishing in one of the videos, embedded below.

Continue reading “Monstrous Suit Of Power Armor 3D Printed Over 140 Days”