Proprietary Fan Blows, Gets PWM Upgrade

Proprietary components are the bane of anyone who dares to try and repair their own hardware. Nonstandard sizes, lack of labeling or documentation, and unavailable spare parts are all par for the course. [Jason] was unlucky enough to have an older Dell computer with a broken, and proprietary, cooling fan on it and had to make some interesting modifications to replace it.

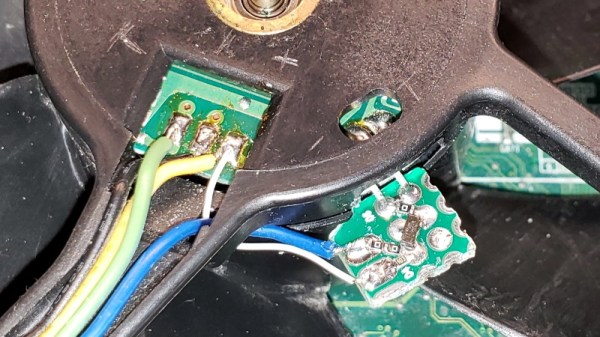
The original fan had three wires and was controlled thermostatically, meaning that a small thermistor would speed up the the fan as the temperature increased. Of course, the standard way of controlling CPU fans these days is with PWM, so he built a circuit which essentially converts the PWM signal from the motherboard into a phantom thermistor. It’s even more impressive that it was able to be done with little more than a MOSFET and a Zener diode.

Unfortunately, there was a catch. The circuit only works one way, meaning the fan speed doesn’t get reported to the motherboard and the operating system thinks the fan has failed. But [Jason] simply disabled the warning and washed his hands of that problem. If you don’t want to use a CPU fan at all, you can always just dunk your entire computer in mineral oil.

Comprinter Hides A Laptop Inside A Printer

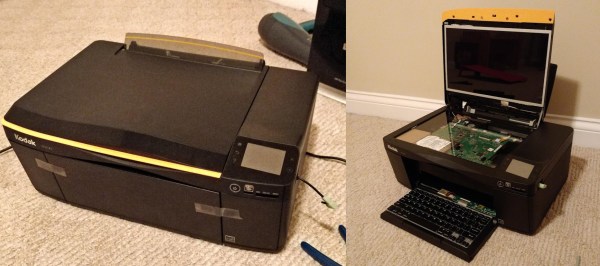
Sometimes we find projects that border on the absurd but are too cool to pass up. The Comprinter is exactly that. [Mason Stooksbury] had a dream. An all-in-one scanner printer that was also a computer. What would turn heads more than walking into a hackerspace with a printer, plugging your headphones in, then opening up the top to reveal a monitor?

[Mason’s] dream became possible when friends gave him some old laptops and a dead Kodak printer. After going through the laptops, he picked a Dell Inspiron 1440 to be the donor machine. The printer and laptop were both carefully stripped down. [Mason’s] goal for the project was to build a “beautiful” printer/computer. No bodges allowed. He spent most of his time planning out how to mount the motherboard and display inside the scanner section of the chassis.

The actual assembly was quite fiddly. Working with only an inch or so of clearance, [Mason] installed standoffs for the motherboard and display. He to do all this without breaking the wires for the display and WiFi antennas.

Once the main parts of the laptop were assembled, [Mason] completed the build with a nine-port USB hub, some internally mounted speakers and a USB keyboard mounted in the paper tray. The twelve-hour operation was a complete success. What looks to be a cheap inkjet actually hides a complete laptop running Xubuntu. The only downside is that the printer doesn’t actually print, but [Mason] is quick to note that if the printer hadn’t been broken in the first place, it would work fine — all the modifications are in the scanner section.

We’ve seen some wild casemods over the years, including a Nintendo in a toaster, a modern PC stuffed into an original Xbox, and Raspberry Pi’s stuffed into just about everything.

The Silence Of The Fans

The good thing about using a server-grade machine as your desktop is having raw computing power at your fingertips. The downside is living next to a machine that sounds like a fleet of quadcopters taking off. Luckily, loud server fans can be replaced with quieter units if you know what you’re doing.

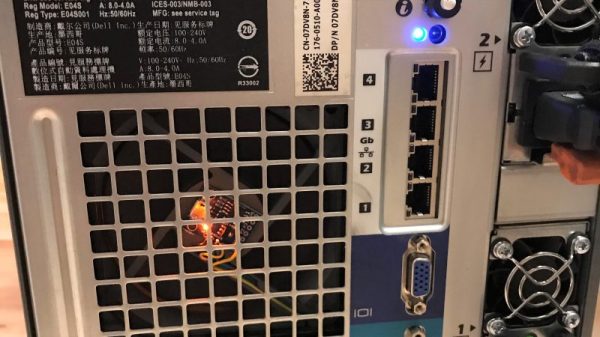
Servers are a breed apart from desktop-grade machines, and are designed around the fact that they’ll be installed in some kind of controlled environment. [Juan] made his Dell PowerEdge T710 tower server a better neighbor by probing the PWM signals to and from the stock Dell fans; he found that the motherboard is happy to just receive a fixed PWM signal that indicates the fans are running at top speed. Knowing this, [Juan] was able to spoof the feedback signal with an ATtiny85 and a single line of code. The noisy fans could then be swapped for desktop-grade fans; even running full-tilt, the new fans are quieter by far and still keep things cool inside.

But what to do with all those extra fans? Why not team them up with some lasers for a musical light show?

Hacking Dell Laptop Charger Identification

If you’ve ever had a laptop charger die, you know that they can be expensive to replace. Many laptops require you to use a ‘genuine’ charger, and refuse to boot when a knock off model is used. Genuine chargers communicate with the laptop and give information such as the power, current, and voltage ratings of the device. While this is a good safety measure, ensuring that a compatible charger is used, it also allows the manufacturers to increase the price of their chargers.

[Xuan] built a device that spoofs this identification information for Dell chargers. In the four-part series (1, 2, 3, 4), the details of reverse engineering the communications and building the spoofer are covered.

Dell uses the 1-Wire protocol to communicate with the charger, and [Xuan] sniffed the communication using a MSP430. After reading the data and verifying the CRC, it could be examined to find the fields that specify power, voltage, and current.

Next, a custom PCB was made with two Dell DC jacks and an MSP430. This passes power through the board, but uses the MSP430 to send fake data to the computer. The demo shows off a 90 W adapter pretending to run at 65 W. With this working, you could power the laptop from any supply that can meet the requirements for current and voltage.

Reverse Engineering Old PDA Software

[Troy Wright] acquired a lot of twenty broken Dell Axim PDAs. This type hardware was quite popular a decade ago, but looks archaic when compared to a modern cell phone. That’s why he was able to get them for a song. After a bit of work he managed to resurrect eight of the units, but was dismayed to find there’s no published method for controlling the back light from software. For some reason this is a deal-breaker for his project. But he knew it was possible because there are some apps for the device which are able to set the back light level. So he found out how to do it by reverse engineering the software.

The trick is to get a hold of the code. Since it’s not open source [Troy] used IDA, a graphical disassember and debug suite. He had some idea of what he was hunting for as the Windows CE developer documentation does mention a way to directly control the graphical hardware independently from the display driver. A few hours of pawing through assembly language, setting break points, and testing eventually led him to the solution.

Hacking Old Server Hardware For New Home Use

[Arnuschky] was looking for a network storage solution that included redundancy. He could have gone with a new NAS box, but didn’t want to shell out full price. Instead, he picked up a Dell PowerEdge 2800 and hacked it for SATA drives and quiet operation.

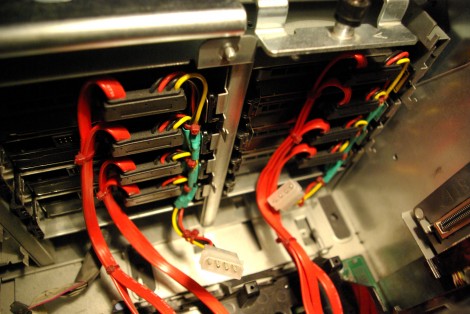
It’s not surprising that this hardware can be had second-hand at a low price. The backplane for it requires SCSI drives, and it’s cheaper to upgrade to new server hardware than it is to keep replacing those drives. This didn’t help out [Arnuschky’s] any, so he started out by removing the SCSI connectors. While he was at it, he soldered wires to the HDD activity light pads on the PCB. These will be connected to the RAID controller for status indication. The image above shows the server with eight SATA drives installed (but no backplane); note that all of the power connectors in each column are chained together for a total of two drive power connectors. He then applied glue to each of these connectors, then screwed the backplane in place until the glue dried. Now the device has swappable SATA drives!

His server conversion spans several posts. The link at the top is a round-up so make sure you click through to see how he did the fan speed hack in addition to the SATA conversion.

If your tolerances don’t allow you to glue the connectors like this, check out this other hack that uses shims for spacing.

SNES Controller Dock For Dell Streak

The Dell Streak is an Android tablet. [Collin Meyer] wanted to use an original SNES controller to play emulated games on the device. What he came up with is a controller that is a dock for he handheld.

Several things have to come together to make this happen. The Streak uses a standard PDMI dock that connects to a computer via a USB connection. [Collin] repurposed a sync cable by connecting a couple of pins on the dock connector which forces the device to use USB host mode. From there he used a Teensy microcontroller to convert the SNES controller into a USB device (very similar to this hack). The Teensy and shortened sync cable find a new home inside the SNES controller body and, in the video after the break, it looks like he used something like sugru to add a bit of support for the Streak.

Continue reading “SNES Controller Dock For Dell Streak”